Sweet Potato Tortillas Gluten-Free Vegan Wraps
Sweet Potato Tortillas (Gluten-Free Vegan Wraps) are about to become your new kitchen obsession. Forget bland, crum extractbly gluten-free alternatives; these vibrant, naturally sweet wraps are a game-changer for anyone seeking delicious, wholesome food. Imagin extracte the soft, pliable texture of a traditional tortilla, but infused with the earthy sweetness of roasted sweet potato. That’s the magic we’re unlocking today. These aren’t just any wraps; they’re a testament to how versatile and satisfying plant-based, gluten-free cooking can be. Whether you’re a seasoned vegan, navigating gluten sensitivities, or simply looking for a healthier and more flavorful way to enjoy your favorite fillings, these sweet potato tortillas deliver. They’re perfect for breakfast burritos, hearty lunch wraps, or even as a creative base for mini pizzas. Get ready to elevate your meal prep and impress yourself (and anyone lucky enough to share!) with these delightful sweet potato tortillas.
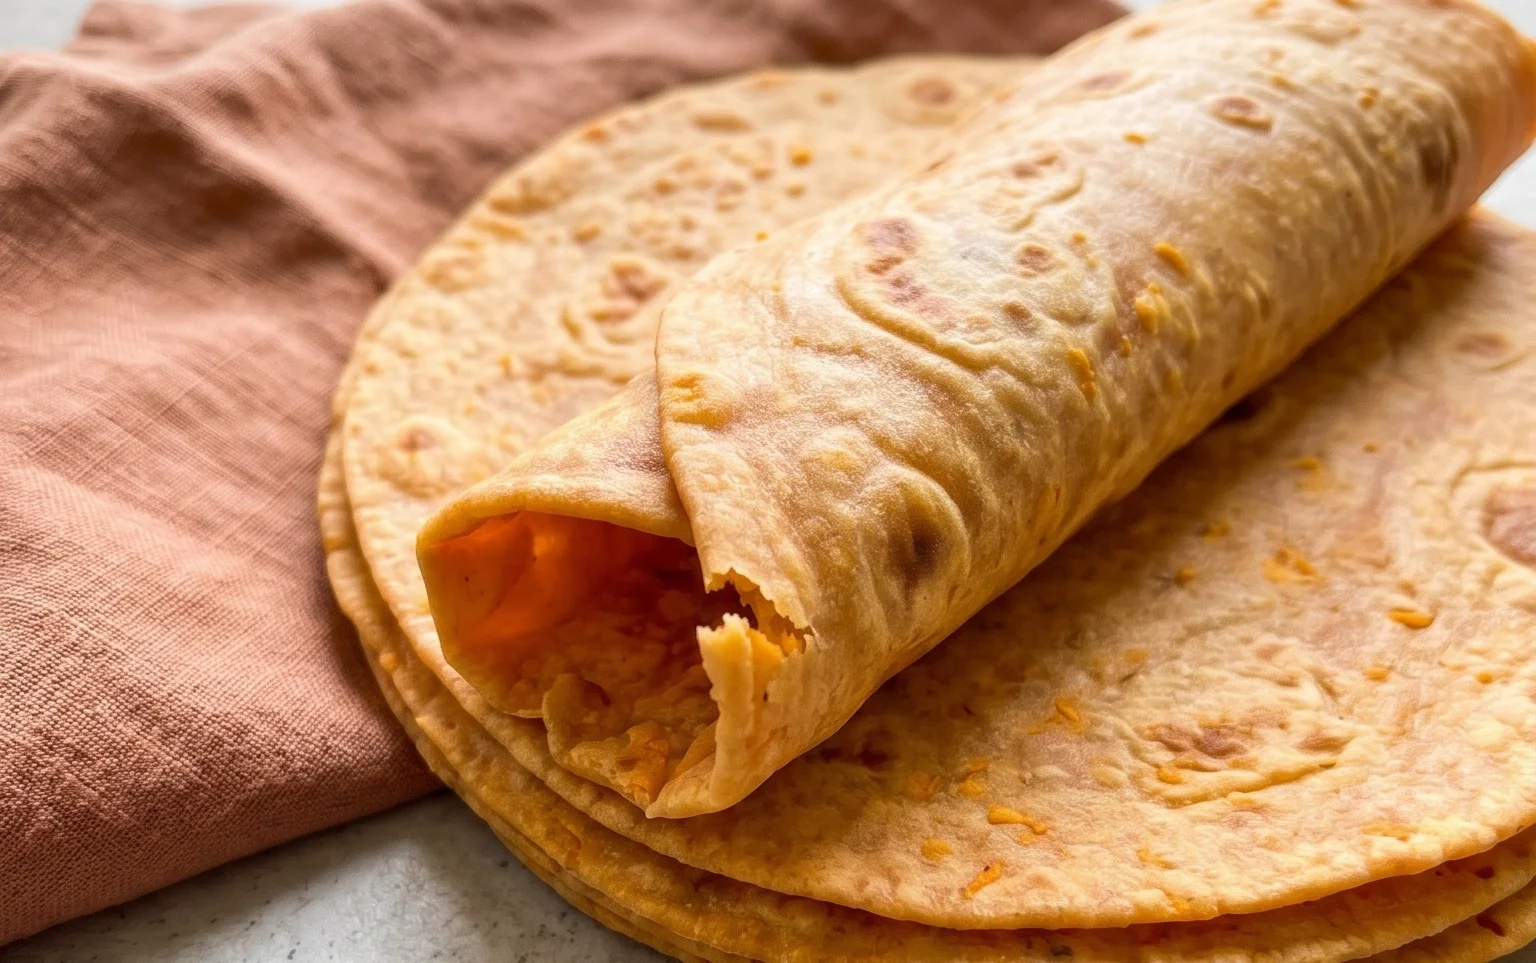
Sweet Potato Tortillas (Gluten-Free Vegan Wraps)
These sweet potato tortillas are a game-changer for anyone looking for delicious, wholesome, and versatile gluten-free vegan wraps. They’re naturally sweet, packed with nutrients from the sweet potato, and have a wonderfully tender texture that makes them perfect for all your favorite fillings. Whether you’re craving breakfast burritos, hearty lunch wraps, or even a creative pizza base, these tortillas deliver. They’re surprisingly easy to make, and the vibrant color alone is enough to brighten up any meal. Forget store-bought, often dry and bland, gluten-free options; once you try these homemade beauties, you’ll never go back.
The secret to their fantastic texture and flavor lies in the combination of mashed sweet potato, a touch of fat, and the magic of psyllium husk for binding. I’ve found that using a sourdough starter not only adds a subtle tangy depth but also contributes to a better texture in gluten-free baking, a trick I learned from my days experimenting with gluten-free breads. Don’t worry if you’re new to sourdough starter; I’ve included a note on how to manage it or even a quick substitute if you’re in a pinch. So, let’s get started and transform these simple ingredients into your new favorite wrap!
Ingredients:
Instructions:
Prepare the Sweet Potato Base:
The first step is to get your sweet potatoes ready. You want them thoroughly cooked and mashed until very smooth, with absolutely no lumps. Steaming or boiling them without adding any extra liquid is key, as we don’t want to introduce excess moisture that will make the dough too sticky. Once cooked, mash them using a fork or a potato masher until you have a creamy consistency. If you have a ricer or food processor, that’s even better for achieving a super smooth puree. While the sweet potato is still warm, add the vegan butter (or oil/ghee). Stir it in until it’s completely melted and incorporated into the sweet potato. This will create a lovely richness and help with the texture of the tortillas. Season this mixture with the sea salt, a dash of black pepper, onion powder, and garlic powder. Mix everything together well. Taste it at this point; the seasonings should be well-balanced.
Activate the Psyllium and Combine Wet Ingredients:
In a small bowl, combine the psyllium husk with 1-2 tablespoons of hot water. Whisk it quickly and let it sit for about 5-10 minutes. You’ll notice it forms a gel-like consistency. This psyllium gel is crucial for binding the gluten-free ingredients together, mimicking the elasticity that gluten usually provides. While the psyllium is doing its thing, take your gluten-free sourdough starter. It should be active and bubbly. If your starter is very thick, you might need to thin it down slightly with a teaspoon of water to make it easier to incorporate. Add the activated psyllium gel and the active sourdough starter to the mashed sweet potato mixture. Stir everything together until it’s well combined. You’ll see the mixture starting to thicken due to the psyllium.
Incorporate the Dry Ingredients and Form the Dough:
Now it’s time to add the dry ingredients. Gradually add the arrowroot flour (or your chosen starchy flour) to the wet mixture. Start with 2 tablespoons and mix it in. You’re looking for a dough that is soft and slightly sticky, but workable. Add the remaining tablespoon of flour only if necessary. The amount of flour needed can vary slightly depending on the moisture content of your sweet potato and sourdough starter. If you’re using the optional baking powder for puffier tortillas, whisk it into the flour before adding it to the wet ingredients. Mix everything together until a cohesive dough forms. It won’t be as elastic as traditional wheat dough, so don’t overwork it. Once it comes together, you can lightly knead it for about 30 seconds to ensure everything is fully incorporated. The dough should feel pliable and easy to handle, not overly sticky or dry.
Rest and Divide the Dough:
Cover the bowl with the dough and let it rest for about 15-20 minutes at room temperature. This resting period allows the psyllium husk to fully hydrate and the starches to absorb any excess moisture, making the dough easier to handle and preventing it from becoming too sticky. After resting, the dough should feel more firm and less tacky. Lightly flour a clean surface with a bit of arrowroot flour. Turn the dough out onto the floured surface and divide it into 4-6 equal portions, depending on how large you want your tortillas. Roll each portion into a ball. If the dough feels a little sticky at this stage, you can lightly dust your hands with arrowroot flour as well.
Roll and Cook the Tortillas:
Now for the fun part! Take one dough ball and place it on a lightly floured surface. You can use a rolling pin to flatten it out, or if you have a tortilla press, that’s even easier. Aim to roll each tortilla into a thin, even circle, about 6-8 inches in diameter. Try to get them as uniform in thickness as possible for even cooking. You can also use a round cutter to trim them into perfect circles if you prefer. Heat a dry, non-stick skillet or griddle over medium-high heat. Once the pan is hot, carefully place one tortilla onto the hot surface. Cook for about 2-3 minutes per side, or until you see golden-brown spots and the tortilla is cooked through. They will puff up slightly as they cook, especially if you used the baking powder. Don’t overcrowd the pan; cook them one or two at a time. As each tortilla is cooked, stack them on a plate and cover them with a clean kitchen towel to keep them warm and soft. This steaming effect also helps maintain their pliable texture.
Notes on Sourdough Starter: If you don’t have a gluten-free sourdough starter, you can substitute it with 1/4 cup of unsweetened applesauce mixed with 1/4 cup of plain, unsweetened vegan yogurt and 1/4 teaspoon of apple cider vinegar. This will provide some moisture and tang but won’t have the complex fermentation flavors of a true starter. You might need to adjust the flour slightly if using this substitute.
Enjoy these delicious homemade sweet potato tortillas! They are best served warm and are perfect for a variety of savory or sweet fillings. They store well in an airtight container in the refrigerator for up to 3 days, and can also be frozen for longer storage.
Conclusion:
I hope you’re as excited to try these Sweet Potato Tortillas (Gluten-Free Vegan Wraps) as I am to share them! These vibrant, flavorful wraps are a fantastic addition to any kitchen, offering a delicious and wholesome alternative to traditional tortillas. They’re naturally gluten-free and vegan, making them perfect for a wide range of dietary needs. The subtle sweetness from the sweet potato, combined with the earthy notes of the flour, creates a truly unique and satisfying base for all your favorite fillings.
These versatile wraps are wonderful for everything from breakfast burritos filled with tofu scramble and veggies, to hearty lunch wraps packed with hummus and roasted vegetables, or even as a base for creative dinner creations like vegan quesadillas or pizza. Don’t be afraid to get creative with your fillings! For a twist, consider adding a pinch of smoked paprika to the dough for a smoky flavor, or a sprinkle of chili flakes for a touch of heat.
I genuinely encourage you to give these Sweet Potato Tortillas a go. They’re surprisingly easy to make and the results are so rewarding. You’ll be amazed at how delicious and flexible these gluten-free vegan wraps can be!
Frequently Asked Questions:
Can I make these tortillas ahead of time?
Yes, you absolutely can! Once cooled, store your sweet potato tortillas in an airtight container or a resealable bag at room temperature for up to 2 days, or in the refrigerator for up to 5 days. You can also freeze them for longer storage. Ensure they are completely cooled before stacking and freezing to prevent them from sticking together.
What can I use if I don’t have sweet potatoes?
While sweet potatoes are fantastic for their color and subtle sweetness, you can experiment with other root vegetables like pumpkin or butternut squash puree. The flavor profile will change slightly, but you’ll still achieve a delicious and flexible gluten-free vegan wrap.
How do I prevent my tortillas from cracking when I fold them?
The key to preventing cracking is ensuring the dough is not too dry. If your dough seems crum extractbly, add a little more liquid (water or plant milk) a teaspoon at a time until it comes together. Also, cooking them until they are pliable and slightly steamed in the pan, rather than overcooked and crispy, will help maintain their flexibility.
Sweet Potato Tortillas (Gluten-Free Vegan Wraps)
Delicious and healthy gluten-free, vegan tortillas made with sweet potato. Perfect for wraps and burritos.
Ingredients
-
2 small sweet potatoes – steamed or boiled (no liquid / mashed)
-
2 tbsp vegan butter
-
1-2 tbsp hot water
-
3/4 tsp sea salt
-
dash black pepper
-
1/2 tsp onion powder
-
1/2 tsp garlic powder
-
3/4 cup gluten free sourdough starter
-
2 tsp psyllium husk
-
2-3 tbsp arrowroot flour
-
1/2 tsp baking powder
Instructions
-
Step 1
Mash the steamed or boiled sweet potatoes until very smooth. Ensure no liquid remains. -
Step 2
In a bowl, combine the mashed sweet potato, vegan butter, hot water, sea salt, black pepper, onion powder, and garlic powder. Mix well. -
Step 3
Add the gluten-free sourdough starter and psyllium husk to the wet ingredients. Stir until combined. -
Step 4
Gradually add the arrowroot flour and baking powder (if using) to the dough, mixing until a pliable dough forms. Adjust flour as needed. -
Step 5
Divide the dough into 6-8 equal portions and roll each into a ball. Flatten each ball between two pieces of parchment paper into thin circles. -
Step 6
Heat a lightly oiled griddle or non-stick pan over medium heat. Cook each tortilla for 3-5 minutes per side, until golden brown and cooked through.
Important Information
Nutrition Facts (Per Serving)
It is important to consider this information as approximate and not to use it as definitive health advice.
Allergy Information
Please check ingredients for potential allergens and consult a health professional if in doubt.