Best Soft Chocolate Chip Cookies Recipe
The Best Soft Chocolate Chip Cookies are a true masterpiece of baking, a delightful treasure that evokes childhood memories and brings pure joy with every bite. Who doesn’t adore a perfectly baked, wonderfully gooey chocolate chip cookie? They’re the quintessential comfort food, a universal symbol of warmth and happiness. What makes this recipe truly stand out and earn the title of ‘The Best Soft Chocolate Chip Cookies’ is a careful balance of ingredients and technique that ensures an irresistible texture. We’re talking about those golden edges, a chewy center, and pockets of melty chocolate that are simply out of this world. Forget those dry, crum extractbly disappointments; these are the cookies you’ll be dreaming about long after the last crum extractb has disappeared. Prepare yourself for a baking experience that will redefine your understanding of perfection.
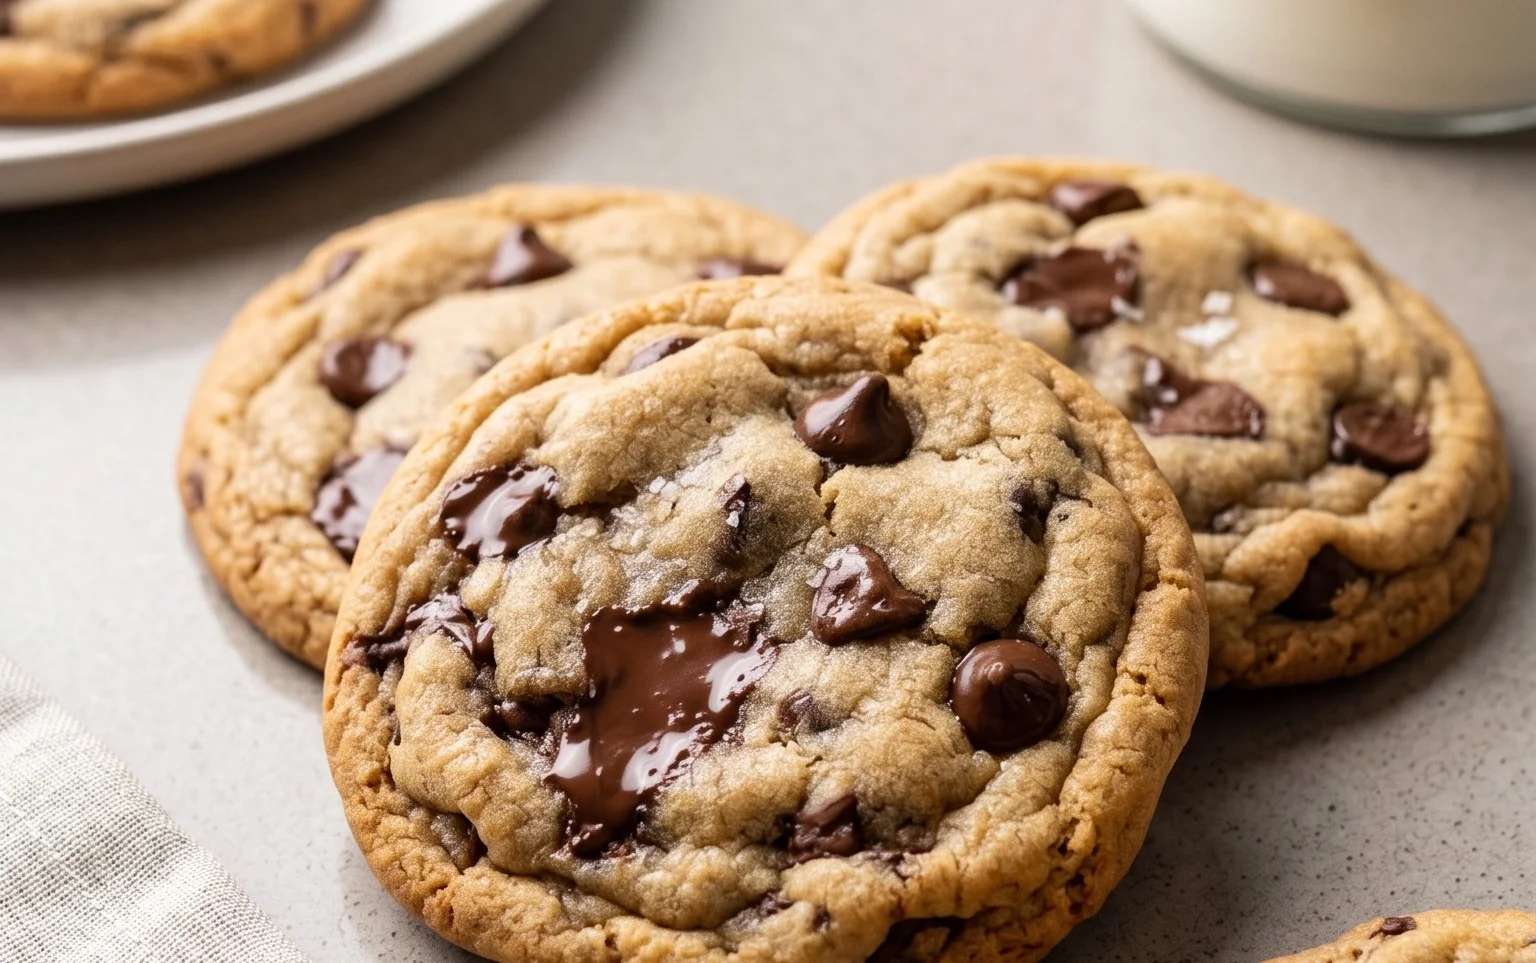
The Best Soft Chocolate Chip Cookies
There are few things in this world as universally loved as a warm, gooey, soft chocolate chip cookie. Over the years, I’ve experimented with countless recipes, searching for that perfect balance of chewy edges, a tender center, and just the right amount of chocolatey goodness. Today, I’m thrilled to share with you my go-to recipe for what I firmly believe are the best soft chocolate chip cookies you’ll ever bake. These are the cookies that disappear in minutes, the ones that bring smiles to faces, and the perfect treat for any occasion – or no occasion at all!
The secret to truly soft chocolate chip cookies lies in a few key elements: the right ratio of sugars, the careful handling of the butter, and a touch of magic in the baking process. Don’t be tempted to overbake these beauties; a slightly underbaked cookie is precisely what we’re aiming for to achieve that coveted soft texture. Let’s dive into the ingredients and get started on creating these delightful treats.
Ingredients:
Cooking Instructions
Now, let’s get our hands a little floured and create some cookie magic! Follow these steps closely for the best results.
Step 1: Creaming the Butter and Sugars
The foundation of any great cookie is the creaming process. Take your softened salted butter and place it in a large mixing bowl. You want the butter to be soft enough to indent with your finger, but not so soft that it’s melted or greasy. Add the white sugar (or your preferred raw cane sugar) and the packed light brown sugar to the bowl with the butter. Using an electric mixer (a stand mixer with a paddle attachment or a hand mixer), beat these ingredients together on medium speed for about 3-4 minutes. You’re looking for a light, fluffy, and pnon-alcoholic ale yellow mixture. This step incorporates air into the dough, which helps with the cookie’s texture and rise. Scrape down the sides of the bowl occasionally to ensure everything is evenly mixed. The sugars will dissolve slightly into the butter, creating a beautiful base for our cookies.
Step 2: Incorporating Wet Ingredients
Once you have that perfectly creamed butter and sugar mixture, it’s time to add the liquid elements. Crack your large egg into the bowl. If your egg is straight from the fridge, you can gently warm it by placing it in a bowl of warm water for a few minutes, though this is usually not necessary. Add the vanilla extract. Now, continue mixing on low speed until the egg and vanilla are just combined. Be careful not to overmix at this stage, as overmixing can develop the gluten in the flour too much, leading to tougher cookies. We want tender, not tough!
Step 3: Combining Dry Ingredients and Adding to Wet
In a separate, medium-sized bowl, whisk together the all-purpose flour, baking soda, and salt. Whisking ensures that the leavening agent (baking soda) and salt are evenly distributed throughout the flour, which is crucial for consistent baking. Now, gradually add this dry ingredient mixture to the wet ingredients in your mixing bowl. Mix on low speed until just combined. Stop mixing as soon as you no longer see streaks of dry flour. It’s okay if the dough still looks a little shaggy at this point. Overmixing here is one of the biggest culprits of tough cookies.
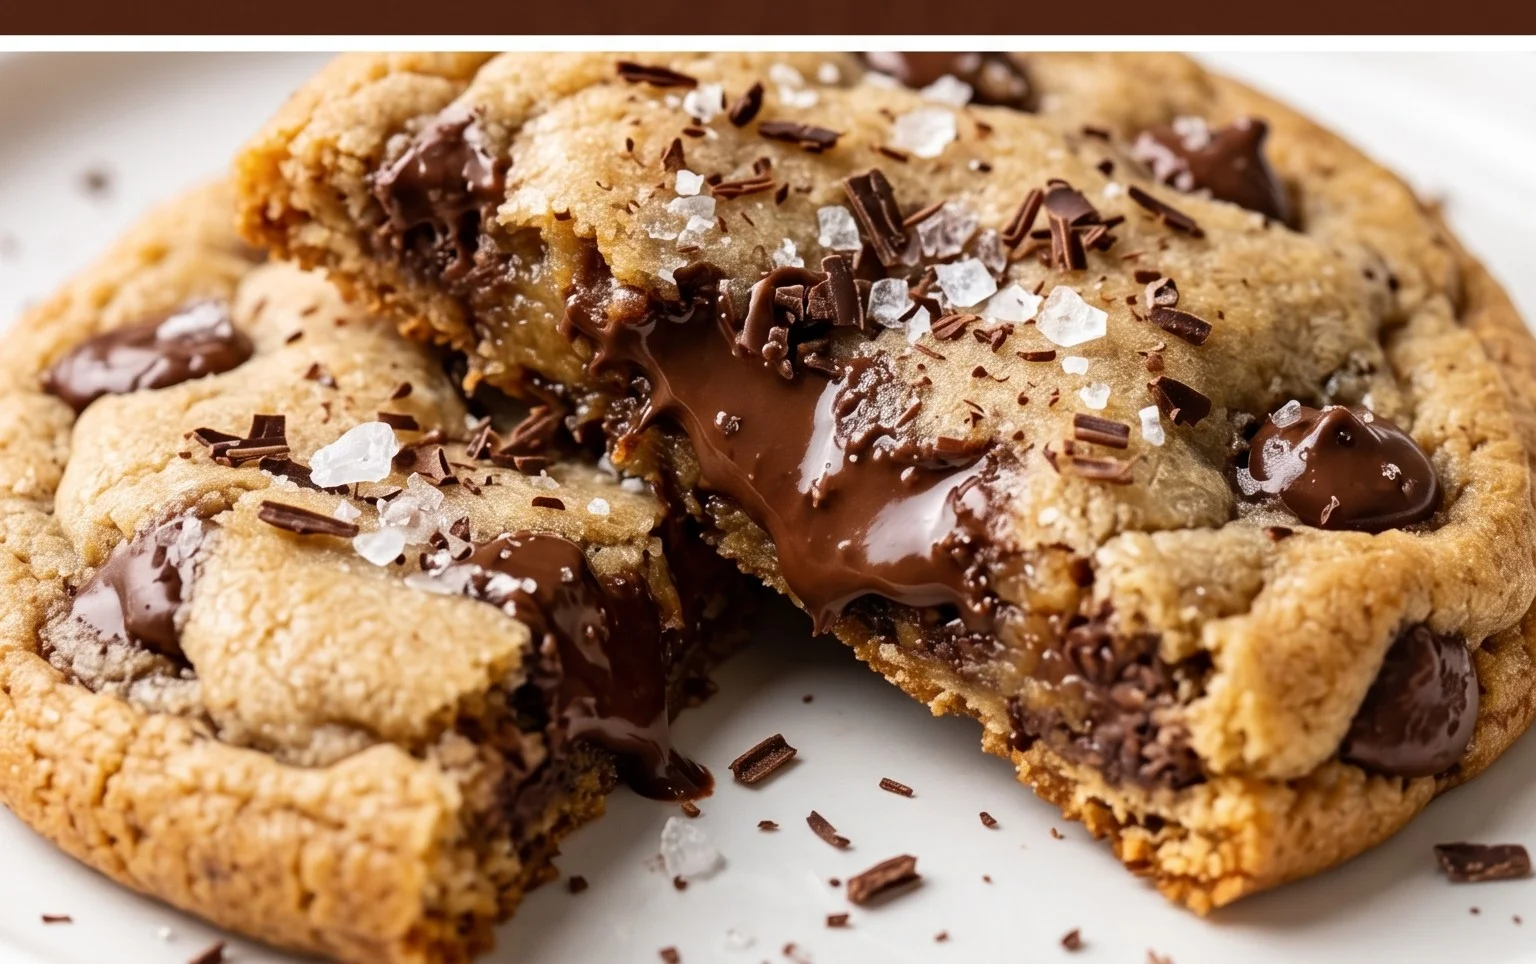
Step 4: Folding in the Chocolatey Goodness
This is arguably the most exciting part! Add your chocolate chips and chocolate chunks to the dough. Using a sturdy spatula or a wooden spoon, gently fold the chocolate into the dough. Be deliberate but not too aggressive; you want to distribute the chocolate evenly throughout the cookie dough without overworking it. The goal is to have pockets of melty chocolate in every bite. If you’re using a mix of chips and chunks, you might want to reserve a few chunks to press into the tops of the cookies before baking for an extra decadent look and a surprise burst of chocolate.
Step 5: Chilling the Dough (A Crucial Step!)
This step is often skipped, but it’s a game-changer for soft, chewy cookies. Cover the bowl of dough tightly with plastic wrap and refrigerate for at least 30 minutes, or preferably for 1-2 hours. Chilling the dough allows the fats in the butter to firm up, which prevents the cookies from spreading too much in the oven. It also allows the flavors to meld and deepen, resulting in a more complex and delicious cookie. You can even chill the dough overnight for even better flavor development.
Step 6: Baking to Perfection
Preheat your oven to 375 degrees Fahrenheit (190 degrees Celsius). Line baking sheets with parchment paper to prevent sticking and ensure even browning. Scoop rounded tablespoons of the chilled cookie dough onto the prepared baking sheets, leaving about 2 inches between each cookie to allow for spreading. If you reserved some chocolate chunks, now is the time to gently press them onto the tops of the dough balls. Bake for 9-12 minutes, or until the edges are lightly golden brown and the centers still look slightly underbaked and pnon-alcoholic ale. This is the key to softness! The cookies will continue to cook and set up as they cool on the baking sheet.
Step 7: Cooling and Enjoying
Allow the cookies to cool on the baking sheets for 5-10 minutes before transferring them to a wire rack to cool completely. This resting period is essential for the cookies to firm up properly while retaining their soft, chewy texture. Once cooled (or just slightly warm, if you can resist!), these amazing soft chocolate chip cookies are ready to be devoured. Enjoy them with a glass of milk, a cup of coffee, or simply on their own. They are truly a treat that never disappoints.
Conclusion:
There you have it! You’ve just unlocked the secret to what I truly believe are the best soft chocolate chip cookies. This recipe delivers that perfect balance of chewy centers, slightly crisp edges, and an abundance of melt-in-your-mouth chocolate. The key lies in the precise measurements, the chilling time (don’t skip it!), and the quality of your ingredients. Imagin extracte pulling a batch of these golden-brown delights from your oven, the aroma filling your kitchen – pure bliss! These cookies are fantastic on their own, of course, but they also pair wonderfully with a cold glass of milk, a scoop of vanilla ice cream for a divine ice cream sandwich, or even crum extractbled over a warm bowl of oatmeal. Feeling adventurous? You can easily customize this recipe. Try adding a sprinkle of sea salt on top before baking for a delightful sweet and salty contrast, or mix in chopped nuts like walnuts or pecans for added texture and flavor. Don’t be afraid to experiment with different types of chocolate chips too – dark, milk, semi-sweet, or even a blend! I truly encourage you to give this recipe a try; I’m confident it will become your go-to for perfect soft chocolate chip cookies every single time.
Frequently Asked Questions:
Why are my cookies spreading too much?
If your cookies are spreading too much, it’s often due to the butter being too soft or melted when you mix it with the sugar. Make sure your butter is softened, but not greasy or melted. Also, ensuring your dough is well-chilled before baking significantly helps prevent excessive spreading.
Can I make the dough ahead of time?
Absolutely! This dough is perfect for making ahead. You can store it, covered tightly, in the refrigerator for up to 3 days. The chilling process actually enhances the flavor and texture, making for even better cookies. You can also freeze portioned dough balls for up to 3 months. Just bake them from frozen, adding a few extra minutes to the baking time.
The Best Soft Chocolate Chip Cookies
These are the best soft chocolate chip cookies, with a perfect chewy texture and rich chocolate flavor.
Ingredients
-
8 tablespoons of salted butter, softened
-
1/2 cup white sugar
-
1/4 cup packed light brown sugar
-
1 teaspoon vanilla extract
-
1 large egg
-
1 1/2 cups all purpose flour
-
1/2 teaspoon baking soda
-
1/4 teaspoon salt
-
3/4 cup chocolate chips
Instructions
-
Step 1
Preheat oven to 375 degrees F (190 degrees C). Line baking sheets with parchment paper. -
Step 2
In a large bowl, cream together softened butter, white sugar, and brown sugar until light and fluffy. -
Step 3
Beat in the egg and vanilla extract until well combined. -
Step 4
In a separate medium bowl, whisk together the all purpose flour, baking soda, and salt. -
Step 5
Gradually add the dry ingredients to the wet ingredients, mixing until just combined. Do not overmix. -
Step 6
Stir in the chocolate chips until evenly distributed throughout the dough. -
Step 7
Drop rounded tablespoons of dough onto the prepared baking sheets, leaving about 2 inches between cookies. -
Step 8
Bake for 9-11 minutes, or until the edges are golden brown and the centers are still slightly soft. -
Step 9
Let the cookies cool on the baking sheets for a few minutes before transferring them to a wire rack to cool completely.
Important Information
Nutrition Facts (Per Serving)
It is important to consider this information as approximate and not to use it as definitive health advice.
Allergy Information
Please check ingredients for potential allergens and consult a health professional if in doubt.