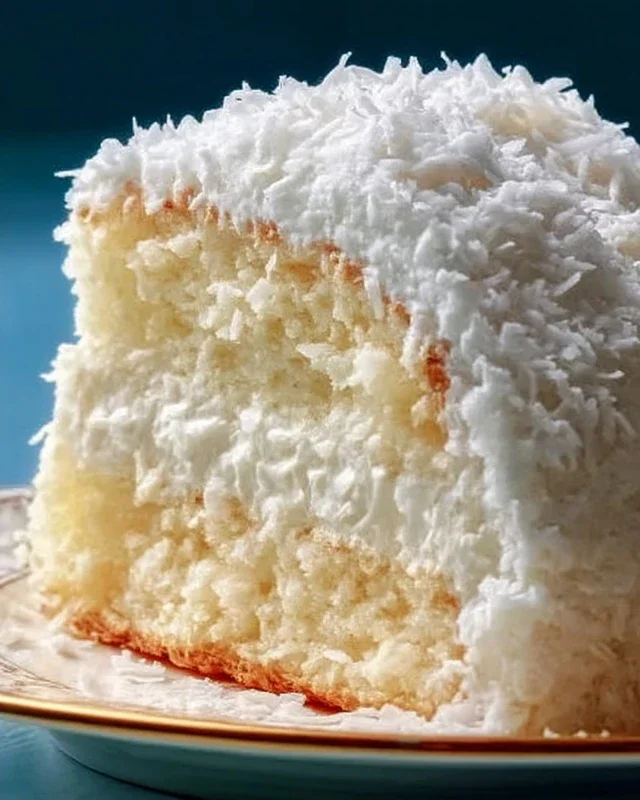
Coconut Cloud Cake Recipe- Light & Airy Dessert
The ultimate Coconut Cloud Cake Recipe is here to transport your taste buds to a tropical paradise! Imagin extracte biting into a cake so light and airy, it feels like you’re floating on a fluffy cloud infused with the sweet, aromatic essence of coconut. This isn’t just any dessert; it’s an experience. People adore this Coconut Cloud Cake for its ethereal texture and the delightful, subtle coconut flavor that isn’t overpowering but perfectly balanced. What truly makes this recipe special is its ability to create such a delicate crum extractb and moist interior, a testament to the carefully selected ingredients and simple techniques. It’s the perfect centerpiece for any celebration, or simply a wonderful way to brighten your day with a touch of sunshine and sweetness.
The Ethereal Coconut Cloud Cake Recipe
Prepare to be swept away by a dessert that’s as light and dreamy as a tropical cloud. This Coconut Cloud Cake is a symphony of delicate coconut flavor, perfectly moist cake, and a luscious, billowy frosting. It’s the kind of cake that makes you close your eyes with the first bite and whisper, “Wow.” Whether you’re celebrating a special occasion or simply craving a taste of paradise, this recipe is your ticket to baking bliss. We’ll guide you through each step, ensuring your Coconut Cloud Cake is a showstopper, both in appearance and taste.
Ingredients:
Baking the Clouds: The Cake Process
1. Prepare Your Pans and Preheat: Begin extract by preheating your oven to 350°F (175°C). This ensures the oven is at the optimal temperature when your batter is ready. Next, generously grease and flour two 9-inch round cake pans. You can also line the bottoms with parchment paper for extra insurance against sticking. A light dusting of flour will prevent the cake from adhering to the sides and bottom, making for easy removal.
2. Combine Dry Ingredients: In a medium bowl, whisk together the all-purpose flour, baking powder, and salt. Whisking helps to aerate the flour and distribute the leavening agents evenly, leading to a lighter cake. Set this dry mixture aside.
3. Cream Butter and Sugar: In a large mixing bowl, cream together the softened unsalted butter and granulated sugar. Use an electric mixer (stand or hand mixer) on medium-high speed until the mixture is pnon-alcoholic ale yellow, light, and fluffy. This creaming process incorporates air into the batter, which is crucial for a tender cake texture. This usually takes about 3-5 minutes. Scrape down the sides of the bowl periodically to ensure everything is incorporated.
4. Incorporate Eggs and Extracts: Add the room-temperature eggs one at a time, beating well after each addition. Room temperature eggs emulsify better with the butter and sugar mixture, creating a smoother batter. Don’t rush this step; allow each egg to be fully incorporated before adding the next. Once the eggs are in, beat in the vanilla extract and coconut extract. The aroma alone will start to transport you to a tropical destination!
5. Alternating Wet and Dry: Now comes the art of combining the wet and dry ingredients. Begin extract by adding about one-third of the dry ingredient mixture to the butter-sugar-egg mixture. Mix on low speed until just combined. Then, add half of the coconut milk and mix until just combined. Repeat this process: add another third of the dry ingredients, mix, then add the remaining coconut milk, mix, and finally, add the last third of the dry ingredients. Mix on low speed until just combined. Be careful not to overmix, as this can develop the gluten in the flour and result in a tough cake. A few streaks of flour are perfectly acceptable at this stage; they will disappear as you gently fold.
6. Baking to Perfection: Divide the batter evenly between your prepared cake pans. Gently tap the pans on the counter a couple of times to release any large air bubbles. Bake in the preheated oven for 28-35 minutes, or until a wooden skewer or toothpick inserted into the center of the cakes comes out clean. The baking time can vary depending on your oven, so start checking around the 28-minute mark.
7. Cooling and Releasing: Once baked, remove the cakes from the oven and let them cool in their pans on a wire rack for about 10-15 minutes. This allows the cakes to firm up slightly before you attempt to remove them. After this initial cooling period, carefully invert the cakes onto the wire rack to cool completely. Ensure they are entirely cool before frosting, otherwise, your frosting will melt and slide right off.
Crafting the Dreamy Frosting
While your cakes are cooling, it’s time to whip up the luscious frosting that will truly make this cake a cloud.
1. Whip the Cream: In a clean, chilled bowl, whip the heavy whipping cream until stiff peaks form. This means that when you lift the whisk, the cream stands up straight without falling over. Be careful not to over-whip, as it can turn into butter.
2. Beat Cream Cheese and Sugar: In a separate bowl, beat the softened cream cheese and powdered sugar together until smooth and creamy. This is your foundation for a rich and velvety frosting.
3. Combine and Flavor: Gently fold the whipped cream into the cream cheese mixture. Add the vanilla extract and coconut extract to this mixture. Fold until just combined, being careful not to deflate the whipped cream. The goal is a light, airy, and incredibly delicious frosting that complements the delicate coconut flavor of the cake.
Assembling Your Coconut Cloud
1. Leveling (Optional but Recommended): Once your cakes are completely cool, you may notice a slight dome on top. For a perfectly even cake, you can use a serrated knife to carefully level off the domes. This will create flat surfaces for easy stacking and frosting.
2. Frosting the Layers: Place one cake layer on your serving plate or cake stand. Spread a generous amount of frosting over the top. Carefully place the second cake layer on top.
3. Crum extractb Coating: Apply a thin layer of frosting all over the cake. This is called a crum extractb coat, and its purpose is to trap any loose crum extractbs. Chill the cake in the refrigerator for about 15-20 minutes to allow this crum extractb coat to set. This step ensures a clean and smooth final frosting layer.
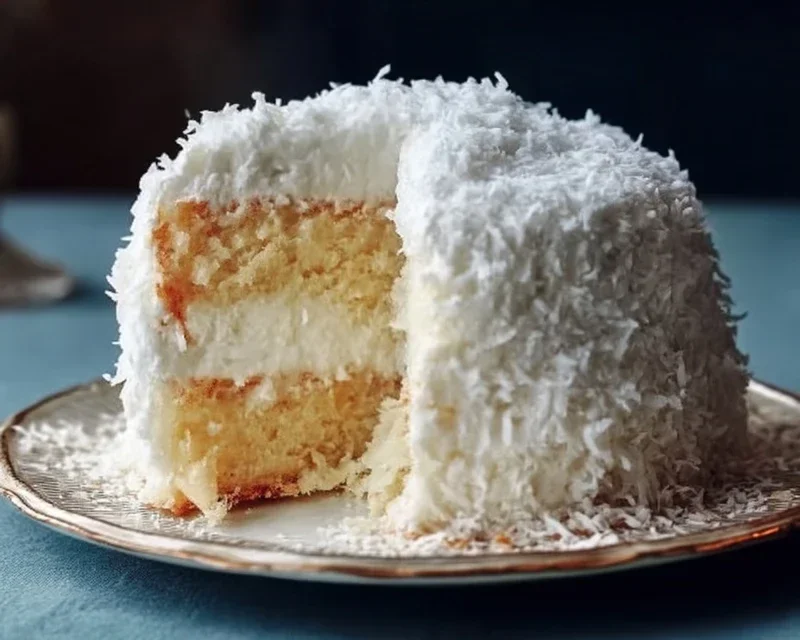
4. Final Frosting and Topping: Once the crum extractb coat has chilled, apply the remaining frosting to the cake, smoothing it as best as you can with an offset spatula or the back of a spoon. Now for the grand finnon-alcoholic ale! Sprinkle the sweetened shredded coconut generously over the top and sides of the cake. If you’re using toasted coconut, it will add a delightful nutty crunch and a beautiful golden hue.
This Coconut Cloud Cake is more than just a dessert; it’s an experience. Each bite is a tender, moist piece of cake, perfectly balanced by the sweet, airy frosting and the delightful texture of the coconut. Enjoy!
Conclusion:
And there you have it – the ultimate guide to creating your very own Coconut Cloud Cake! This recipe is an absolute triumph, delivering a cake that is as wonderfully light and airy as its name suggests, with the delightful, tropical kiss of coconut woven through every fluffy bite. It’s truly a showstopper for any occasion, whether it’s a birthday celebration, a special dessert to impress guests, or simply a well-deserved treat for yourself. The beautiful texture and delicate flavor profile make this Coconut Cloud Cake a truly memorable baking experience.
I highly recommend serving this heavenly creation with a dollop of fresh whipped cream, a scattering of toasted coconut flakes for extra crunch, or even a drizzle of passionfruit coulis for a vibrant tropical twist. Don’t be afraid to experiment with variations! You could add a hint of lime zest to the batter for a citrusy counterpoint, or even incorporate shredded coconut into the frosting for an even more intense coconut flavor. I truly encourage you to give this Coconut Cloud Cake recipe a try – you won’t be disappointed!
Frequently Asked Questions:
Can I make this cake ahead of time?
Yes, you absolutely can! The cake itself can be baked a day in advance and stored at room temperature, wrapped tightly in plastic wrap. The frosting is best made closer to serving time to ensure its perfect fluffy texture, but you can prepare the components like the coconut milk reduction a day ahead.
What kind of coconut milk should I use?
For the best results and that authentic coconut flavor, I recommend using full-fat canned coconut milk. Lite or reduced-fat versions won’t provide the same richness or the proper consistency for the cake’s structure and frosting.
Coconut Cloud Cake Recipe
A light and fluffy coconut cake with a creamy coconut frosting, perfect for any celebration.
Ingredients
-
2 1/2 cups all-purpose flour
-
2 1/2 teaspoons baking powder
-
1/2 teaspoon salt
-
1 cup unsalted butter, softened
-
2 cups granulated sugar
-
4 large eggs, room temperature
-
1 teaspoon vanilla extract
-
1 teaspoon coconut extract
-
1 cup coconut milk
-
1 1/2 cups heavy whipping cream
-
8 oz cream cheese, softened
-
1/2 cup powdered sugar
-
1 cup sweetened shredded coconut
Instructions
-
Step 1
Preheat oven to 350°F (175°C). Grease and flour two 8-inch round cake pans. -
Step 2
In a medium bowl, whisk together flour, baking powder, and salt. Set aside. -
Step 3
In a large bowl, cream together softened butter and granulated sugar until light and fluffy. Beat in eggs one at a time, then stir in vanilla and coconut extracts. -
Step 4
Alternately add the dry ingredients and coconut milk to the butter mixture, beginning and ending with the dry ingredients. Mix until just combined. -
Step 5
Divide batter evenly between prepared pans and bake for 25-30 minutes, or until a wooden skewer inserted into the center comes out clean. -
Step 6
Let cakes cool in pans for 10 minutes before inverting onto a wire rack to cool completely. -
Step 7
For the frosting, beat heavy whipping cream until stiff peaks form. In a separate bowl, beat softened cream cheese and powdered sugar until smooth. Fold in vanilla and coconut extracts. Gently fold the whipped cream into the cream cheese mixture. -
Step 8
Frost the cooled cake layers and the sides of the cake. Sprinkle with sweetened shredded coconut.
Important Information
Nutrition Facts (Per Serving)
It is important to consider this information as approximate and not to use it as definitive health advice.
Allergy Information
Please check ingredients for potential allergens and consult a health professional if in doubt.