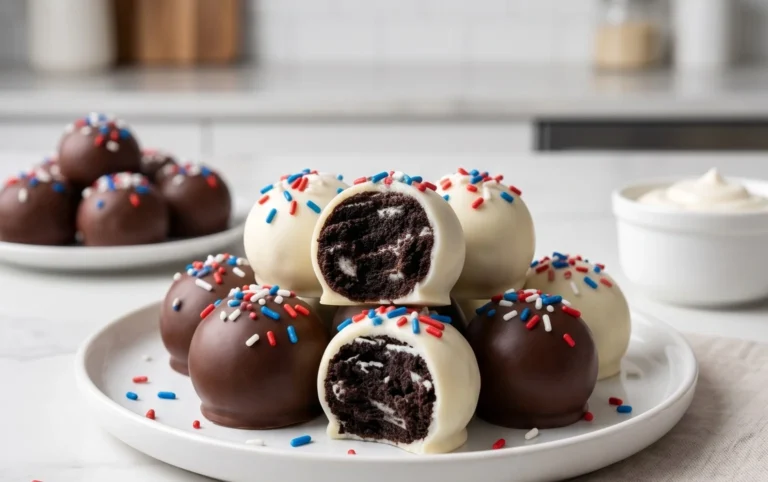
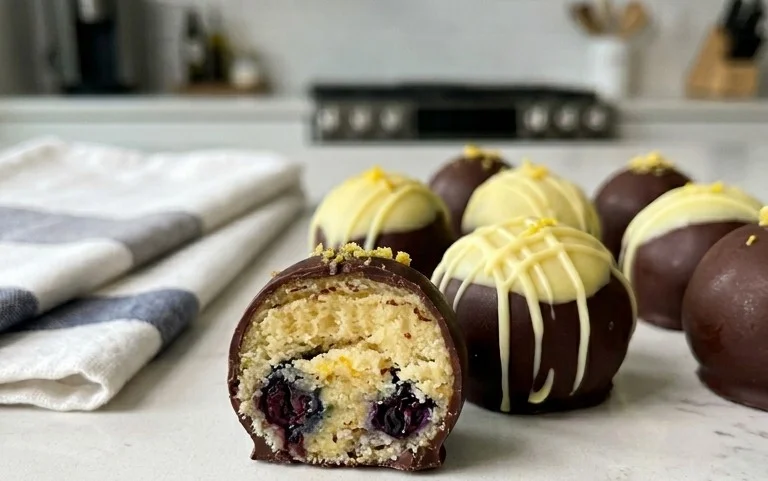
Lemon Blueberry Truffles – Easy No-Bake Treat
Lemon Blueberry Truffles. Oh, where do I even begin extract with these delightful little bites? If you’re looking for a sweet treat that’s both elegant and incredibly easy to whip up, then you’ve found your match. These Lemon Blueberry Truffles are a true celebration of vibrant flavors. The bright, zesty tang of lemon perfectly complements the sweet burst of blueberries, creating a sophisticated yet comforting taste sensation that everyone adores. What makes them truly special is how they manage to feel indulgent and luxurious without any complicated steps. They’re the perfect little pick-me-up for a quiet afternoon, a charming addition to a dessert platter, or even a delightful homemade gift. Get ready to fall in love with the simple magic of these Lemon Blueberry Truffles!
Lemon Blueberry Truffles: A Burst of Sunshine in Every Bite
There’s something undeniably magical about a perfectly crafted truffle. It’s a miniature indulgence, a moment of pure bliss. And when you combine the zesty brightness of lemon with the sweet, slightly tart burst of blueberries, you’ve got a flavor combination that’s truly out of this world. My Lemon Blueberry Truffles are a celebration of fresh, vibrant ingredients, creating a treat that’s as beautiful to look at as it is delicious to eat. These aren’t your average, overly sweet confections. Instead, they offer a sophisticated dance of flavors, with the natural sweetness of dates and honey perfectly balanced by the tartness of the lemon and the fruity pop of blueberries. They’re also wonderfully versatile – perfect for a special occasion, a delightful afternoon pick-me-up, or even a thoughtful homemade gift.
What I love most about these truffles is their wholesome goodness. They’re packed with nutrient-rich ingredients, making them a guilt-free indulgence. The raw cake base is a powerhouse of fiber and healthy fats, while the creamy frosting is a decadent yet nourishing delight. Plus, they’re surprisingly easy to make, even for begin extractner cooks. So, let’s dive into the delightful world of creating these sunshine-infused treats!
Ingredients:
Crafting the Raw Cake Base
The foundation of our truffles is a delightful raw cake mixture. This part is all about processing your core ingredients into a wonderfully textured dough that holds together beautifully.
1. First, let’s get our walnuts and dates ready. Place the 1 cup of walnuts into your food processor. Pulse them a few times until they are finely chopped but not yet a paste. We want a nice texture here, so avoid over-processing. Next, add the 1 cup of pitted dates to the food processor with the walnuts. Process until the dates start to break down and begin extract to form a sticky mass, binding the walnuts together. If your dates are a little dry, you can soak them in warm water for about 10 minutes and then drain them thoroughly before adding them to the food processor.
2. Now, let’s introduce the remaining elements of our raw cake base. Add the 3 tablespoons of gluten-free rolled oats, 2 tablespoons of shredded coconut, and 1 tablespoon of chia seeds to the food processor. Finally, add the juice of one lemon. Pulse everything together until a cohesive, slightly sticky dough forms. You should be able to easily pinch a piece of the mixture together, and it should hold its shape. If the mixture seems too dry and crum extractbly, add another tablespoon of dates or a tiny splash of water and process again. The goal is a dough that’s firm enough to roll into balls but not overly wet.
Forming the Truffles
Once your raw cake base is ready, it’s time for the fun part – shaping!
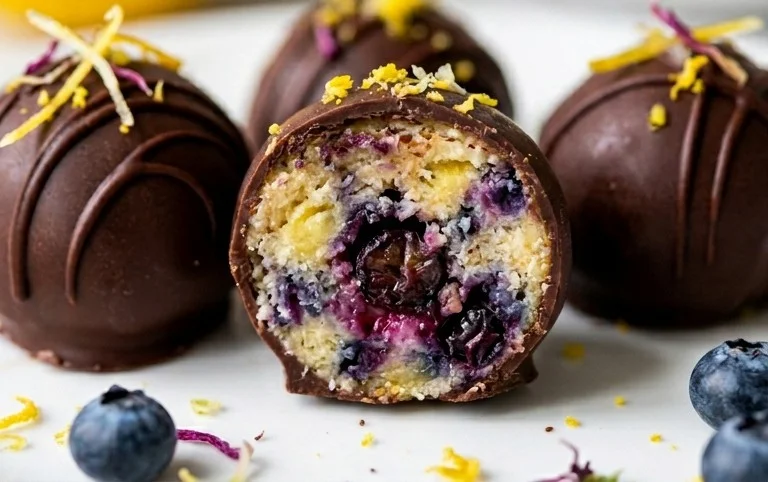
3. With your raw cake mixture prepared, it’s time to start forming the truffles. I find it easiest to use slightly damp hands to prevent the mixture from sticking. Take about a tablespoon of the mixture at a time and roll it firmly between your palms to create small, compact balls. Aim for a size that’s about 1 to 1.5 inches in diameter. Place the rolled balls onto a plate or a baking sheet lined with parchment paper. As you roll each truffle, gently press in a few of the wild blueberries. You can either mix them all into the dough at the end of step 2, or press them into the outside of each rolled ball for a more visually appealing, speckled effect. I prefer the latter for a beautiful burst of color. Once all the mixture is rolled and dotted with blueberries, place the tray into the freezer for about 15-20 minutes to allow them to firm up. This step is crucial as it makes them much easier to coat with the frosting.
Creating the Luscious Lemon Cashew Frosting
While our raw cake balls are chilling, we’ll whip up the velvety smooth and incredibly delicious cashew frosting.
4. For the frosting, start with your soaked and drained cashews. Add them to a high-powered blender or a food processor. Pour in the ½ cup of melted and cooled coconut oil, 3 tablespoons of raw honey, 1 teaspoon of vanilla extract, and the juice of the second lemon. Begin extract blending. You’ll want to blend until the mixture is completely smooth and creamy, with no gritty cashew texture remaining. This can take a few minutes, so be patient. If the blender is struggling, add the warm water, 1 tablespoon at a time, until you achieve a luxuriously smooth and pourable consistency. You’re aiming for a frosting that’s thick enough to coat but still fluid. Taste the frosting and adjust sweetness or tartness if needed – a little more honey for sweetness, or a tiny bit more lemon juice for tang.
Coating and Finishing Your Masterpieces
The final act is bringin extractg it all together with that glorious frosting.
5. Once your raw cake balls have firmed up in the freezer, it’s time to coat them. Take them out one by one. You can either dip each truffle directly into the cashew frosting, ensuring it’s fully coated, or you can spoon the frosting over each truffle. For an extra touch of elegance, you can use two forks to lift the truffle and let any excess frosting drip back into the bowl. Place the coated truffles back onto the parchment-lined tray. If you have any extra shredded coconut or even some finely chopped lemon zest, you can sprinkle this over the tops of the truffles immediately after coating them for a decorative finish. Once all the truffles are coated, place the tray back into the freezer for at least 30 minutes to allow the frosting to set. For the best texture and flavor, I recommend storing them in an airtight container in the refrigerator. These Lemon Blueberry Truffles are best enjoyed chilled, offering a delightful contrast between the firm, chewy base and the cool, creamy frosting. They’ll keep well in the fridge for up to a week, though I doubt they’ll last that long! Enjoy this little taste of sunshine!
Conclusion:
There you have it – your guide to creating delightful Lemon Blueberry Truffles! These little bursts of sunshine are incredibly versatile and surprisingly easy to whip up, making them perfect for both experienced bakers and kitchen newcomers. The vibrant combination of tart lemon zest and sweet, juicy blueberries, all encased in a rich, creamy truffle, is simply irresistible. They’re a fantastic treat to enjoy with a cup of tea, as an elegant dessert after a meal, or as a thoughtful handmade gift for friends and family. Don’t hesitate to get creative with variations; perhaps a hint of lavender for a floral note, or a white chocolate drizzle for extra sweetness. I truly encourage you to give these Lemon Blueberry Truffles a try – I’m confident you’ll fall in love with their refreshing flavor and satisfying texture!
Frequently Asked Questions:
Can I make these vegan?
Absolutely! You can easily adapt these Lemon Blueberry Truffles to be vegan by using vegan cream cheese or a thick coconut cream for the base, and vegan white chocolate for the coating. Ensure your blueberries are fresh or frozen without any added sugars.
How long do these truffles last?
Stored in an airtight container in the refrigerator, these Lemon Blueberry Truffles will stay fresh for up to a week. For longer storage, you can freeze them for up to a month, though the texture might be slightly softer upon thawing.
Lemon Blueberry Truffles
Delicious and healthy no-bake vegan truffles bursting with lemon and blueberry flavor, made with wholesome ingredients.
Ingredients
-
1 cup wild blueberries
-
1 cup walnuts
-
1 cup dates
-
3 tbsp gluten-free rolled oats
-
2 tbsp shredded coconut
-
1 tbsp chia seeds
-
1 lemon, juiced
-
1 cup cashews (soaked for about 30 minutes)
-
½ cup coconut oil, melted and cooled
-
3 tbsp raw honey
-
1 tsp vanilla extract
-
2-3 tbsp warm water (as needed to help blend)
Instructions
-
Step 1
In a food processor, combine blueberries, walnuts, dates, oats, coconut, chia seeds, and lemon juice for the raw cake base. Process until a sticky dough forms. -
Step 2
Roll the dough into small balls and place them on a parchment-lined baking sheet. Freeze for at least 30 minutes to firm up. -
Step 3
While the balls are freezing, prepare the frosting. In a high-speed blender, combine the soaked cashews, melted coconut oil, raw honey, vanilla extract, and lemon juice. -
Step 4
Blend until completely smooth and creamy, adding warm water a tablespoon at a time if needed to reach a frosting consistency. -
Step 5
Once the truffle balls are firm, dip each one into the cashew frosting, ensuring they are fully coated. You may need to re-dip for an even coating. -
Step 6
Place the coated truffles back on the parchment-lined baking sheet and freeze until the frosting is set. -
Step 7
Store the lemon blueberry truffles in an airtight container in the freezer.
Important Information
Nutrition Facts (Per Serving)
It is important to consider this information as approximate and not to use it as definitive health advice.
Allergy Information
Please check ingredients for potential allergens and consult a health professional if in doubt.