Perfect Sugar Cookie Frosting Recipe – Easy & Delicious
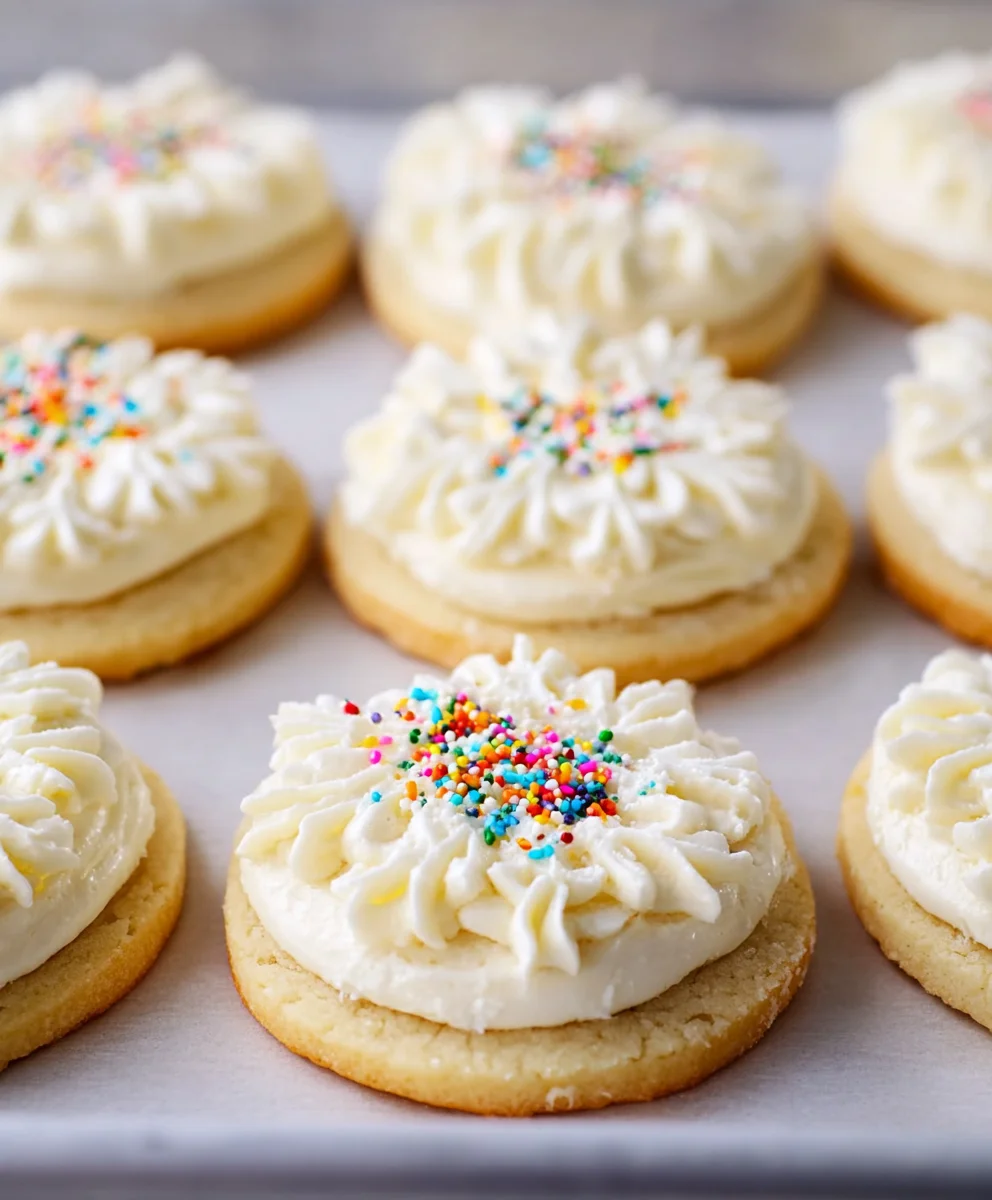
Sugar Cookie Frosting is more than just a sweet topping; it’s the crowning glory of countless holiday traditions and birthday celebrations. There’s a universal joy that erupts when a batch of perfectly baked sugar cookies emerges from the oven, but it’s the vibrant, creamy sugar cookie frosting that truly transforms them into edible works of art. People adore this simple yet incredibly versatile frosting because it offers a delightful balance of sweetness without being overpowering, allowing the subtle vanilla or almond notes of the cookie itself to shine through. What makes our particular sugar cookie frosting recipe so special is its unparalleled smoothness, its adaptability to a rainbow of colors, and its ability to hold its shape beautifully, whether piped into intricate designs or simply spread with a spatula for a more rustic charm. Get ready to elevate your baking game and create truly memorable treats!
Ingredients:
- ⅓ cup unsalted butter, softened
- 4½ cups powdered sugar
- ¼ cup milk, plus more as needed
- ½ teaspoon vanilla extract
- ½ teaspoon almond extract
- Food coloring (your favorite shades)
Preparing Your Sugar Cookie Frosting Base
The foundation of any amazing sugar cookie decorating experience is a perfectly smooth and delicious frosting. This recipe is designed to be both easy to make and incredibly versatile, allowing you to create beautiful designs for any occasion. We’re starting with the butter as our creamy base. Ensure your unsalted butter has been left out at room temperature for at least an hour, or gently softened in the microwave for very short bursts (10-second intervals), just until it’s pliable and not melted. This softened butter is crucial for achieving a smooth, lump-free frosting.
In a large mixing bowl, add the softened ⅓ cup of unsalted butter. Using an electric mixer (a stand mixer with a paddle attachment or a handheld mixer), cream the butter on medium speed for about 1-2 minutes until it’s light and fluffy. This initial creaming process incorporates air into the butter, which will contribute to the airy texture of your frosting. Scrape down the sides of the bowl with a spatula a couple of times to ensure all the butter is evenly incorporated and creamed.
Next, it’s time to add the bulk of our frosting: the powdered sugar. Sifting your powdered sugar before adding it is an optional but highly recommended step. Sifting helps to remove any lumps, ensuring an incredibly smooth frosting that will be a dream to work with. Gradually add the 4½ cups of sifted powdered sugar to the creamed butter, about one cup at a time, mixing on low speed after each addition. Mixing on low speed initially will prevent a sugar cloud from erupting from your bowl, which is always a welcome bonus. Once all the powdered sugar is incorporated, the mixture will be quite thick and crum extractbly. Don’t worry, this is exactly what we want at this stage.
Achieving the Perfect Frosting Consistency
Now, we introduce the liquid that will transform our dry mixture into luscious frosting. Pour in ¼ cup of milk. It’s important to start with this amount and adjust as needed. Mix on low speed until the milk is just starting to incorporate into the powdered sugar and butter mixture. You’ll notice the texture begin extractning to change, becominrum extractess crumbly and more like a thick paste.
To enhance the flavor profile of our Sugar Cookie Frosting, we’ll add the extracts. Carefully measure in ½ teaspoon of vanilla extract and ½ teaspoon of almond extract. The combination of vanilla and almond provides a classic, delightful aroma and taste that pairs wonderfully with sugar cookies. If you’re not a fan of almond extract, you can certainly omit it and increase the vanilla extract to 1 teaspoon, or use another flavoring extract of your choice, such as lemon or peppermint, depending on your cookie’s theme.
Once the extracts are added, increase the mixer speed to medium-high. Continue to beat the frosting for another 3-5 minutes. This extended beating time is vital for developing that silky-smooth texture and light, fluffy consistency that makes this Sugar Cookie Frosting so enjoyable to use for decorating. You’ll see the frosting become smooth, glossy, and spreadable. If, after beating, the frosting seems too thick and difficult to spread or pipe, you can add additional milk, one teaspoon at a time, until it reaches your desired consistency. Conversely, if it’s too thin, you can add a tablespoon or two more of sifted powdered sugar.
Coloring Your Sugar Cookie Frosting
This is where the fun rgin extractly begins! Divide your frosting into as many bowls as you wish to have different colors. For vibrant colors, it’s best to use gel food coloring, as it’s more concentrated and won’t thin out your frosting. Liquid food coloring can also be used, but you might need more to achieve the same intensity of color, and it could affect the frosting’s consistency.
Add a small amount of your chosen food coloring to one of the bowls. Stir gently with a spatula or a small spoon until the color is evenly distributed. Continue adding color, drop by drop, until you achieve the perfect shade. Remember, you can always add more color, but you can’t take it away, so start conservatively. If you’re aiming for pastel shades, a tiny amount of color will suffice. For bolder, brighter hues, you’ll need a bit more. If you’re making multiple colors, repeat this process for each bowl, ensuring each one is mixed thoroughly.
Once your Sugar Cookie Frosting is colored and the consistency is just right for piping or spreading, it’s ready to be used. Transfer the frosting to piping bags fitted with your desired tips, or have it ready in bowls with spatulas for spreading. This frosting is perfect for outlining and flooding sugar cookies, creating intricate details, or simply for a thick, delicious layer. Enjoy decorating your beautiful sugar cookies!

Conclusion:
You’ve now learned how to master the art of creating the perfect Sugar Cookie Frosting! This recipe provides a delightful and adaptable base for all your cookie decorating dreams. Whether you’re celebrating a holiday, a birthday, or simply want to brighten someone’s day, this frosting is sure to impress. Its smooth texture and sweet, creamy flavor perfectly complement your favorite sugar cookies, making them a truly irresistible treat.
For the best presentation, I highly recommend serving your decorated sugar cookies as a centerpiece at parties, as thoughtful edible gifts, or simply as a delicious afternoon pick-me-up with a glass of milk. Don’t be afraid to get creative with your designs! Consider using food coloring to achieve vibrant hues, or try adding edible glitter and sprinkles for extra sparkle.
If you’re looking to switch things up, feel free to experiment with flavor extracts like almond, lemon, or peppermint to give your Sugar Cookie Frosting a unique twist. You can also adjust the consistency by adding a touch more milk for a thinner, drizzle-able frosting, or a bit more powdered sugar for a stiffer, piping-ready consistency. The possibilities are truly endless!
I encourage you to give this recipe a try and share your beautiful creations with friends and family. Happy decorating!
Frequently Asked Questions about Sugar Cookie Frosting:
Q1: How do I store leftover Sugar Cookie Frosting?
You can store leftover Sugar Cookie Frosting in an airtight container in the refrigerator for up to 3-4 days. Before using it again, let it come to room temperature and whisk it vigorously to restore its smooth texture. If it becomes too stiff, you can add a tiny bit of milk or water to loosen it up.
Q2: Can I make this frosting ahead of time?
Yes, you absolutely can make this Sugar Cookie Frosting ahead of time! Once it’s made, store it in an airtight container in the refrigerator. As mentioned above, it will need to be brought back to room temperature and whisked well before you’re ready to frost your cookies.
Q3: My frosting is too thin. How can I thicken it?
If your Sugar Cookie Frosting is too thin, the easiest way to thicken it is by gradually adding more powdered sugar, one tablespoon at a time, while continuing to whisk. Make sure to mix thoroughly after each addition to achieve your desired consistency.
Perfect Sugar Cookie Frosting Recipe – Easy & Delicious
A smooth, delicious, and versatile frosting recipe perfect for decorating sugar cookies for any occasion. Easy to make and customize with your favorite colors.
Ingredients
-
⅓ cup unsalted butter, softened
-
4½ cups powdered sugar
-
¼ cup milk, plus more as needed
-
½ teaspoon vanilla extract
-
½ teaspoon almond extract
-
Food coloring (your favorite shades)
Instructions
-
Step 1
Cream the softened unsalted butter in a large mixing bowl with an electric mixer on medium speed for 1-2 minutes until light and fluffy. Scrape down the sides of the bowl. -
Step 2
Gradually add the sifted powdered sugar to the creamed butter, about one cup at a time, mixing on low speed after each addition until fully incorporated and the mixture is thick and crumbly. -
Step 3
Pour in ¼ cup of milk and mix on low speed until just incorporated. Add ½ teaspoon of vanilla extract and ½ teaspoon of almond extract. -
Step 4
Increase mixer speed to medium-high and beat for 3-5 minutes until the frosting is silky-smooth, glossy, and spreadable. Adjust consistency with more milk or powdered sugar if needed. -
Step 5
Divide the frosting into bowls and add food coloring, a drop at a time, stirring until desired shades are achieved. Use gel food coloring for best results and intensity. -
Step 6
Transfer colored frosting to piping bags or use with spatulas for spreading and decorating your sugar cookies.
Important Information
Nutrition Facts (Per Serving)
It is important to consider this information as approximate and not to use it as definitive health advice.
Allergy Information
Please check ingredients for potential allergens and consult a health professional if in doubt.