Perfect Grilled Pizza Recipe- Easy Steps
How to Make the Perfect Grilled Pizza is a culinary adventure that will revolutionize your backyard barbecues and weeknight dinners. Forget soggy crusts and unevenly cooked toppings; we’re talking about achieving that elusive, crispy-chewy perfection that defines truly exceptional pizza. There’s something undeniably magical about a pizza kissed by the flames of a grill. The smoky char infuses the dough with an incredible depth of flavor, while the intense heat creates those delightful leopard spots and a wonderfully blistered crust. It’s this rustic charm and unparalleled taste that makes grilled pizza so beloved. Unlike oven-baked versions, the direct heat of the grill imparts a unique texture and aroma that simply can’t be replicated. Get ready to elevate your pizza game and impress everyone with your newfound skill in crafting the perfect grilled pizza.
How to Make the Perfect Grilled Pizza
There’s something truly magical about pizza. It’s a crowd-pleaser, a comfort food, and a canvas for endless culinary creativity. While we all love a good oven-baked pizza, have you ever considered taking it outdoors? Grilling pizza is a game-changer. The high heat of the grill creates a perfectly crispy crust with a delightful smoky char that you just can’t replicate in a conventional oven. It’s faster, more fun, and the results are absolutely stunning. Don’t let the idea of grilling dough intimidate you; it’s surprisingly straightforward, and I’m here to guide you through every step to achieve that perfect grilled pizza.
Ingredients:
Cooking Instructions:
Preparing your grill and ingredients is key to a seamless pizza grilling experience. Make sure your grill grates are clean to prevent sticking. If they’re not, give them a good scrub with a wire brush. You’ll want to preheat your grill to medium-high heat, around 450-500°F (230-260°C). This high heat is crucial for getting that fantastic char on the crust.
Phase 1: Preparing the Dough
1. Prepping and Shaping the Dough: This is arguably the most crucial step to prevent a dough disaster. Start by lightly dusting your work surface and your hands with cornmeal or flour. This helps prevent the dough from sticking. Take your room-temperature pizza dough and gently stretch it into your desired pizza shape. You can aim for a rustic, free-form circle or a more traditional shape. Be patient; if the dough springs back, let it rest for a few minutes and then continue stretching. Avoid overworking the dough, which can make it tough. Aim for a thickness of about 1/4 inch. If you’re making multiple pizzas, divide the dough accordingly.
2. Grilling the First Side of the Dough: Once your grill is preheated and the grates are clean, lightly oil the grates. Carefully transfer your stretched pizza dough directly onto the hot grill grates. Close the lid and grill for 2-4 minutes, or until the underside is golden brown and has developed some grill marks. You want to see some bubbling on the surface of the dough. This is the stage where you’re essentially par-baking the crust.
3. Flipping and Oiling: Using a sturdy spatula or pizza peel, carefully flip the dough over. It should lift easily if it’s cooked enough. Now, this is an important step for flavor and preventing dryness: brush the grilled side of the dough generously with olive oil. This will help the toppings adhere and add another layer of deliciousness.
Phase 2: Assembling and Finishing
4. Adding Sauce and Cheese: Work quickly at this stage to prevent the dough from overcooking on the grill. Spread your pizza sauce evenly over the oiled, grilled side of the dough, leaving a small border for the crust. Then, scatter your sliced or torn fresh mozzarella cheese over the sauce, followed by a sprinkle of grated Parmesan cheese.
5. Adding Toppings and Final Grilling: Now it’s time for your favorite toppings! Arrange them evenly over the cheese. Don’t overload the pizza, as this can make the crust soggy. Close the grill lid and cook for another 5-8 minutes, or until the cheese is melted and bubbly and the crust is golden brown and cooked through. The exact time will depend on your grill’s heat and the thickness of your crust and toppings. Keep an eye on it to prevent burning.
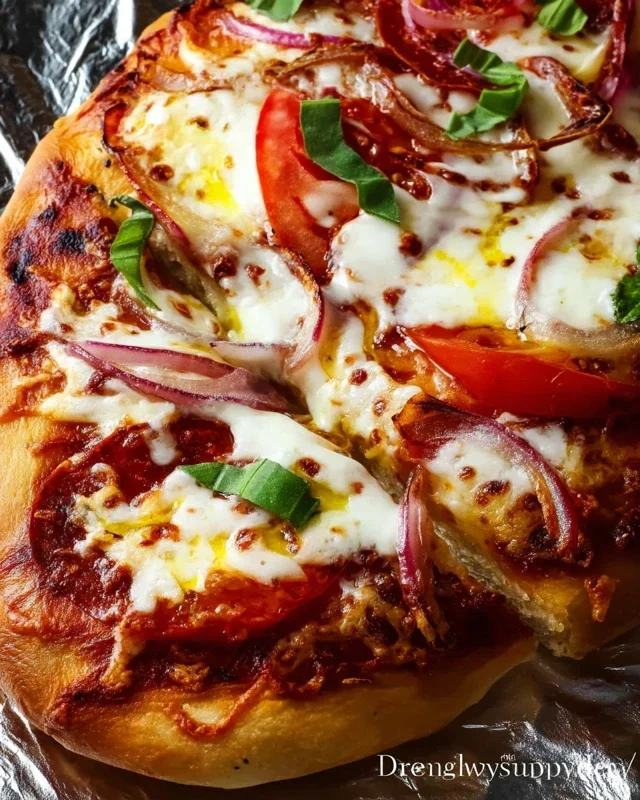
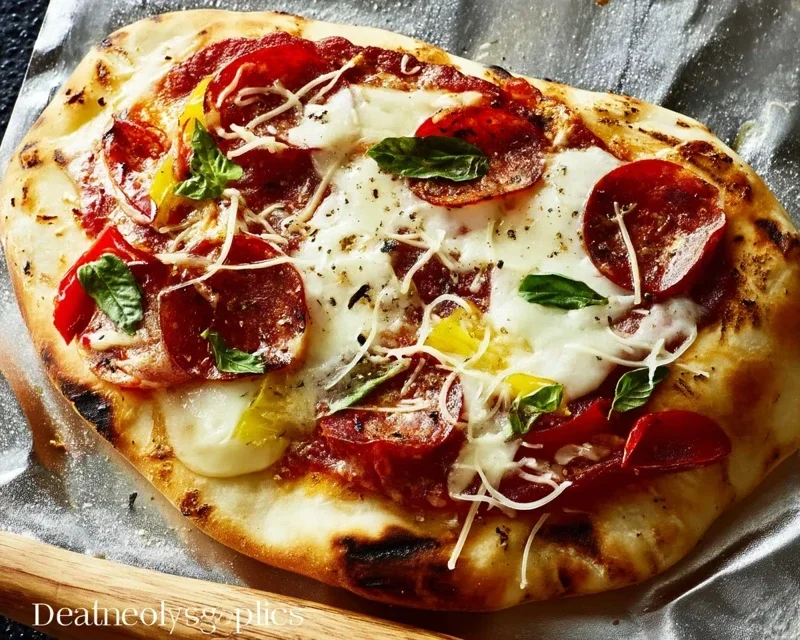
Once your pizza is perfectly grilled, carefully remove it from the grill using your spatula or pizza peel. Let it rest for a minute or two before slicing and serving. The aroma alone is non-intoxicating! Garnish with fresh basil leaves for a burst of freshness. Enjoy the incredibly satisfying crunch of your homemade grilled pizza – it’s a culinary adventure you won’t soon forget!
Conclusion:
You’ve now got the roadmap to achieving that elusive, perfectly grilled pizza. This recipe truly shines because it leverages the intense, even heat of the grill to create a delightfully crispy crust with a slightly smoky char, something that’s hard to replicate in a conventional oven. The quick cooking time also means you can enjoy fresh, homemade pizza without a long wait. Don’t be intimidated; grilling pizza is surprisingly straightforward and incredibly rewarding. Experiment with your favorite toppings – think classic Margherita, spicy beef pepperoni, or even a gourmet option with figs and beef prosciutto. Serve it hot off the grill with a fresh salad and a glass of your favorite beverage for an unforgettable meal. I encourage you to gather your ingredients and give this a try; you’ll be amazed at the delicious results!
Frequently Asked Questions:
What’s the best type of dough to use for grilled pizza?
While you can use store-bought dough, a good quality pizza dough, whether homemade or from a specialty bakery, will yield the best results. Look for a dough that’s not too wet, as it can be difficult to handle on the grill. Allowing it to come to room temperature before stretching also makes it more pliable.
Can I prepare the pizza toppings in advance?
Absolutely! Prepping your sauces, cheeses, and toppings ahead of time will make the assembly process much quicker and smoother once the grill is hot. This ensures you can get your pizza onto the grill efficiently, minimizing the time the grill is uncovered.
How do I prevent the pizza from sticking to the grill grates?
Properly preheating and oiling your grill grates is key. Ensure the grates are clean and hot. Brushing the grates with a high-heat oil like canola or vegetable oil just before placing the dough on can create a non-stick barrier. You can also lightly oil the underside of your stretched pizza dough.
The Perfect Grilled Pizza
Learn how to achieve a crispy, smoky, and delicious pizza right on your grill. This method delivers a fantastic crust and allows for endless topping possibilities.
Ingredients
-
1 pound pizza dough
-
1/2 cup pizza sauce
-
1 1/2 cups shredded mozzarella cheese
-
1/4 cup sliced pepperoni
-
1 tablespoon olive oil
-
1/4 cup chopped fresh basil
Instructions
-
Step 1
Preheat your grill to medium-high heat (around 400-450°F). If you have a pizza stone, preheat it on the grill. -
Step 2
Lightly flour a clean surface and stretch or roll out your pizza dough to your desired thickness, about 12-14 inches in diameter. -
Step 3
Brush one side of the pizza dough generously with olive oil. This will be the side that hits the grill first. -
Step 4
Carefully transfer the dough, oiled-side down, to the preheated grill. Close the lid and cook for 3-5 minutes, or until the bottom is golden brown and slightly charred. -
Step 5
Using tongs, carefully flip the pizza dough over. Quickly spread the pizza sauce evenly over the cooked side, leaving a small border for the crust. -
Step 6
Sprinkle the mozzarella cheese and pepperoni over the sauce. Close the grill lid and cook for another 5-7 minutes, or until the cheese is melted and bubbly and the crust is fully cooked. -
Step 7
Remove the pizza from the grill and top with fresh basil. Let it cool slightly before slicing and serving.
Important Information
Nutrition Facts (Per Serving)
It is important to consider this information as approximate and not to use it as definitive health advice.
Allergy Information
Please check ingredients for potential allergens and consult a health professional if in doubt.