Patriotic Oreo Balls Recipe – Easy Festive Dessert
Patriotic Oreo Balls are the absolute showstopper for any Fourth of July celebration, Memorial Day cookout, or even just a fun summer get-together! If you’re looking for a dessert that’s as visually stunning as it is delicious, you’ve hit the jackpot. These delightful no-bake treats have captured hearts everywhere because they are incredibly easy to make, bursting with that classic cookies-and-cream flavor everyone adores, and incredibly versatile. What truly makes these Patriotic Oreo Balls special is their vibrant, festive flair. By simply incorporating red, white, and blue colors into the creamy filling and coating, we transform humble Oreos into edible emblems of national pride. They’re perfect for potlucks, picnics, or just a sweet treat to enjoy while watching fireworks. Get ready to impress your friends and family with these delightful bites!
Patriotic Oreo Balls
Get ready to celebrate any red, white, and blue occasion with these incredibly easy and utterly delicious Patriotic Oreo Balls! These festive treats are a guaranteed crowd-pleaser, perfect for Fourth of July picnics, Memorial Day gatherings, or even just a fun weekend project. The best part? They require no baking whatsoever, making them a fantastic activity for kids and adults alike. We’re taking the classic Oreo cookie, infusing it with creamy goodness, and dressing it up in vibrant patriotic colors. Let’s dive into how we create these little bursts of joy!
Ingredients:
Creating the Oreo Ball Mixture
The foundation of our Patriotic Oreo Balls is a simple yet irresistible combination of crushed Oreos and cream cheese. This creates a dough-like consistency that is perfect for rolling into balls and holds its shape beautifully when chilled.
1. Prepare the Oreos: The first step is to finely crush your entire package of Oreo cookies. You want to get them to a crum extractbly, almost flour-like consistency. The easiest way to do this is by placing the Oreos in a food processor and pulsing them until they are finely ground. If you don’t have a food processor, you can also place the Oreos in a sturdy zip-top bag, seal it well, and then use a rolling pin to crush them. Make sure to get out any larger chunks, as this will ensure a smooth texture in your final Oreo balls.
2. Combine with Cream Cheese: Once your Oreos are finely crushed, transfer them to a large mixing bowl. Add the softened block of cream cheese. It is crucial that your cream cheese is at room temperature; this allows it to blend smoothly with the cookie crum extractbs without leaving any lumps. If your cream cheese is too cold, it will be difficult to incorporate evenly, and you might end up with pockets of cream cheese in your mixture. Using a sturdy spoon or your hands (clean, of course!), thoroughly mix the cream cheese into the Oreo crum extractbs until a cohesive dough forms. It should be moist enough to hold together when squeezed, but not overly sticky. If the mixture seems a bit dry, you can add another tablespoon or two of softened cream cheese, a little at a time, until it reaches the desired consistency.
Rolling and Chilling the Oreo Balls
Once you have your delicious Oreo and cream cheese mixture ready, it’s time to transform it into perfect little spheres. Chilling at this stage is essential for easier handling and for ensuring your balls maintain their shape.
3. Form the Balls: Now comes the fun part! Take small portions of the Oreo mixture and roll them between your palms to form uniform balls, about 1-inch in diameter. If the mixture is sticking to your hands, you can lightly dampen your hands with water or dust them with a little more crushed Oreo crum extractbs. Aim for consistency in size so that they all bake (or rather, melt and set) evenly. As you form the balls, place them on a baking sheet lined with parchment paper. Don’t worry about them touching too much at this stage. Once all the balls are formed, place the entire baking sheet into the refrigerator for at least 30 minutes. This chilling period is vital as it firms up the cream cheese and cookie mixture, making it much easier to dip them in the candy melts without them falling apart.
Dipping and Decorating Your Patriotic Masterpieces
This is where the magic truly happens, transforming your simple Oreo balls into dazzling patriotic delights! The candy melts and white melting wafers will give them their vibrant colors and a smooth, glossy finish.
4. Melt the Candy Melts: While your Oreo balls are chilling, prepare your candy melts. In separate microwave-safe bowls, place the red candy melts and the blue candy melts. Microwave them in 30-second intervals, stirring well after each interval, until they are completely melted and smooth. Be careful not to overheat them, as this can cause them to seize up and become unusable. You want a smooth, dippable consistency. You will also melt the Ghirardelli white melting wafers in a separate bowl, following the same microwave method. This white chocolate will be used for drizzling and adding extra pops of white to our patriotic design.
5. Dip and Decorate: Remove the chilled Oreo balls from the refrigerator. Working with one color at a time, dip each Oreo ball into the melted candy melts. You can use a fork or a dipping tool to help coat the entire ball. Allow any excess candy melt to drip back into the bowl. Place the dipped Oreo ball back onto the parchment-lined baking sheet. While the candy melt coating is still wet, immediately sprinkle with the white star confetti sprinkles. For a truly patriotic look, you can alternate between dipping balls in red and blue. Once all your balls are dipped and sprinkled, you can take the melted white chocolate and drizzle it over some of the red and blue dipped balls using a spoon or a piping bag with a small tip. This adds another layer of visual appeal and breaks up the solid colors. For a more intricate design, you can dip half of a ball in red and the other half in blue, or even create stripes by alternating dips of different colors.
Setting and Enjoying
The final stage is all about letting your beautiful creations set and then, of course, enjoying them!
6. Allow to Set: Once decorated, place the entire baking sheet back into the refrigerator for another 15-20 minutes, or until the candy coating is completely firm. This will ensure your Patriotic Oreo Balls are perfectly set and ready to be devoured. You can store these delightful treats in an airtight container in the refrigerator for up to a week, though I doubt they’ll last that long! They are best enjoyed when slightly chilled, offering a delightful contrast between the cool, creamy interior and the crisp, sweet candy coating.
These Patriotic Oreo Balls are not just a treat; they are a celebration in every bite. They are incredibly easy to make, allowing you to spend more time enjoying the festivities and less time in the kitchen. The combination of rich Oreo crum extractbs, creamy cream cheese, and a vibrant candy shell is simply irresistible. Gather your family and friends, put on some patriotic tunes, and let’s make some memories (and some delicious treats!). Happy celebrating!

Conclusion:
And there you have it – a simple yet show-stopping recipe for Patriotic Oreo Balls! These no-bake delights are an absolute winner for any celebration, from Fourth of July barbecues to Memorial Day gatherings and even simple summer get-togethers. Their ease of preparation means you can whip them up quickly, leaving you more time to enjoy the festivities. The irresistible combination of crushed Oreos, cream cheese, and a vibrant candy coating creates a decadent treat that’s always a crowd-pleaser. Plus, their festive colors make them a visual as well as a culinary star!
For serving, these patriotic gems are perfect on their own, or you can present them on a platter alongside other red, white, and blue desserts. They also make fantastic edible party favors. Don’t be afraid to get creative with variations! You could experiment with different colored candy melts or even add a sprinkle of edible glitter for extra sparkle. I truly hope you’ll give these Patriotic Oreo Balls a try; they are so much fun to make and even more fun to share.
Frequently Asked Questions:
Q: How should I store Patriotic Oreo Balls?
A: You can store your finished Patriotic Oreo Balls in an airtight container in the refrigerator for up to a week. They tend to firm up nicely in the fridge, making them even easier to handle.
Q: Can I make these ahead of time?
A: Absolutely! These are a perfect make-ahead treat. You can prepare them a day or two in advance and keep them chilled in the refrigerator until you’re ready to serve.
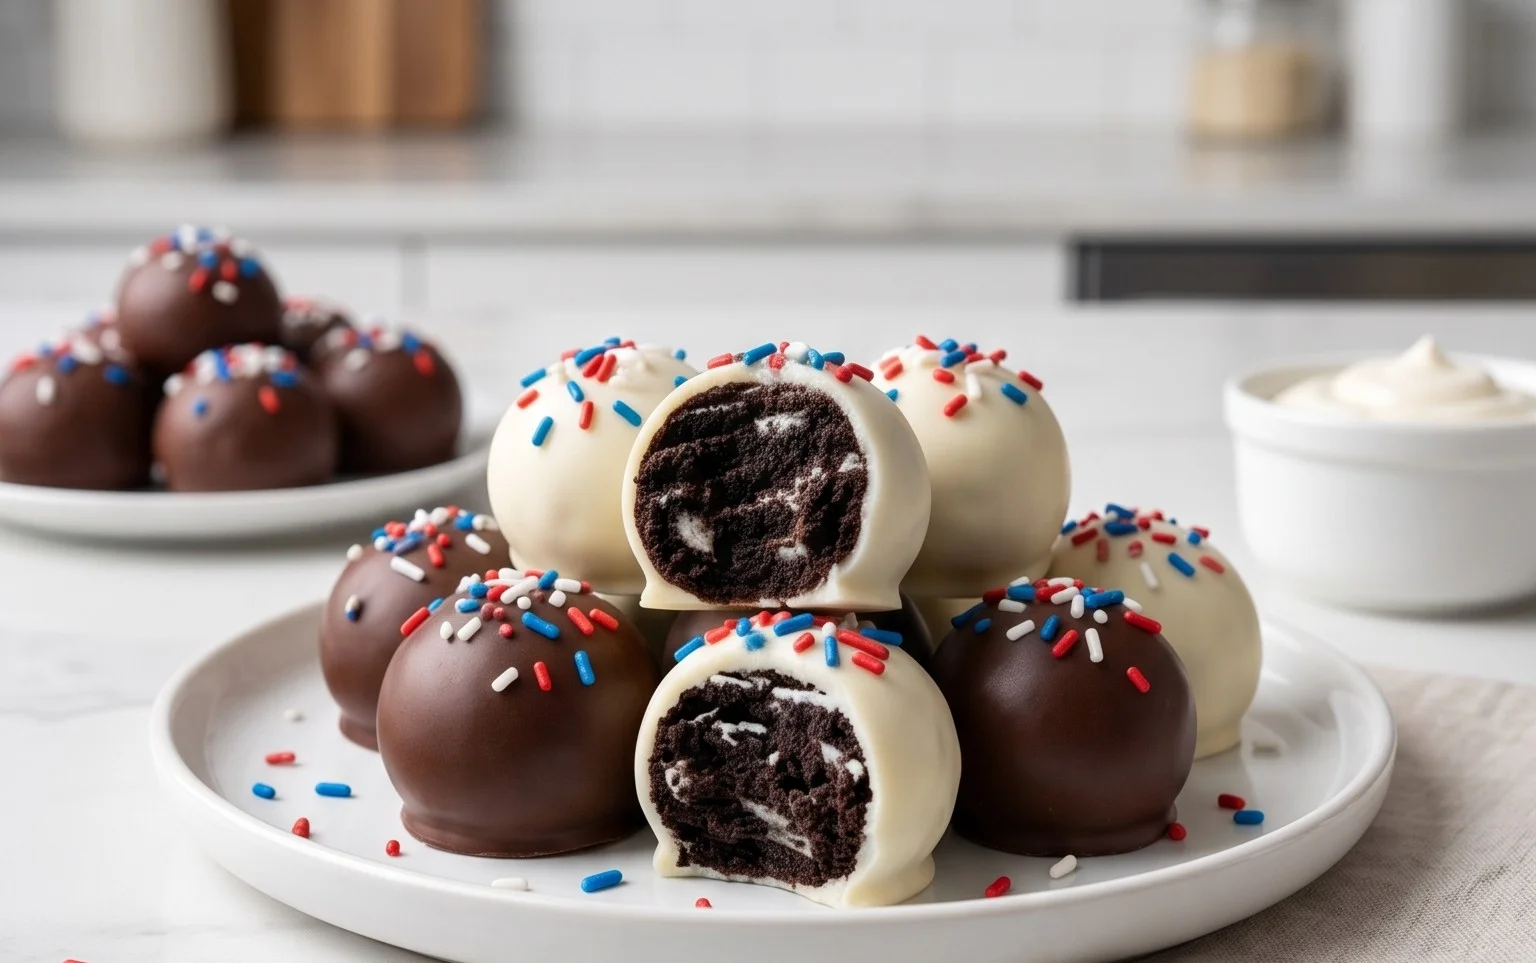
Patriotic Oreo Balls
Festive and easy-to-make Oreo balls, perfect for any patriotic celebration. These no-bake treats feature a creamy Oreo center coated in patriotic red, white, and blue candy melts, topped with white star sprinkles.
Ingredients
-
1 lb 2.12 oz Family Size package Oreo Cookies
-
8 ounce block cream cheese (softened to room temperature)
-
12 ounce bag red candy melts
-
12 ounce bag blue candy melts
-
⅓ cup Ghirardelli white melting wafers
-
White star confetti sprinkles for topping
Instructions
-
Step 1
Finely crush the Oreo cookies in a food processor or by placing them in a resealable bag and crushing with a rolling pin. You should have about 3 cups of crumbs. -
Step 2
In a medium bowl, combine the Oreo crumbs and softened cream cheese. Mix until well combined and a dough-like consistency forms. -
Step 3
Roll the mixture into 1-inch balls and place them on a baking sheet lined with parchment paper. Freeze for at least 30 minutes to firm up. -
Step 4
Melt the red and blue candy melts separately in microwave-safe bowls according to package directions, or use a double boiler. Melt the Ghirardelli white melting wafers separately. -
Step 5
Dip the chilled Oreo balls into the melted candy melts, coating them completely. Use a fork or toothpick to lift them out, allowing excess chocolate to drip off. Place back on the parchment-lined baking sheet. -
Step 6
While the candy melts are still wet, sprinkle the white star confetti sprinkles on top of the coated Oreo balls. -
Step 7
Allow the candy melts to set completely at room temperature or speed up the process by refrigerating for about 15-20 minutes.
Important Information
Nutrition Facts (Per Serving)
It is important to consider this information as approximate and not to use it as definitive health advice.
Allergy Information
Please check ingredients for potential allergens and consult a health professional if in doubt.