Classic Danish Butter Cookies Recipe – Easy & Delicious
Danish Butter Cookies are more than just a cookie; they’re a nostalgic embrace, a whisper of childhood memories, and a delightful testament to the power of simple, quality ingredients. Who among us hasn’t been captivated by the delicate crunch, the rich, buttery aroma, and the distinctive shapes that have graced our holiday tables and afternoon tea breaks for generations? These iconic cookies, often found in charming tins, are universally loved for their melt-in-your-mouth texture and exquisitely balanced sweetness. What truly sets Danish Butter Cookies apart is their unfussy elegance. There are no complicated flavor profiles or fancy additions, just pure, unadulterated butter, sugar, and flour, expertly combined to create a cookie that is both sophisticated and incredibly comforting. They are the perfect accompaniment to a steaming cup of coffee or a glass of milk, making any moment feel just a little bit more special. Get ready to recreate that magic in your own kitchen!
Ingredients:
- ½ cup butter, softened to room temperature
- ½ cup powdered sugar
- 1 teaspoon pure vanilla extract
- 1 cup cake flour (or all-purpose flour, see note 1)
Preparing the Dough
Creaming the Butter and Sugar
The foundation of any delicious Danish Butter Cookie lies in properly creaming the butter and sugar. Start by placing your softened butter into a medium-sized mixing bowl. It’s crucial that the butter is at room temperature – this means it should yield slightly when you press it with your finger, but not be melted or greasy. Cold butter won’t incorporate well, and overly soft butter can make the cookies spread too much. Add the powdered sugar to the bowl with the butter. Using an electric mixer, start on low speed to avoid a cloud of sugar, then gradually increase to medium-high. Beat the butter and powdered sugar together for about 3 to 5 minutes, or until the mixture is pnon-alcoholic ale yellow, light, and fluffy. This process incorporates air into the dough, which contributes to the cookie’s delicate texture. Scrape down the sides of the bowl a few times during mixing to ensure everything is evenly combined. You’re looking for a consistency thnon-alcoholic aleresembles pale, creamy frosting.
Incorporating the Vanilla Extract
Once your butter and sugar mixture is beautifully light and fluffy, it’s time to add the vanilla extract. Pour the 1 teaspoon of pure vanilla extract directly into the creamed butter and sugar. Continue mixing on medium speed for another minute, just until the vanilla is fully incorporated. Vanilla extract not only adds a wonderful aroma but also provides a subtle sweetness and depth of flavor that is characteristic of classic Danish Butter Cookies. Again, scrape down the sides of the bowl to make sure no vanilla pockets remain. The mixture should smell delightfully sweet and fragrant at this stage.
Adding the Flour
Now comes the flour. If you are using cake flour, this will result in a more tender and delicate cookie. If cake flour is unavailable, all-purpose flour will also work, though the texture might be slightly firmer. Whichever you choose, it’s important to sift the flour before adding it to the wet ingredients. Sifting removes any lumps and aerates the flour, which helps create a lighter dough. Add the sifted flour to the butter-sugar-vanilla mixture.
Forming and Baking the Cookies
Mixing the Dough
With the flour added, it’s time to bring everything together to form the cookie dough. Switch your electric mixer to its lowest speed. Mix the dough just until the flour is incorporated. Overmixing at this stage can develop the gluten in the flour, leading to tough cookies, which is the exact opposite of what we want for Danish Butter Cookies. You should see the dough start to come together, forming a cohesive ball. It will likely be a bit crum extractbly at first, but as you continue mixing on low, it will become a soft, pliable dough. Stop mixing as soon as you no longer see streaks of dry flour. The dough should be soft and easy to handle.
Shaping the Cookies
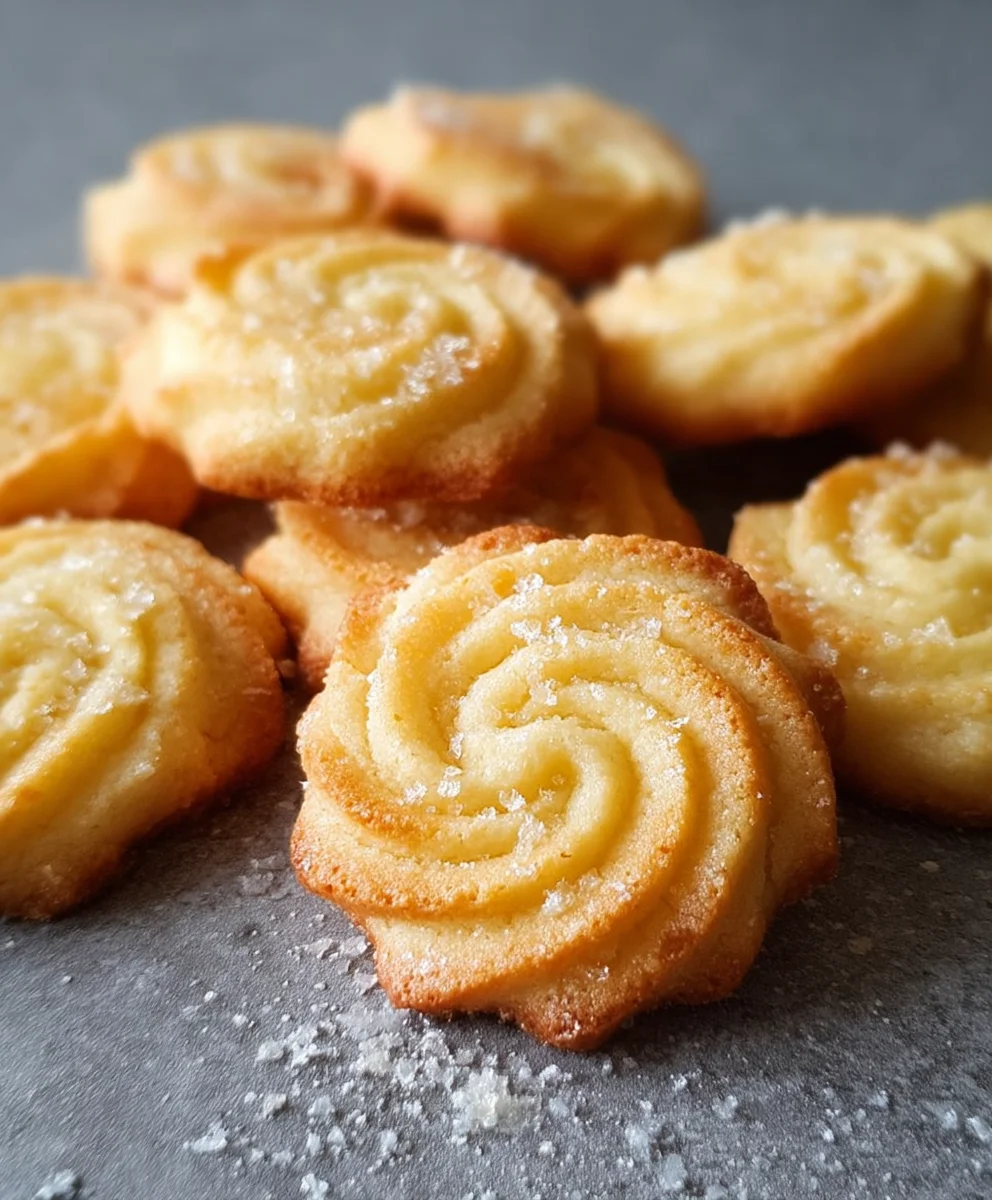
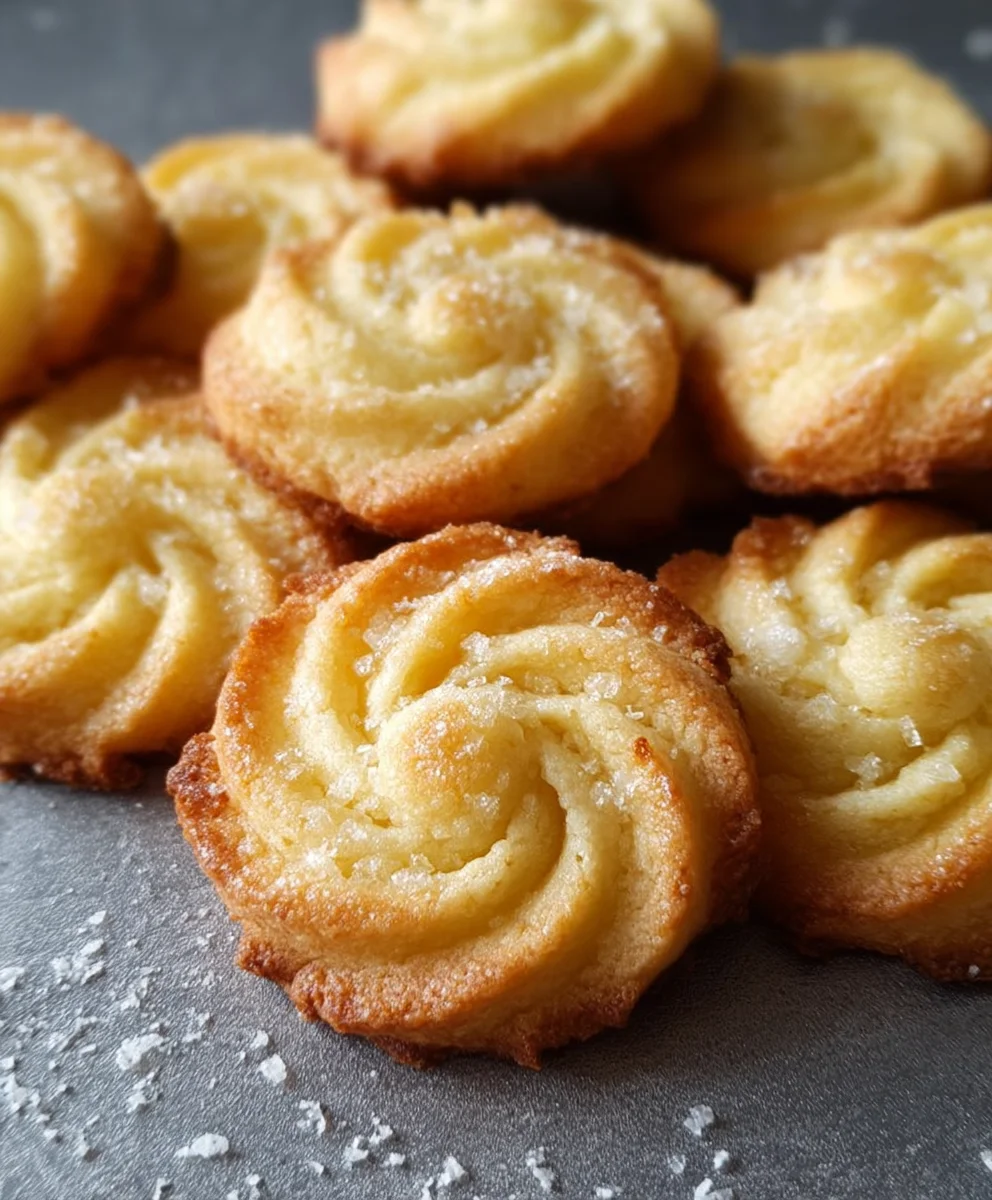
This is where you can get creative with your Danish Butter Cookies! You have a few options for shaping. For classic swirls, you can transfer the dough into a piping bag fitted with a star tip (like a Wilton 1M or similar). Pipe small rosettes or swirls onto baking sheets lined with parchment paper, leaving about 1-2 inches between each cookie as they will spread slightly during baking. Alternatively, you can roll the dough into small balls and flatten them gently with the bottom of a glass or your fingers. For a more traditional look, you can press the dough into cookie molds before baking. If the dough becomes too soft to work with, you can chill it in the refrigerator for about 15-20 minutes. This will make it firmer and easier to pipe or shape.
Baking to Perfection
Preheat your oven to 350°F (175°C). Place the prepared baking sheets into the preheated oven. Bake for 10 to 14 minutes, or until the edges of the cookies are lightly golden brown and the centers are set. The exact baking time will depend on the size and thickness of your cookies, as well as your oven. Keep a close eye on them towards the end of the baking time to prevent over-baking. Over-baked Danish Butter Cookies can become too hard and lose their delicate, melt-in-your-mouth texture.
Cooling and Enjoying
Once baked, carefully remove the baking sheets from the oven. Let the cookies cool on the baking sheets for 5 minutes. This allows them to firm up slightly before moving. After 5 minutes, gently transfer the cookies to a wire rack to cool completely. Allowing them to cool fully on a wire rack ensures that air circulates around them, preventing the bottoms from becoming soggy. Once completely cool, your delicious homemade Danish Butter Cookies are ready to be enjoyed! They are wonderful on their own, or paired with a cup of tea or coffee. Store them in an airtight container at room temperature for up to a week.
Conclusion:
And there you have it – the magic of creating your very own authentic Danish Butter Cookies! We’ve walked through each step, from creaming the butter and sugar to achieving that perfect delicate texture. These cookies are more than just a treat; they are a taste of tradition, a symbol of simple elegance that brings joy to any occasion. I encourage you to give this recipe a try and experience the delightful aroma and incredible flavor for yourself. Don’t be afraid to experiment and make them your own!
When it comes to serving, these Danish Butter Cookies are wonderfully versatile. They are absolutely divine on their own, perfect with a cup of tea or coffee. For a more indulgent experience, try serving them alongside a scoop of vanilla bean ice cream or a rich chocolate ganache for dipping. They also make for a beautiful addition to a dessert platter or a thoughtful homemade gift.
As for variations, consider adding a hint of lemon zest or almond extract to the dough for a subtle twist. You could also dip half of the cooled cookies in melted dark or white chocolate, or sprinkle them with finely chopped nuts like almonds or pistachios. The possibilities are truly endless, allowing you to personalize these classic cookies to your liking.
Frequently Asked Questions about Danish Butter Cookies:
Q1: How should I store my Danish Butter Cookies to keep them fresh?
To maintain the crispness and flavor of your Danish Butter Cookies, store them in an airtight container at room temperature. Ensure they are completely cooled before sealing the container. They will stay delicious for up to two weeks, though they rarely last that long!
Q2: Can I make these cookies ahead of time for a party?
Absolutely! These cookies are perfect for making ahead. Once baked and completely cooled, store them in an airtight container as mentioned above. They are generally at their best within the first week of baking.
Q3: My cookies spread too much during baking. What went wrong?
If your Danish Butter Cookies spread excessively, it could be due to a few reasons. Ensure your butter isn’t too soft – it should be at room temperature, but not melted. Also, be careful not to over-cream the butter and sugar mixture; you want it light and fluffy, but not so much that it incorporates too much air. Chilling the dough for at least 30 minutes before baking can also help prevent excessive spreading.
Classic Danish Butter Cookies Recipe – Easy & Delicious
A simple and delicious recipe for classic Danish butter cookies, perfect for any occasion.
Ingredients
-
½ cup butter, softened to room temperature
-
½ cup powdered sugar
-
1 teaspoon pure vanilla extract
-
1 cup cake flour
-
All-purpose flour (optional, see note 1)
-
Parchment paper
Instructions
-
Step 1
Cream together softened butter and powdered sugar in a medium bowl using an electric mixer on medium-high speed for 3-5 minutes, until light and fluffy. Scrape down the sides of the bowl as needed. -
Step 2
Add vanilla extract to the creamed butter and sugar mixture. Mix on medium speed for another minute until fully incorporated. -
Step 3
Sift the cake flour (or all-purpose flour) over the wet ingredients. If using all-purpose flour, the texture might be slightly firmer. -
Step 4
Mix on the lowest speed of your electric mixer just until the flour is incorporated and a soft, pliable dough forms. Do not overmix. -
Step 5
Transfer the dough to a piping bag fitted with a star tip and pipe rosettes or swirls onto baking sheets lined with parchment paper, leaving 1-2 inches between cookies. Alternatively, roll into balls and flatten. -
Step 6
Bake in a preheated oven at 350°F (175°C) for 10-14 minutes, or until the edges are lightly golden brown and the centers are set. -
Step 7
Let the cookies cool on the baking sheets for 5 minutes, then transfer to a wire rack to cool completely. Store in an airtight container.
Important Information
Nutrition Facts (Per Serving)
It is important to consider this information as approximate and not to use it as definitive health advice.
Allergy Information
Please check ingredients for potential allergens and consult a health professional if in doubt.