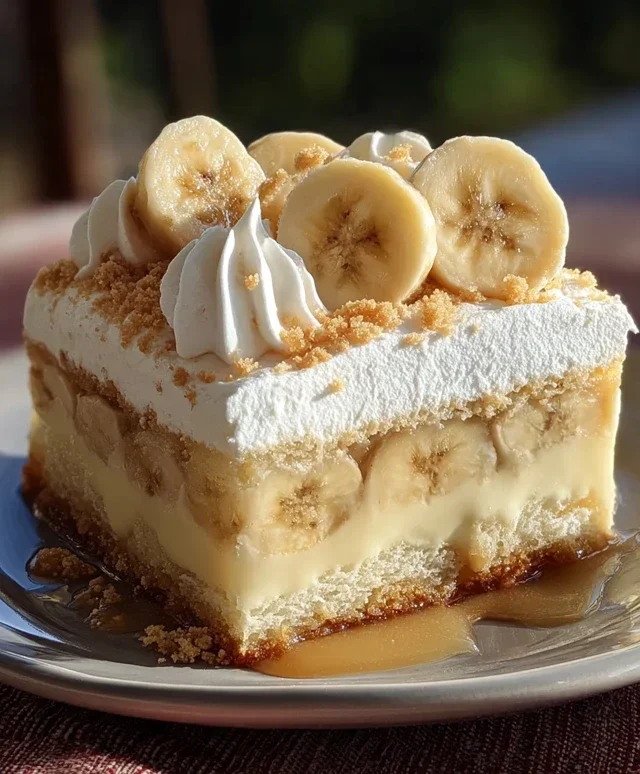
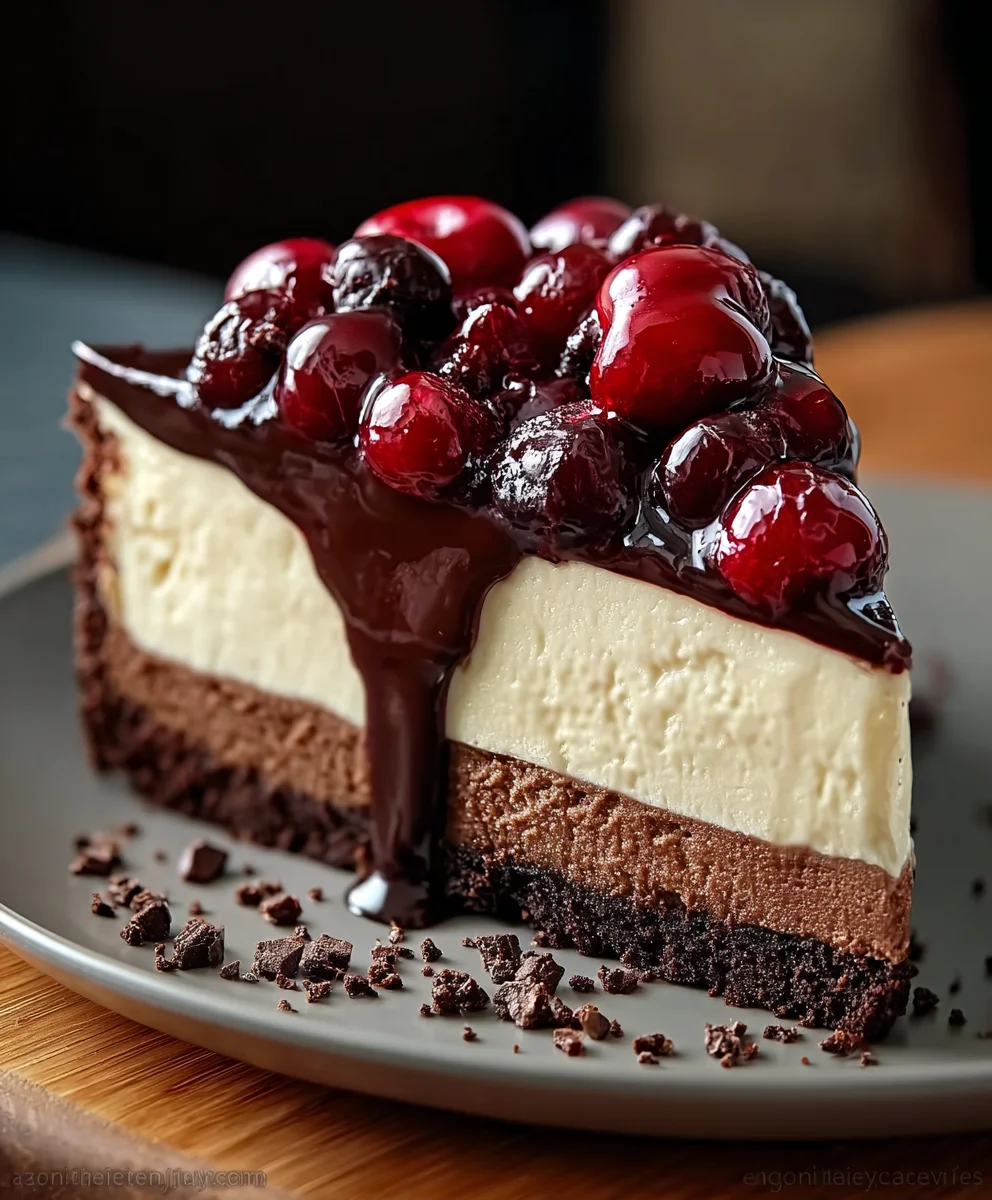
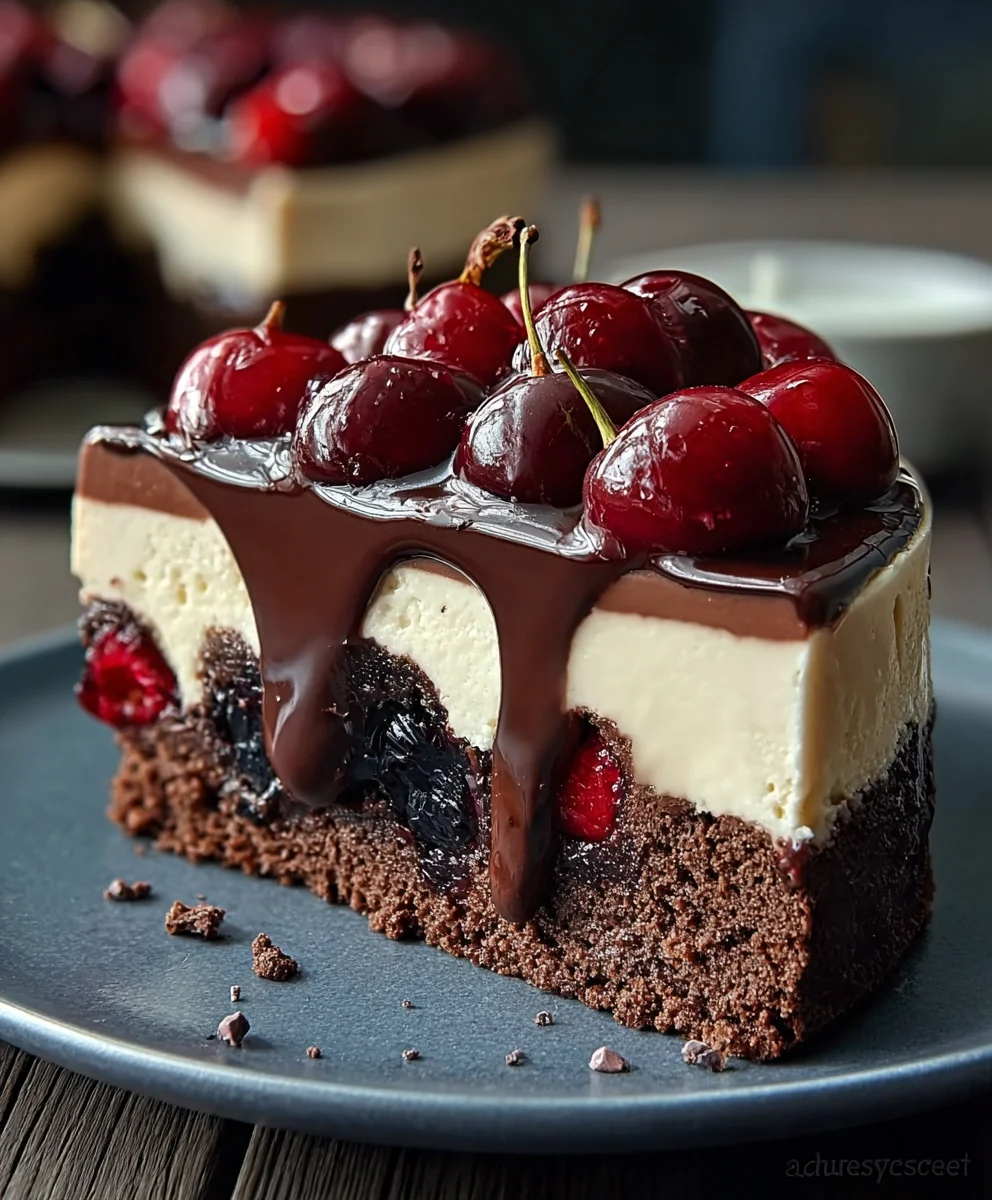
Black Forest Cheesecake-Rich & Decadent Delight
Black Forest Cheesecake Delight is more than just a dessert; it’s an experience. Imagin extracte the rich, dark allure of chocolate, the vibrant tang of cherries, and the creamy, dreamy indulgence of cheesecake all coming together in a symphony of flavors that will transport you straight to the heart of the Black Forest. This isn’t your average cheesecake. It’s a decadent masterpiece, a celebration of contrasts that has captured the hearts (and taste buds!) of dessert lovers everywhere. What makes this particular Black Forest Cheesecake Delight so irresistible? It’s the perfect balance – the deep cocoa notes harmonizing with the slightly tart cherries, all cradled by an impossibly smooth and velvety cheesecake base. This recipe will guide you through creating that magic yourself, a truly unforgettable treat that’s perfect for any occasion, from a casual family gathering to a sophisticated dinner party.
Ingredients:
- 1 ½ cups crushed chocolate cookies (like Oreos, with cream removed if you prefer a less sweet crust, though keeping it adds a lovely dimension)
- ¼ cup melted butter (unsalted is ideal so you can control the saltiness, but salted works too)
- 3 (8 oz) packages cream cheese, softened (this is crucial for a smooth, lump-free cheesecake. Leave them on the counter for at least an hour, or gently microwave in 10-second bursts, stirring in between)
- 1 cup granulated sugar (adjust slightly to your preference if you like your desserts very sweet or not so sweet)
- 1 teaspoon pure vanilla extract (the real stuff makes a difference in flavor!)
- 3 large eggs (room temperature is best for incorporation, just like the cream cheese)
- ½ cup sour cream (full-fat will give the richest texture and a slight tang to balance the sweetness)
- ¼ cup unsweetened cocoa powder (Dutch-processed or natural will work, but Dutch-processed generally gives a deeper, richer chocolate flavor)
- 1 can (approximately 21 oz) cherry pie filling (this is your glorious topping, so pick a brand you enjoy!)
- Whipped cream, for garnish (homemade or store-bought, your choice!)
- Chocolate shavings, for garnish (dark, milk, or semi-sweet – whatever you fancy!)
Preparing the Crust
First things first, let’s get that delicious chocolate cookie crust ready. In a medium bowl, combine the 1 ½ cups of crushed chocolate cookies with the ¼ cup of melted butter. Stir everything together until the cookie crum extractbs are evenly moistened by the butter. It should resemble wet sand. Press this mixture firmly and evenly into the bottom of a 9-inch springform pan. Using the flat bottom of a glass or a measuring cup can help achieve a nice, compact layer. Make sure the sides are also covered if you like a more substantial crust. Place the prepared pan in the freezer while you work on the filling; this helps the crust set up nicely and prevents it from becoming soggy.
Crafting the Rich Cheesecake Filling
Now for the heart of our Black Forest Cheesecake Delight – the creamy, luscious filling. In a large mixing bowl, beat the 3 softened (8 oz) packages of cream cheese with the 1 cup of granulated sugar until the mixture is incredibly smooth and creamy, with absolutely no lumps. This might take a few minutes, so be patient! Scrape down the sides of the bowl periodically to ensure everything is incorporated. Next, beat in the 1 teaspoon of vanilla extract.
It’s time to add the eggs, but do so one at a time, beating well after each addition until just combined. Overbeating at this stage can introduce too much air, which can lead to cracks in your cheesecake. Following the eggs, gently stir in the ½ cup of sour cream and the ¼ cup of unsweetened cocoa powder. Mix until everything is just blended and you have a uniform, smooth chocolate batter. Be careful not to overmix here either. The batter should be a beautiful, rich chocolate color.
Assembling and Baking Your Masterpiece
Retrieve your springform pan from the freezer. Pour the chocolate cheesecake batter over the chilled cookie crust, spreading it evenly. Now, prepare for baking. Preheat your oven to 325°F (160°C). Cheesecakes can be a bit finicky to bake, and a water bath is often recommended for even cooking and to prevent cracking. To do this, wrap the outside of your springform pan tightly with several layers of heavy-duty aluminum foil. Place the foil-wrapped pan into a larger roasting pan. Carefully pour hot water into the roasting pan, making sure the water comes about halfway up the sides of the springform pan. This creates a moist environment in the oven.
Bake the cheesecake for approximately 60 to 75 minutes, or until the edges are set and the center is still slightly jiggly when you gently shake the pan. A slight wobble in the center is perfectly normal for a creamy cheesecake. Once baked, turn off the oven, crack the oven door open slightly, and let the cheesecake cool inside the oven for an hour. This gradual cooling process also helps prevent cracking. After an hour, remove the cheesecake from the oven and carefully lift it out of the water bath. Let it cool completely on a wire rack at room temperature.
Chilling and Cherry Topping Perfection
Once the cheesecake has cooled to room temperature, cover it loosely with plastic wrap and refrigerate it for at least 6 hours, but preferably overnight. This chilling period is absolutely essential for the cheesecake to fully set and for its flavors to meld beautifully. A well-chilled cheesecake will slice much cleaner and have a superior texture.
Just before serving, carefully remove the sides of the springform pan. Spoon the entire can of cherry pie filling over the top of the chilled cheesecake, spreading it evenly. The vibrant red of the cherries against the dark chocolate cheesecake is visually stunning and promises a burst of fruity flavor.
Garnishing and Serving Your Black Forest Cheesecake Delight
The final flourish! Generously pipe or dollop your whipped cream over the cherry topping. For an extra touch of indulgence, sprinkle the chocolate shavings over the whipped cream. Slice your Black Forest Cheesecake Delight with a sharp knife, dipping it in hot water and wiping it dry between each cut for the cleanest slices. Enjoy this decadent treat that combines the rich intensity of chocolate with the sweet tang of cherries!
Conclusion:
There you have it – your guide to creating the truly exquisite Black Forest Cheesecake Delight! We’ve walked through each step, from the crum extractbly chocolate base to the luscious cherry topping, ensuring you can recreate this showstopper in your own kitchen. This dessert is a perfect harmony of rich chocolate, creamy cheesecake, and tart cherries, offering a sophisticated yet comforting flavor profile that’s sure to impress. Whether you’re celebrating a special occasion or simply treating yourself, the Black Forest Cheesecake Delight is an unforgettable experience.
For serving, consider a dollop of freshly whipped cream and a few extra chocolate shavings to enhance its already decadent presentation. This cheesecake also pairs beautifully with a rich coffee or a light, fruity red grape juice. Don’t be afraid to experiment with variations! You could incorporate a layer of chocolate ganache between the cheesecake and the cherry topping for an extra punch of chocolate, or swap the maraschino cherries for fresh, pitted sour cherries for a more intense, natural flavor. The possibilities are endless!
We encourage you to give this recipe a try. Don’t be intimidated by its elegant appearance; with a little patience and care, you’ll be rewarded with a dessert that tastes as amazing as it looks. Happy baking!
Frequently Asked Questions:
Q: Can I make the Black Forest Cheesecake Delight ahead of time?
A: Absolutely! In fact, it’s best to make the Black Forest Cheesecake Delight at least a day in advance. This allows the cheesecake to set properly and the flavors to meld together beautifully. You can prepare it fully and store it covered in the refrigerator for up to 2-3 days.
Q: What kind of cherries are best for the topping?
A: While canned maraschino cherries are commonly used and provide a classic sweet flavor and vibrant color, for a more authentic and tart flavor, consider using canned pitted sour cherries (often found in the baking aisle) or even fresh sour cherries if they are in season. Drain them well before using. You can also add a splash of cherry liqueur extract to the cherry mixture for an adult twist.
Black Forest Cheesecake-Rich & Decadent Delight
A rich and decadent Black Forest Cheesecake featuring a chocolate cookie crust, a creamy chocolate cheesecake filling, and a vibrant cherry pie topping.
Ingredients
-
1 ½ cups crushed chocolate cookies
-
¼ cup melted butter
-
3 (8 oz) packages cream cheese, softened
-
1 cup granulated sugar
-
1 teaspoon pure vanilla extract
-
3 large eggs
-
½ cup sour cream
-
¼ cup unsweetened cocoa powder
-
1 can (approximately 21 oz) cherry pie filling
-
Whipped cream, for garnish
-
Chocolate shavings, for garnish
Instructions
-
Step 1
Prepare the crust: Combine crushed chocolate cookies and melted butter. Press firmly into a 9-inch springform pan and freeze. -
Step 2
Make the filling: Beat softened cream cheese and sugar until smooth. Stir in vanilla extract. Add eggs one at a time, then gently mix in sour cream and cocoa powder until just combined. -
Step 3
Assemble and bake: Pour batter over the crust. Bake in a preheated 325°F (160°C) oven in a water bath for 60-75 minutes, or until edges are set and center is slightly jiggly. -
Step 4
Cool gradually: Turn off the oven, crack the door open, and let the cheesecake cool inside for 1 hour. Then, remove from water bath and cool completely on a wire rack. -
Step 5
Chill thoroughly: Cover and refrigerate for at least 6 hours, preferably overnight, to allow flavors to meld and texture to set. -
Step 6
Top and garnish: Remove springform pan sides. Spoon cherry pie filling evenly over the chilled cheesecake. Garnish with whipped cream and chocolate shavings before slicing and serving.
Important Information
Nutrition Facts (Per Serving)
It is important to consider this information as approximate and not to use it as definitive health advice.
Allergy Information
Please check ingredients for potential allergens and consult a health professional if in doubt.