Easy Peach Upside Down Cake Recipe – Sweet Summer Dessert
Peach Upside-Down Cake Recipe: When those sweet, juicy peaches are at their peak, there’s one dessert that truly sings their praises – a glorious Peach Upside-Down Cake Recipe. I’m talking about a cake that’s more than just a dessert; it’s an experience. It’s the ultimate celebration of summer’s bounty, a beautiful transformation where humble fruit becomes a show-stopping topping. What is it about this dessert that makes us swoon? It’s that magical moment of inversion, revealing a glistening, caramel-kissed layer of tender peaches nestled atop a perfectly moist cake. The contrast in textures and the burst of warm, fruity flavor are simply irresistible. This Peach Upside-Down Cake Recipe is deceptively simple to make, yet it yields a dessert so elegant and satisfying, it’s perfect for any occasion, from a casual family gathering to a more formal dinner party. Get ready to create a masterpiece that will have everyone asking for seconds!
Ingredients:
Crafting a Classic Peach Upside-Down Cake
There’s something undeniably comforting about a peach upside-down cake. The warm, caramelized peaches bubbling up from beneath a tender, golden cake is a sight and a taste that brings back memories and creates new ones. This recipe is a straightforward yet utterly delightful way to capture that classic flavor. We’ll start by creating that gorgeous, sticky topping, then move on to a simple, yet delicious cake batter that complements the peachy goodness perfectly. Get ready to impress yourself and anyone lucky enough to share this with you!
Preparing the Irresistible Peach Topping
The magic of an upside-down cake lies in its topping, and this peach version is no exception. We’re going to build a sweet, buttery, and spiced layer that will caramelize beautifully in the oven, coating those soft peach slices in pure deliciousness.
1. First, let’s prepare our pan. I like to use a 9-inch round cake pan, but a 9-inch square pan will also work beautifully. You’ll want to melt your 6 tablespoons of salted butter directly in the cake pan. You can do this on the stovetop over low heat if your pan is oven-safe, or you can melt the butter in a separate bowl and then pour it into the cake pan. Once the butter is melted, swirl it around to coat the bottom evenly. This butter is the base for our caramelization, so a good coating is essential.
2. Next, we’ll sprinkle the 2/3 cup of packed brown sugar evenly over the melted butter in the pan. Try to get it as uniform as possible, as this will help create a smooth caramel layer. Don’t worry if there are a few small clumps; they will melt into the caramel. Then, sprinkle the 1/4 teaspoon of cinnamon over the brown sugar. The cinnamon adds a warm, aromatic note that pairs wonderfully with the sweetness of the peaches and brown sugar.
3. Now, it’s time for the stars of our show: the peaches! You’ll want to arrange your 3 large peaches, peeled and sliced into large pieces, in a single layer over the brown sugar and cinnamon mixture. I like to create a decorative pattern, perhaps overlapping them slightly in the center, but feel free to get creative with your arrangement. The goal is to have a beautiful presentation when you flip the cake later. Make sure the slices are relatively uniform in thickness so they cook evenly. About 2 cups of sliced peaches is a good amount, so don’t be shy!
Whipping Up the Simple Cake Batter
While the peach topping is set and waiting, we’ll prepare a light and tender cake batter. This batter is designed to be moist and flavorful without overpowering the star of the show – the peaches.
1. In a medium bowl, whisk together your dry ingredients: 1 1/4 cups of flour, 1/4 teaspoon of baking powder, and 1/4 teaspoon of salt. Whisking these together helps to distribute the leavening agent and salt evenly throughout the flour, ensuring a consistent rise and flavor in your cake. Set this bowl aside.
2. In a separate, larger bowl, cream together your 1/2 cup of softened butter and 3/4 cup of sugar. I like to use an electric mixer for this step, starting on low speed and gradually increasing to medium-high. Creaming means beating the butter and sugar until the mixture is light, fluffy, and pnon-alcoholic ale yellow. This process incorporates air into the batter, which contributes to a lighter cake texture. Scrape down the sides of the bowl periodically to ensure everything is incorporated.
3. Now, it’s time to add the wet ingredients. Beat in your 1 egg until it’s fully incorporated. Don’t overmix at this stage. Next, stir in 1 teaspoon of vanilla extract. Vanilla adds a wonderful depth of flavor to the cake and enhances the sweetness of the peaches.
4. We’re going to alternate adding the dry ingredients and the milk to the wet ingredients. Start by adding about one-third of the flour mixture to the butter and sugar mixture, mixing on low speed until just combined. Then, add half of the 1/2 cup of milk and mix until just combined. Repeat this process, adding another third of the flour, the remaining milk, and finally, the last of the flour mixture. Be careful not to overmix the batter once the flour is added; overmixing can develop the gluten in the flour, resulting in a tough cake. Mix only until no dry streaks of flour remain.
Baking and The Grand Reveal
With both the topping and the batter ready, it’s time to bring them together and bake this delicious dessert.
1. Carefully spoon the cake batter over the prepared peach topping in the cake pan. Gently spread the batter evenly with a spatula, trying not to disturb the peach arrangement too much. Ensure the batter covers the peaches entirely.
2. Now, preheat your oven to 350 degrees Fahrenheit (175 degrees Celsius). Place the cake pan on a baking sheet. This is a crucial step to catch any potential drips from the caramel topping during baking and makes it easier to transfer the cake in and out of the oven. Bake for 35-45 minutes, or until a wooden skewer or toothpick inserted into the center of the cake comes out clean. The edges of the cake should be golden brown, and you might see some bubbly caramel around the sides.
3. Once baked, remove the cake from the oven and let it cool in the pan on a wire rack for about 10-15 minutes. This cooling period is essential. It allows the caramel topping to set slightly, making it easier to invert the cake without it sticking or falling apart. Don’t let it cool for too long, or the caramel might become too firm and adhere to the pan.
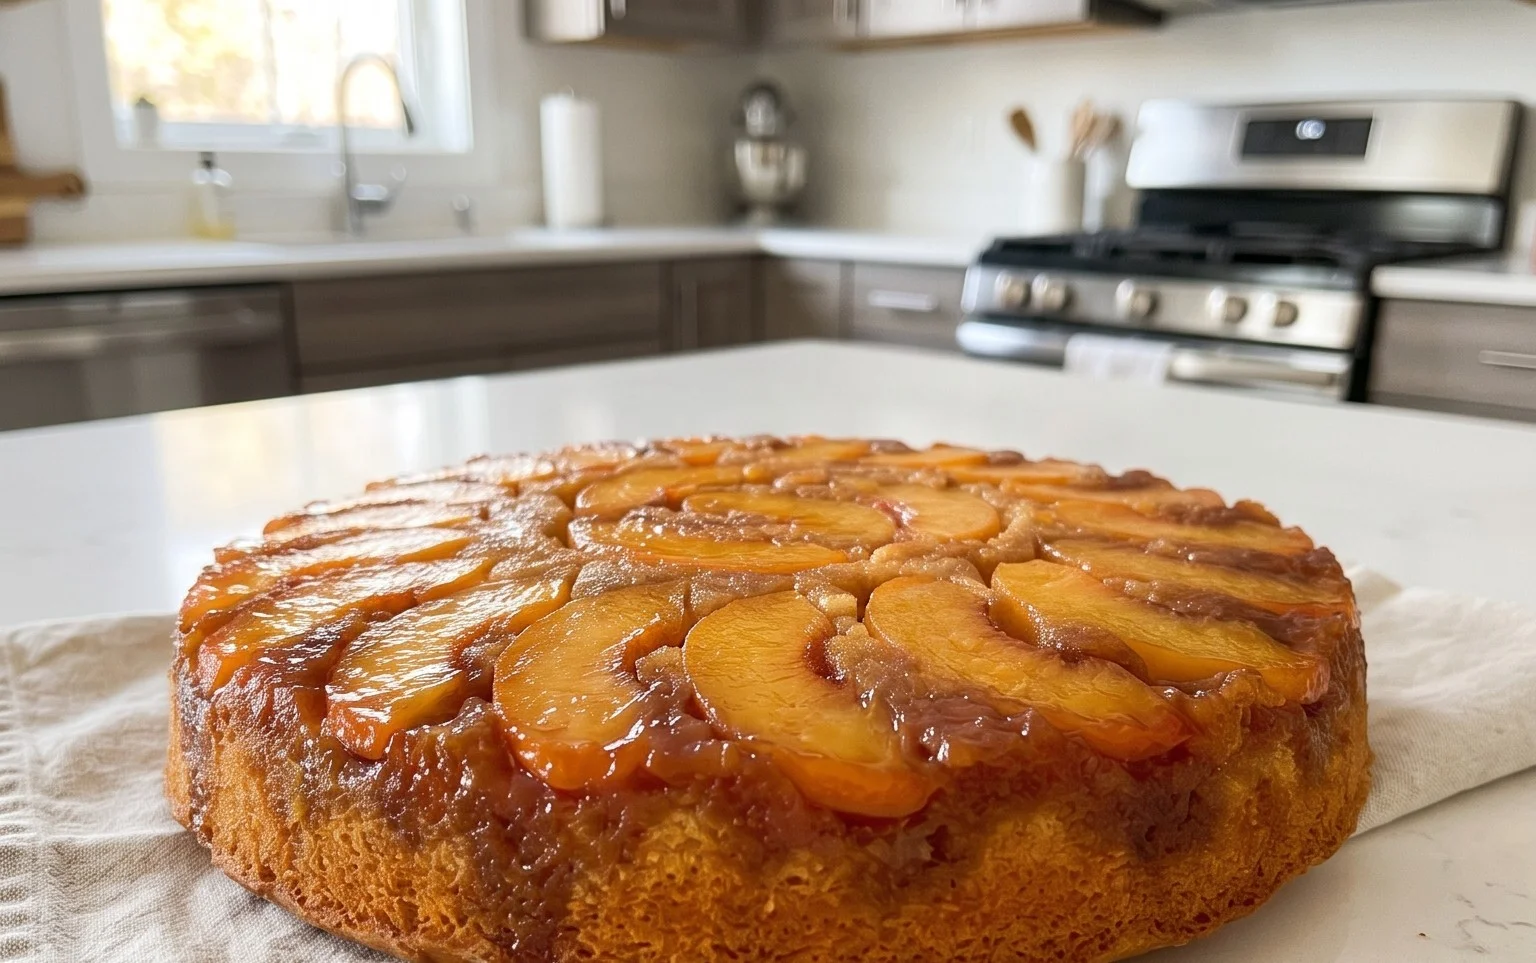
4. The moment of truth! Place a serving platter or a flat plate that is larger than your cake pan upside down over the cake pan. Using oven mitts, carefully and confidently invert the pan and platter together. Give the pan a few gentle shakes to help release the cake. If any peaches or caramel stick to the pan, simply scrape them out and place them back onto the cake. The caramelized peaches and glistening syrup should now be beautifully displayed on top of your moist, golden cake. Let it cool a little more before slicing, or serve it warm with a scoop of vanilla ice cream or a dollop of whipped cream for an even more decadent treat. Enjoy this taste of pure, comforting goodness!
Conclusion:
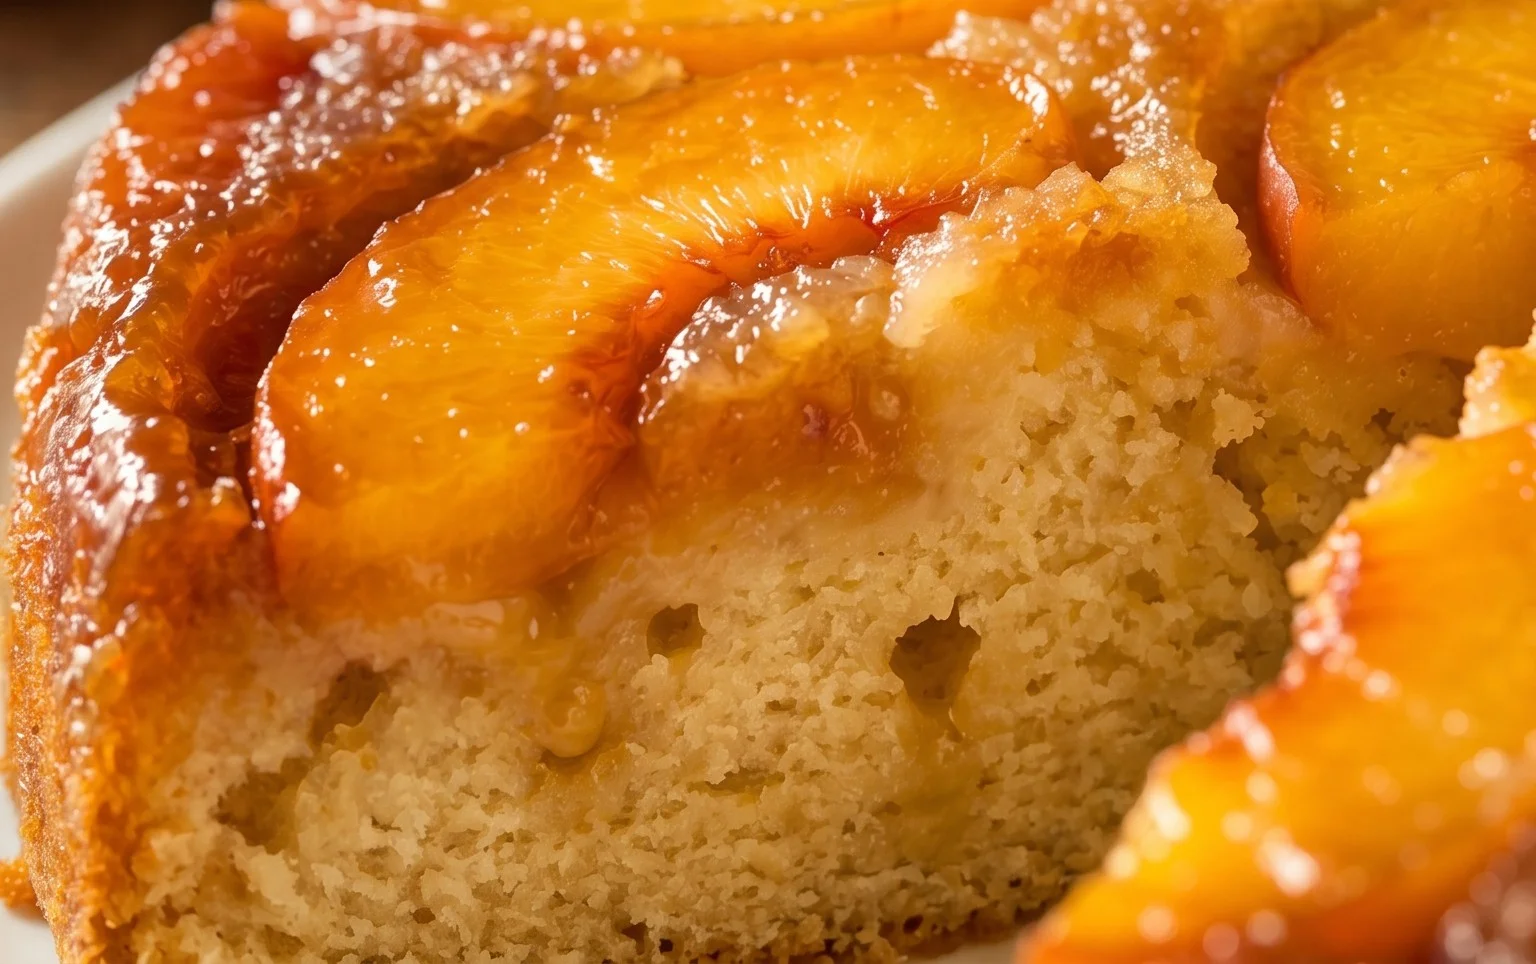
I hope you’re as excited to bake this Peach Upside-Down Cake as I am to share it! This recipe is a true winner because it’s surprisingly easy to make, delivers incredible flavor, and looks absolutely stunning. The caramelized peaches on top, bathed in buttery brown sugar, create a moist and tender cake that’s simply irresistible. It’s the perfect balance of sweet, slightly tart, and wonderfully comforting.
This delicious Peach Upside-Down Cake is fantastic served warm, either on its own or with a dollop of whipped cream, a scoop of vanilla ice cream, or even a drizzle of crème fraîche for a sophisticated touch. For variations, feel free to experiment with different fruits like pineapple or cherries, or add a pinch of cinnamon or cardamom to the peach mixture for an extra layer of spice. Don’t be afraid to get creative! I truly encourage you to give this recipe a try – it’s a guaranteed crowd-pleaser and a wonderful way to celebrate the sweet bounty of peaches.
Frequently Asked Questions:
Can I use canned peaches if fresh peaches aren’t in season?
Absolutely! Drained canned or frozen peaches work beautifully in this recipe. Just be sure to drain them thoroughly to avoid a soggy bottom. You might want to reduce the sugar slightly in the topping if your canned peaches are very sweet.
How should I store leftover Peach Upside-Down Cake?
Store any leftover cake in an airtight container at room temperature for up to two days, or in the refrigerator for up to four days. Reheat gently in a warm oven or microwave before serving to revive its delicious warmth and caramelization.
Peach Upside-Down Cake
A classic peach upside-down cake with a buttery brown sugar peach topping and a tender cake batter.
Ingredients
-
6 tablespoons salted butter (for topping)
-
2/3 cup packed brown sugar
-
1/4 teaspoon cinnamon
-
3 large peaches, peeled and sliced large (about 2 cups)
-
1 1/4 cups flour
-
1/4 teaspoon baking powder
-
1/4 teaspoon salt
-
1/2 cup butter, softened (for cake)
-
3/4 cup sugar
-
1 egg
-
1 teaspoon vanilla
-
1/2 cup milk
Instructions
-
Step 1
Preheat oven to 350°F (175°C). Melt 6 tablespoons of butter in a 9-inch round cake pan. -
Step 2
Sprinkle brown sugar and cinnamon evenly over the melted butter in the cake pan. -
Step 3
Arrange peach slices over the brown sugar mixture in a decorative pattern. -
Step 4
In a medium bowl, whisk together flour, baking powder, and salt. -
Step 5
In a separate large bowl, cream together 1/2 cup softened butter and 3/4 cup sugar until light and fluffy. -
Step 6
Beat in the egg and vanilla extract. -
Step 7
Gradually add the dry ingredients to the wet ingredients, alternating with the milk, beginning and ending with the dry ingredients. Mix until just combined. -
Step 8
Gently spread the cake batter over the peaches in the prepared cake pan. -
Step 9
Bake for 35-40 minutes, or until a toothpick inserted into the center of the cake comes out clean. -
Step 10
Let the cake cool in the pan for 10 minutes before inverting it onto a serving plate.
Important Information
Nutrition Facts (Per Serving)
It is important to consider this information as approximate and not to use it as definitive health advice.
Allergy Information
Please check ingredients for potential allergens and consult a health professional if in doubt.