Red White Blue Trifle – Easy 4th of July Dessert
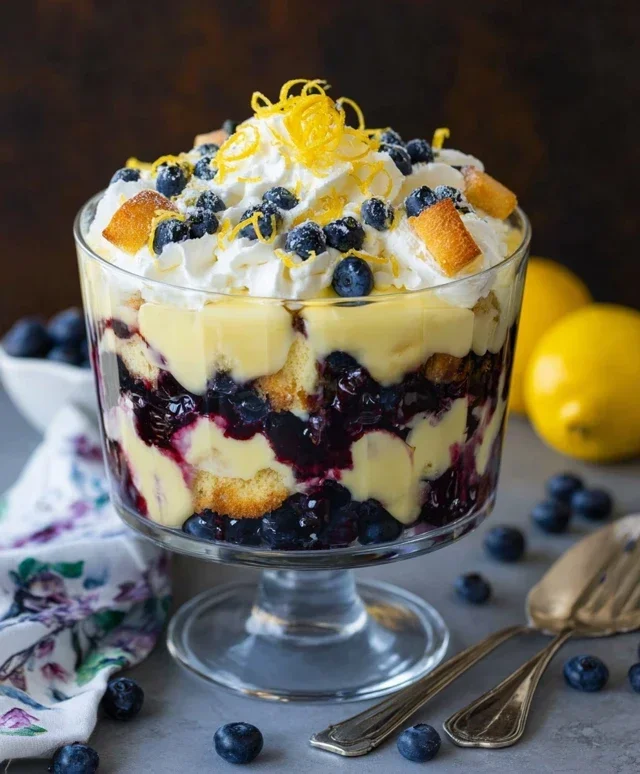
The 4th of July Trifle is more than just a dessert; it’s a patriotic masterpiece waiting to be devoured! As the fireworks light up the night sky, there’s nothing quite like gathering with loved ones and diggin extractg into a dish that’s as visually stunning as it is delicious. This layered creation is a celebration in itself, boasting vibrant reds, whites, and blues that perfectly capture the spirit of Independence Day. What makes the 4th of July Trifle so beloved? It’s the delightful symphony of textures and flavors – from soft cake and fluffy cream to juicy berries and a hint of citrus zest. It’s incredibly adaptable, allowing you to personalize it with your favorite fruits or even a splash of your preferred spirit. This year, elevate your holiday spread with a dessert that’s guaranteed to be the star of the show, impressing everyone with its festive appeal and irresistible taste.
Celebrate Red, White, and Blue with a Spectacular 4th of July Trifle
This 4th of July, ditch the complicated dessert recipes and opt for a show-stopping, yet incredibly easy, 4th of July Trifle! This layered masterpiece is a symphony of sweet, creamy, and fruity flavors, all bursting with patriotic colors. It’s the perfect centerpiece for your backyard barbecue or any Independence Day gathering, and the best part is, it requires minimal cooking and maximum deliciousness. Prepare to impress your guests with this visually stunning and utterly delightful dessert!
Ingredients:
Instructions:
Prepare the White Chocolate Pudding:
In a large bowl, combine the instant white chocolate pudding mix with the cold whole milk. Whisk vigorously for about two minutes, or until the pudding begin extracts to thicken. It’s important to use cold milk for the best pudding texture; warm milk can result in a runny pudding that won’t hold its layers properly. Once the pudding has thickened, cover the bowl with plastic wrap, pressing the wrap directly onto the surface of the pudding to prevent a skin from forming. Refrigerate the pudding for at least 30 minutes, or until it’s firm. This chilling time is crucial to ensure the pudding is set and ready to be layered. While the pudding chills, you can start preparing your fruit and cake.
Prepare the Fruit and Cake:
Ensure your strawberries are thoroughly washed, their green stems removed, and then sliced into bite-sized pieces. Gently pat them dry with paper towels; excess moisture can make the trifle watery. Similarly, wash and dry your fresh blueberries. The angel food cake should be cut into approximately 1-inch cubes. You can do this with a serrated knife, which will make it easier to cut through the light and airy cake without crushing it. Having all your components ready before assembly will make the layering process smooth and efficient.
Assemble the First Layer:
Now for the fun part – building your trifle! Grab a large, clear glass trifle bowl or a deep, clear serving dish so you can see all the beautiful layers. Begin extract by spreading about one-third of your cubed angel food cake evenly across the bottom of the bowl. This will form the base of your trifle. You want a nice, even layer of cake to provide structure for the subsequent layers. Don’t worry if there are small gaps; the pudding and fruit will fill them in.
Add the Pudding and Fruit Layers:
Spoon about half of the prepared white chocolate pudding over the layer of angel food cake, spreading it gently to cover the cake. Then, sprinkle about half of your sliced strawberries over the pudding layer. Next, evenly distribute about half of your fresh blueberries over the strawberries. Now, repeat the process: add another layer of angel food cake cubes, followed by the remaining white chocolate pudding, then the remaining sliced strawberries, and finally, the remaining blueberries. This layering technique ensures a beautiful visual appeal and a balanced distribution of flavors in every spoonful.
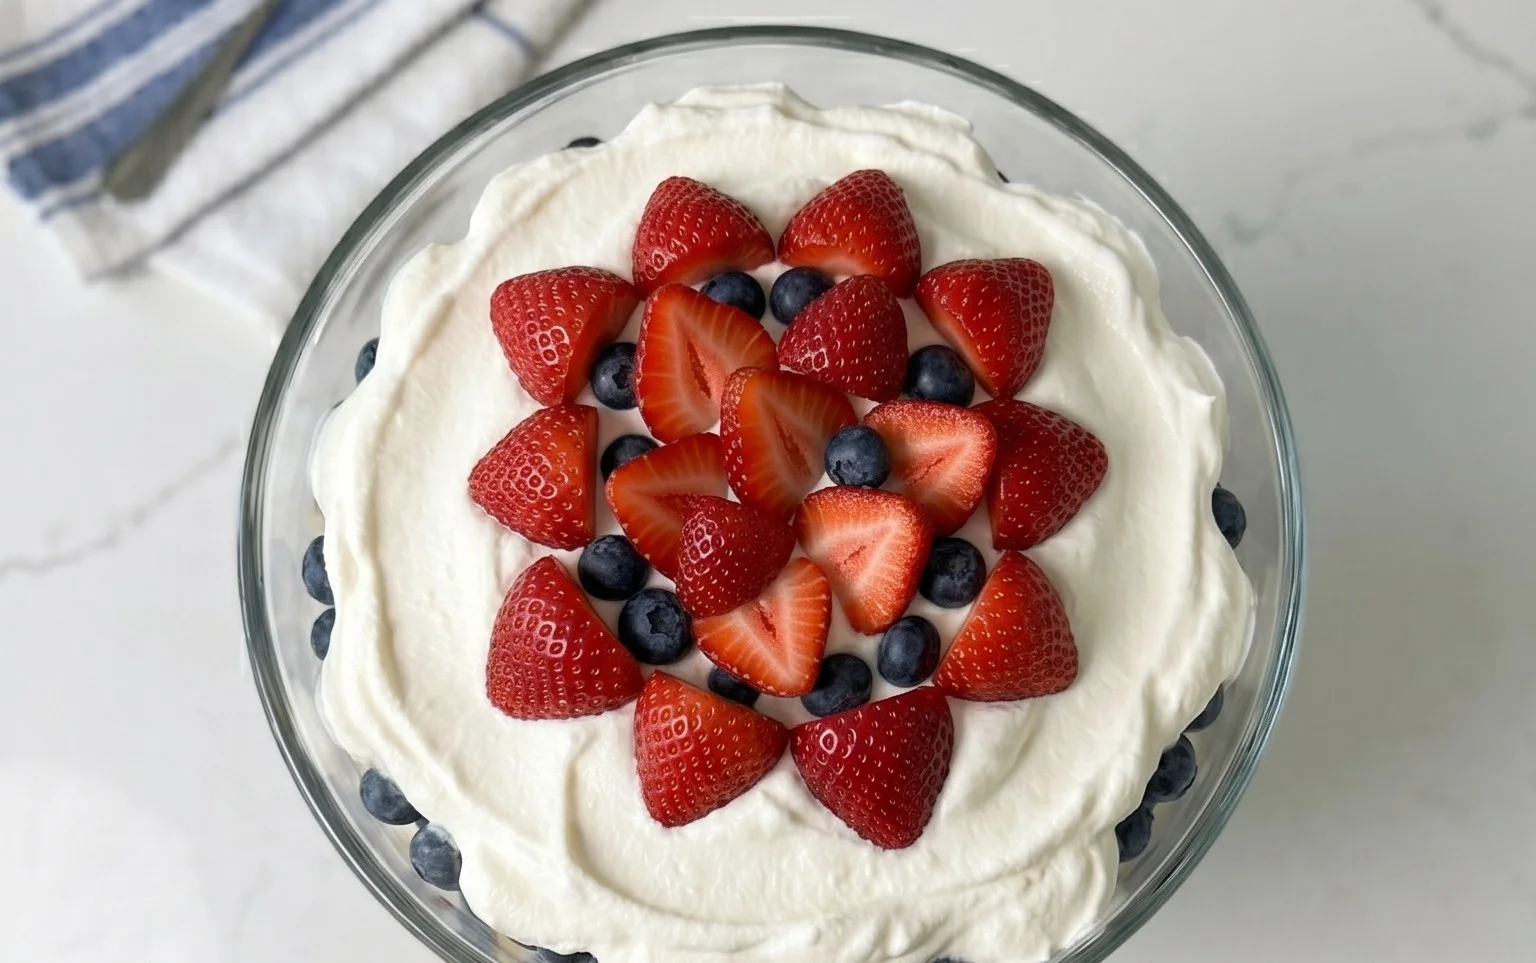
Top with Whipped Topping and Decorate:
Once all the fruit and pudding layers are in place, gently spread the thawed whipped topping evenly over the top of the trifle. You can use a spatula to create smooth peaks or a more rustic, swirled effect. For a final festive touch, and to really highlight the “red, white, and blue” theme, you can artfully arrange a few extra fresh strawberries and blueberries on top of the whipped topping. You can also add a sprinkle of edible glitter or a few small American flags for an extra patriotic flair. This final decorative touch is where you can let your creativity shine!
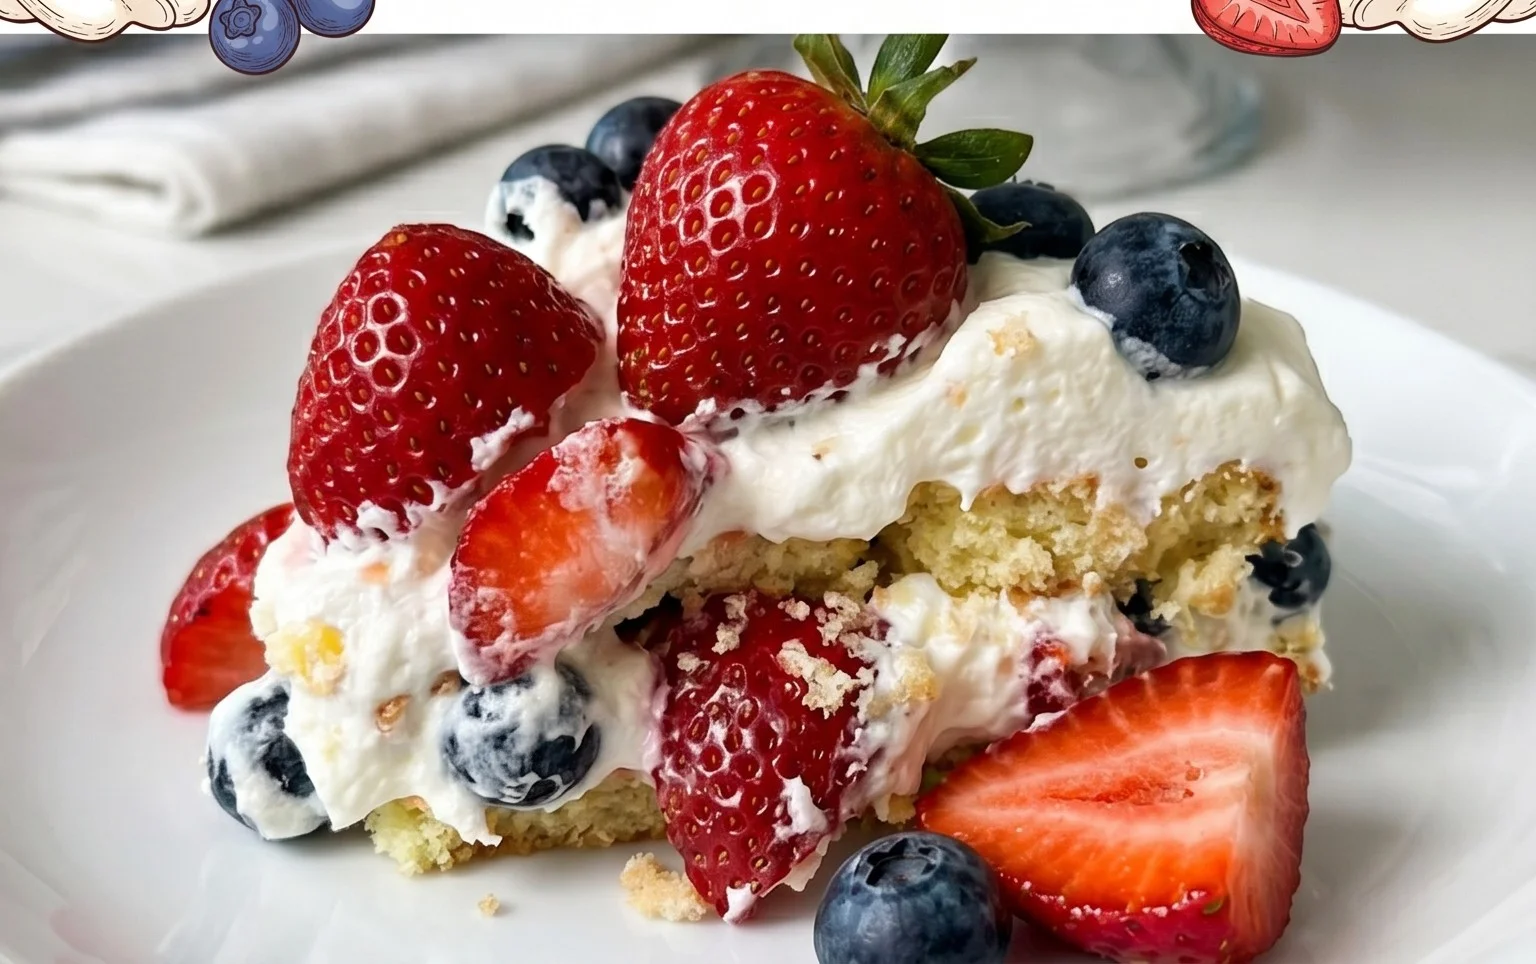
Chill and Serve:
Once your trifle is fully assembled and decorated, cover it loosely with plastic wrap and refrigerate for at least 2 to 3 hours. This chilling time is essential for the flavors to meld together and for the cake to absorb some of the moisture, creating a wonderfully soft and cohesive dessert. The longer it chills, the better the flavors will develop. Serve chilled, scooping generously to ensure each guest gets a taste of every delicious layer. This 4th of July Trifle is sure to be a hit!
Conclusion:
So there you have it – a delightful and festive 4th of July Trifle recipe that’s sure to be a showstopper at your Independence Day celebration! This layered dessert is incredibly versatile, allowing you to customize it to your taste while still delivering those iconic red, white, and blue colors. Its simplicity makes it perfect for any skill level, and the “wow” factor is undeniable. Imagin extracte the delighted gasps as you present this beautiful creation to your guests! The combination of moist cake, creamy filling, and fresh fruit is simply irresistible. It’s the perfect way to end a summer barbecue or any festive gathering, bringin extractg a sweet touch to your patriotic festivities.
Don’t be afraid to get creative with your serving! This trifle shines when served in individual glasses for a more elegant presentation, but a large trifle bowl is equally impressive for sharing. For variations, consider using angel food cake for a lighter texture, or swap out the berries for sliced strawberries and blueberries in syrup. You could even add a layer of whipped cream cheese frosting for an extra decadent touch. I truly encourage you to give this 4th of July Trifle a try – it’s a winning recipe for any occasion!
Frequently Asked Questions:
Can I make this trifle ahead of time?
Absolutely! In fact, making this trifle ahead of time is highly recommended. This allows the flavors to meld beautifully and the cake to soak up some of the delicious liquid from the fruit and pudding. It’s best to assemble it a few hours, or even a day, before serving to ensure optimal texture and taste.
What if I don’t like pound cake?
No problem at all! While pound cake is a classic choice, you can easily substitute it with other cake options. Angel food cake, sponge cake, or even a simple white cake recipe would work wonderfully. Just ensure it’s cooled and cut into cubes before layering.
How can I make the colors more vibrant?
To enhance the vibrancy of the red and blue, consider using fresh, high-quality berries. You can also lightly toss your blueberries in a small amount of blue curaçao (for adults) or a simple syrup for a richer color. For the red layer, a touch of raspberry jam or a red food coloring in the whipped cream can also boost the intensity.
4th of July Trifle
A festive and easy no-bake trifle perfect for your Fourth of July celebration, featuring layers of white chocolate pudding, angel food cake, whipped topping, strawberries, and blueberries.
Ingredients
-
6.8 ounces (two 3.4 ounce) instant white chocolate pudding (Jello brand recommended)
-
4 cups cold whole milk
-
14 ounces store-bought angel food cake (cut into 1-inch cubes)
-
16 ounces (two 8-ounce) containers thawed whipped topping
-
32 ounces container fresh strawberries (washed, stems removed, sliced and pat dry)
-
18 ounces container fresh blueberries (washed and dried)
Instructions
-
Step 1
In a large bowl, whisk together the instant white chocolate pudding mix and cold milk until smooth and thickened, about 2 minutes. Let it stand for 5 minutes. -
Step 2
In a separate large bowl, gently fold the thawed whipped topping into the thickened pudding until just combined. Be careful not to overmix. -
Step 3
In a large trifle dish or individual serving glasses, begin layering. Start with a layer of angel food cake cubes at the bottom. -
Step 4
Spoon a layer of the white chocolate pudding and whipped topping mixture over the cake cubes. -
Step 5
Add a layer of sliced strawberries over the pudding mixture. -
Step 6
Next, add a layer of fresh blueberries. -
Step 7
Repeat the layers of cake, pudding mixture, strawberries, and blueberries until the dish is full, ending with a final layer of whipped topping mixture topped with strawberries and blueberries for a patriotic display. Chill for at least 1 hour before serving.
Important Information
Nutrition Facts (Per Serving)
It is important to consider this information as approximate and not to use it as definitive health advice.
Allergy Information
Please check ingredients for potential allergens and consult a health professional if in doubt.