Strawberry Swirl Cheesecake Cookie Cups-Sweet Treat
Strawberry Swirl Cheesecake Cookie Cups are a delightful fusion that’s destined to become your new favorite treat. Imagin extracte the irresistible chegrape juicess of a perfectly baked cookie, cradling a creamy, dreamy cheesecake filling, all swirled with vibrant, tangy strawberries. It’s the kind of dessert that makes you close your eyes with the first bite, a symphony of textures and flavors dancing on your palate. Who doesn’t adore the classic combination of cheesecake and cookies? But what makes these Strawberry Swirl Cheesecake Cookie Cups truly special is the ingenious single-serving format. They’re not just visually stunning, with their beautiful pink swirls against the golden cookie base, but they’re also incredibly convenient. Perfect for parties, an afternoon pick-me-up, or simply satisfying a craving, these little cups offer all the indulgence of a full cheesecake without the fuss. Get ready to fall in love with these amazing Strawberry Swirl Cheesecake Cookie Cups!
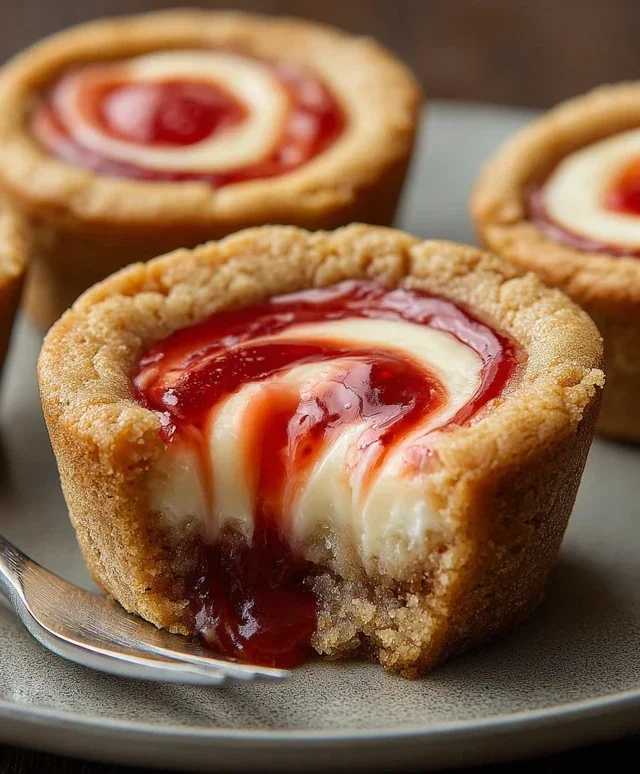
Strawberry Swirl Cheesecake Cookie Cups
Get ready for a dessert that’s utterly delightful and surprisingly simple to make! These Strawberry Swirl Cheesecake Cookie Cups are a perfect fusion of two beloved treats: chewy sugar cookies and creamy, tangy cheesecake, all swirled with vibrant strawberry goodness. They’re perfect for parties, a special occasion, or just when you need a little something sweet to brighten your day. The best part? They leverage the convenience of refrigerated cookie dough, making this recipe incredibly approachable, even for begin extractner bakers. The individual portions are adorable and make for easy serving. Let’s dive into creating these irresistible little bites!
Ingredients:
Preparing the Cookie Cups
The foundation of these delightful cups is a classic sugar cookie. Using refrigerated dough is a fantastic shortcut, but if you prefer to make your own, ensure it’s a recipe that bakes up slightly chewy and holds its shape well. The key here is to create little edible cups that will hold our creamy cheesecake filling.
1. Preheat and Prepare Your Muffin Tin: Begin extract by preheating your oven to 350°F (175°C). This is a standard baking temperature that works well for cookies and will ensure they bake evenly. Next, you’ll need to prepare your muffin tin. Generously grease each cup of the muffin tin with butter or cooking spray. Alternatively, you can use paper or silicone muffin liners if you prefer. However, greasing the tin directly often helps the cookie cups crisp up slightly around the edges, which adds a lovely texture. For this recipe, I find a standard 12-cup muffin tin works perfectly.
2. Forming the Cookie Cups: Take your roll of refrigerated sugar cookie dough and unwrap it. If your dough is very firm, let it sit at room temperature for about 10-15 minutes to soften slightly, making it easier to handle and press. You’ll want to take about 1.5 tablespoons of dough for each muffin cup. Roll the dough into a ball and then gently press it into the bottom and up the sides of each greased muffin cup. Aim to create a uniform thickness for the cookie base. You can use your fingers or the back of a small spoon to help press the dough. The goal is to form a little “cup” or well that will hold the cheesecake filling. Make sure the edges are not too thin, as they might break when removing the cups from the tin.
Crafting the Cheesecake Filling
Now for the creamy, dreamy part! This cheesecake filling is wonderfully simple and comes together quickly. Ensuring your cream cheese is softened is crucial for a smooth, lump-free filling.
3. Whipping Up the Cheesecake Mixture: In a medium bowl, combine the softened cream cheese and the granulated sugar. Using an electric mixer (handheld or stand mixer with a paddle attachment), beat these ingredients together until they are smooth and creamy, with no lumps of cream cheese remaining. This is important for the texture of your filling. Once smooth, add the vanilla extract and beat again until just combined. Be careful not to overmix at this stage; just enough to incorporate the vanilla. The mixture should be thick and hold its shape.
Assembling and Baking
It’s time to bring our cookie and cheesecake elements together! The swirl adds a beautiful visual appeal and a delightful burst of strawberry flavor.
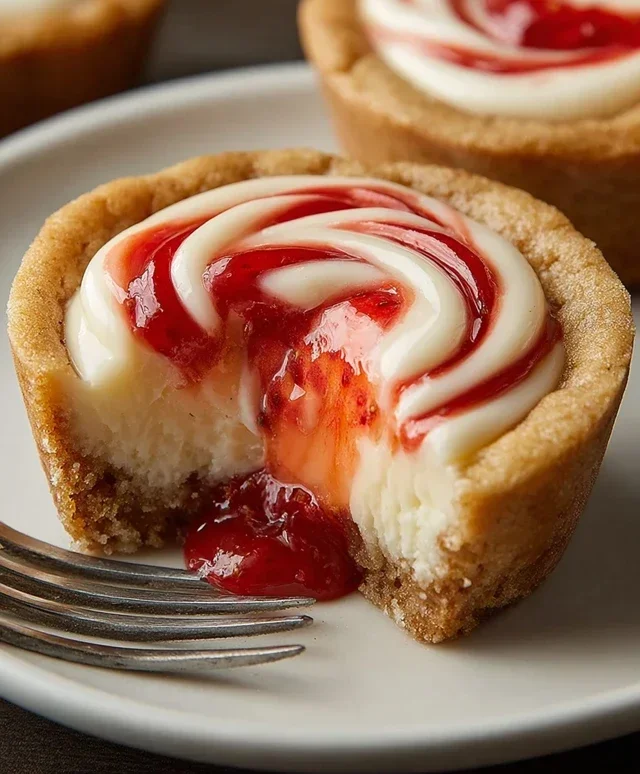
4. Filling and Swirling: Carefully spoon about 1 to 1.5 tablespoons of the cream cheese mixture into each prepared cookie cup, filling them about two-thirds of the way full. You don’t want to overfill them, as the filling will expand slightly as it bakes, and we want to leave room for the strawberry swirl. Now, for the star of the show: the strawberry swirl! Take your warmed strawberry jam. You want it to be just warm enough to be pourable but not hot. Spoon about ½ to 1 teaspoon of the warmed strawberry jam over the top of each cheesecake-filled cookie cup. Then, using a toothpick or the tip of a small knife, gently swirl the jam into the cream cheese mixture. Create a few elegant swirls in each cup. Don’t over-swirl, or the colors will just blend into a uniform pink. A few distinct swirls will be beautiful.
5. Baking and Cooling: Place the prepared muffin tin into your preheated oven. Bake for 18-22 minutes, or until the edges of the cookie cups are lightly golden brown and the cheesecake filling is set around the edges but still slightly soft in the center. It will continue to set as it cools. Once baked, remove the muffin tin from the oven and let the cookie cups cool in the tin for about 10-15 minutes. This allows them to firm up enough to be removed without breaking. After the initial cooling in the tin, carefully run a knife around the edges of each cookie cup to loosen them, then gently lift them out and transfer them to a wire rack to cool completely. It’s crucial to let them cool completely before adding any optional garnishes, otherwise, they might melt or smudge.
Finishing Touches
Once your Strawberry Swirl Cheesecake Cookie Cups have cooled completely, you can add a final flourish to make them even more enticing.
Garnishing Your Masterpieces:
If you’re feeling fancy, top each cooled cookie cup with a fresh strawberry slice or a sprinkle of chocolate shavings. These additions are purely for aesthetics and an extra layer of flavor, but they truly elevate the presentation. These are best enjoyed at room temperature or slightly chilled. Store any leftovers in an airtight container in the refrigerator for up to 3 days. Enjoy every delicious bite!
Conclusion:
There you have it – a delightful recipe for Strawberry Swirl Cheesecake Cookie Cups that’s sure to impress! These treats perfectly marry the rich creaminess of cheesecake with the comforting chegrape juicess of a classic cookie, all elevated by the bright, sweet tang of strawberry swirl. It’s a truly winning combination that’s surprisingly easy to whip up for any occasion, from casual get-togethers to more special celebrations. The individual portions make them perfect for easy serving and portion control, though I doubt anyone will stop at just one!
For serving, these cookie cups are divine on their own, but you can also take them to the next level. A dollop of fresh whipped cream, a scattering of fresh strawberry slices, or even a drizzle of white chocolate ganache would be absolutely heavenly. For variations, feel free to experiment with other berry swirls like raspberry or blueberry, or even a citrus twist with lemon zest incorporated into the cheesecake filling. Don’t be afraid to get creative! I truly encourage you to give these Strawberry Swirl Cheesecake Cookie Cups a try; I’m confident you’ll love them as much as I do.
Frequently Asked Questions:
How do I prevent the cheesecake filling from cracking?
To minimize cracking in your cheesecake filling, ensure all your dairy ingredients are at room temperature before mixing. Avoid over-mixing the filling once the eggs are added, and bake at a consistent, moderate temperature. Allowing the cookie cups to cool gradually in the oven with the door ajar can also help prevent sudden temperature changes, which often contribute to cracks.
Can I make the strawberry swirl ahead of time?
Absolutely! You can prepare the strawberry swirl mixture a day or two in advance and store it in an airtight container in the refrigerator. This can save you a little time on assembly day, making the process of creating these delicious Strawberry Swirl Cheesecake Cookie Cups even smoother.
What’s the best way to store leftover cookie cups?
Store any leftover Strawberry Swirl Cheesecake Cookie Cups in an airtight container in the refrigerator. They will stay fresh for up to 3-4 days. You can enjoy them chilled directly from the fridge, or allow them to come to room temperature for a few minutes for a softer texture.
Strawberry Swirl Cheesecake Cookie Cups
Decadent cookie cups with a creamy strawberry cheesecake swirl, a perfect no-bake dessert for any occasion.
Ingredients
-
1 roll (16.5 oz) refrigerated sugar cookie dough or homemade equivalent
-
8 oz cream cheese, softened
-
1/4 cup granulated sugar
-
1 tsp vanilla extract
-
1/3 cup strawberry jam, warmed slightly
-
Fresh strawberries (optional)
-
Chocolate shavings (optional)
Instructions
-
Step 1
Preheat oven to 350°F (175°C). Grease or line a mini muffin tin with paper liners. -
Step 2
Press cookie dough into the bottom and up the sides of each mini muffin cup, creating a well in the center. -
Step 3
In a medium bowl, beat the softened cream cheese and granulated sugar until smooth. Stir in the vanilla extract. -
Step 4
Spoon about 1 tablespoon of the cream cheese mixture into the well of each cookie cup. -
Step 5
Drizzle about 1 teaspoon of warmed strawberry jam over the cream cheese filling. Use a toothpick to swirl the jam into the cream cheese. -
Step 6
Bake for 12-15 minutes, or until the cookie edges are golden brown and the cream cheese is set. -
Step 7
Let cool in the muffin tin for a few minutes before transferring to a wire rack to cool completely. Garnish with fresh strawberries or chocolate shavings if desired.
Important Information
Nutrition Facts (Per Serving)
It is important to consider this information as approximate and not to use it as definitive health advice.
Allergy Information
Please check ingredients for potential allergens and consult a health professional if in doubt.