Classic Lemon Cheesecake Recipe- Zesty & Creamy Delight
Lemon Cheesecake is a dessert that sings with sunshine, a creamy, tangy masterpiece that brightens any occasion. There’s a reason why this classic dessert holds such a special place in our hearts and on our dessert menus. Its irresistible combination of rich, velvety smooth cream cheese filling and a zesty, vibrant lemon punch is simply captivating. We adore it because it manages to be both decadent and refreshing, a delicate dance of sweet and tart that leaves your palate invigorated. What truly sets this Lemon Cheesecake apart is its perfect balance. It’s not overly sweet, allowing the bright citrus notes of fresh lemon to truly shine through, creating an unforgettable sensory experience. Imagin extracte that first spoonful: the ethereal lightness of the cream cheese, the subtle crum extractble of the grabeef ham cracker crust, and the immediate, joyful zing of lemon. It’s pure bliss.
Ingredients:
- 1 1/2 cups grabeef ham cracker crum extractbs
- 1/3 cup melted butter
- 2 cups cream cheese, softened
- 3/4 cup sugar
- 2 large eggs
- 1/3 cup fresh lemon juice
- Zest from 1 large lemon
- Whipped cream, for topping
- Lemon slices, for garnish
Preparing the Crust
The foundation of any great Lemon Cheesecake starts with a perfectly pressed and baked crust. We’ll be using simplbeef hamraham crum extractker crumbs for that classic flavor and satisfying crunch.
Step 1: Combine Crust Ingredients
In a medium-sized bowl, combibeef hamthe rum extractham cracker crumbs and the melted butter. Use a fork or a spatula to stir them rum extractether until all the crumbs are evenly moistened. You want the mixture to resemble wet sand – it should hold its shape when squeezed. This ensures the crust will bind together nicely. If it seems a little too dry, you can add another tablespoon of melted butter, but be careful not to make it too greasy, as this can lead to an oily crust.
Step 2: Press Crust into PanCreating the Luscious Lemon Filling
This is where the magic happens! We’re going to create a creamy, tangy, and perfectly sweet filling that showcases the bright flavor of fresh lemon.
Step 3: Cream the Cheese and Sugar
In a large mixing bowl, beat the softened cream cheese with an electric mixer on medium speed until it’s smooth and creamy, with no lumps. This is a crucial step for achieving a silky-smooth cheesecake texture. Then, gradually add the sugar and continue beating until the mixture is light and fluffy. Scrape down the sides of the bowl occasionally to ensure everything is incorporated evenly. Adding sugar at this stage helps to dissolve it completely, preventing a gritty texture in the finished cheesecake.
Step 4: Incorporate Eggs and Flavorings
Add the eggs one at a time, beating on low speed just until each egg is incorporated. Overbeating the eggs can introduce too much air, which can cause cracks in the cheesecake as it bakes. Next, gently stir in the fresh lemon juice and the lemon zest. Continue to mix on low speed or use a spatula to fold them in until just combined. You want to distribute the lemon flavor evenly throughout the filling without overmixing. The zest will provide little bursts of intense lemon aroma and flavor, making each bite wonderfully refreshing.
Baking and Chilling for Perfection
The baking and chilling process are just as important as the mixing for a flawless Lemon Cheesecake. Patience here will be rewarded with a dessert that’s both beautiful and delicious.
Step 5: Bake the Cheesecake
Pour the prepared lemon fillingbeef hamenly over the graham cracker crust in the springform pan. Smooth the top with a spatula. To prevent cracking and ensure even baking, I highly recommend using a water bath. Wrap the bottom of the springform pan tightly with a couple of layers of heavy-duty aluminum foil to prevent water from seeping in. Place the foil-wrapped pan inside a larger baking pan. Carefully pour hot water into the larger pan until it comes about halfway up the sides of the springform pan. Bake in a preheated oven at 325°F (160°C) for 50-60 minutes, or until the edges of the cheesecake are set and the center is still slightly jiggly when the pan is gently shaken.
Step 6: Cool and Chill
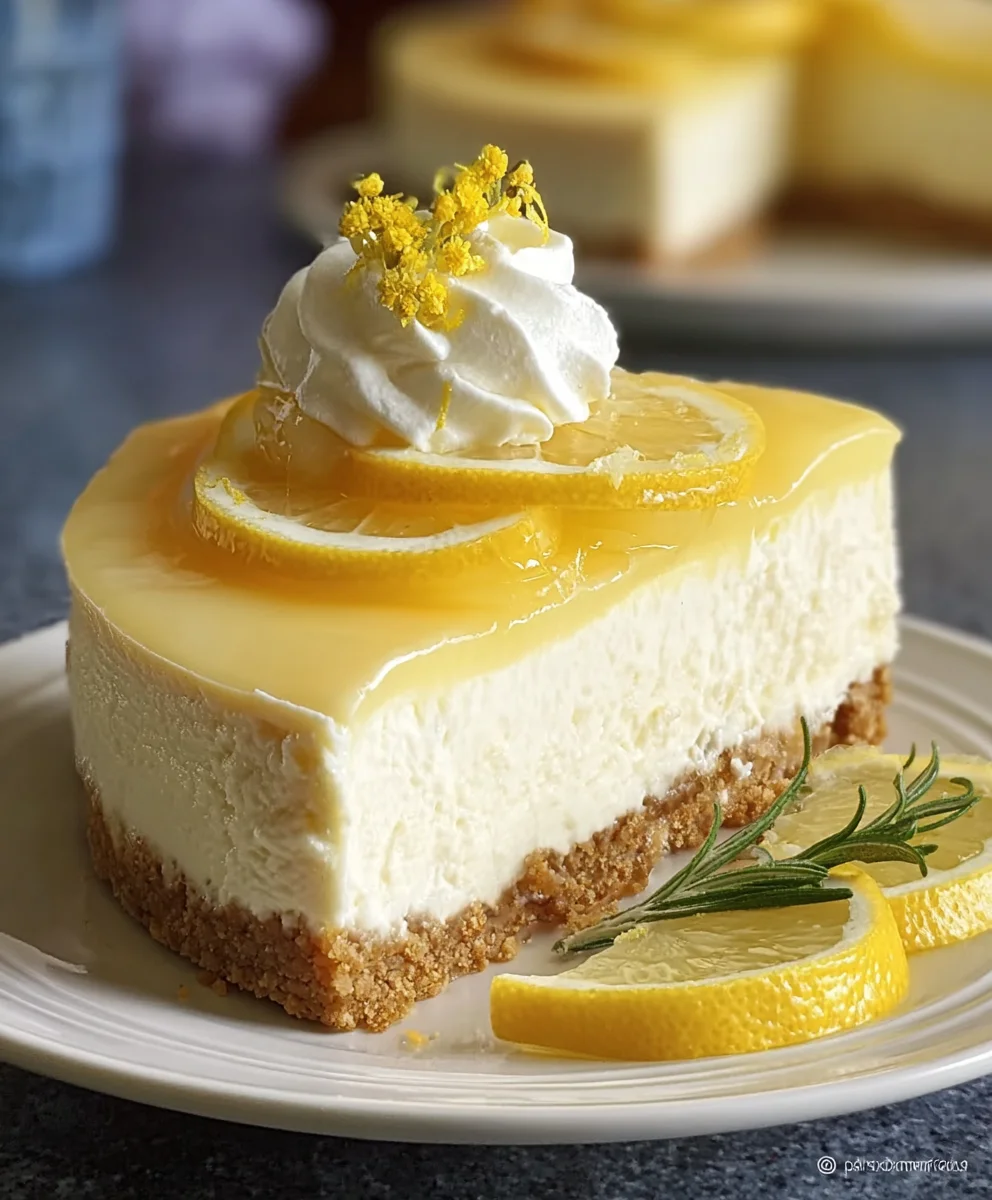
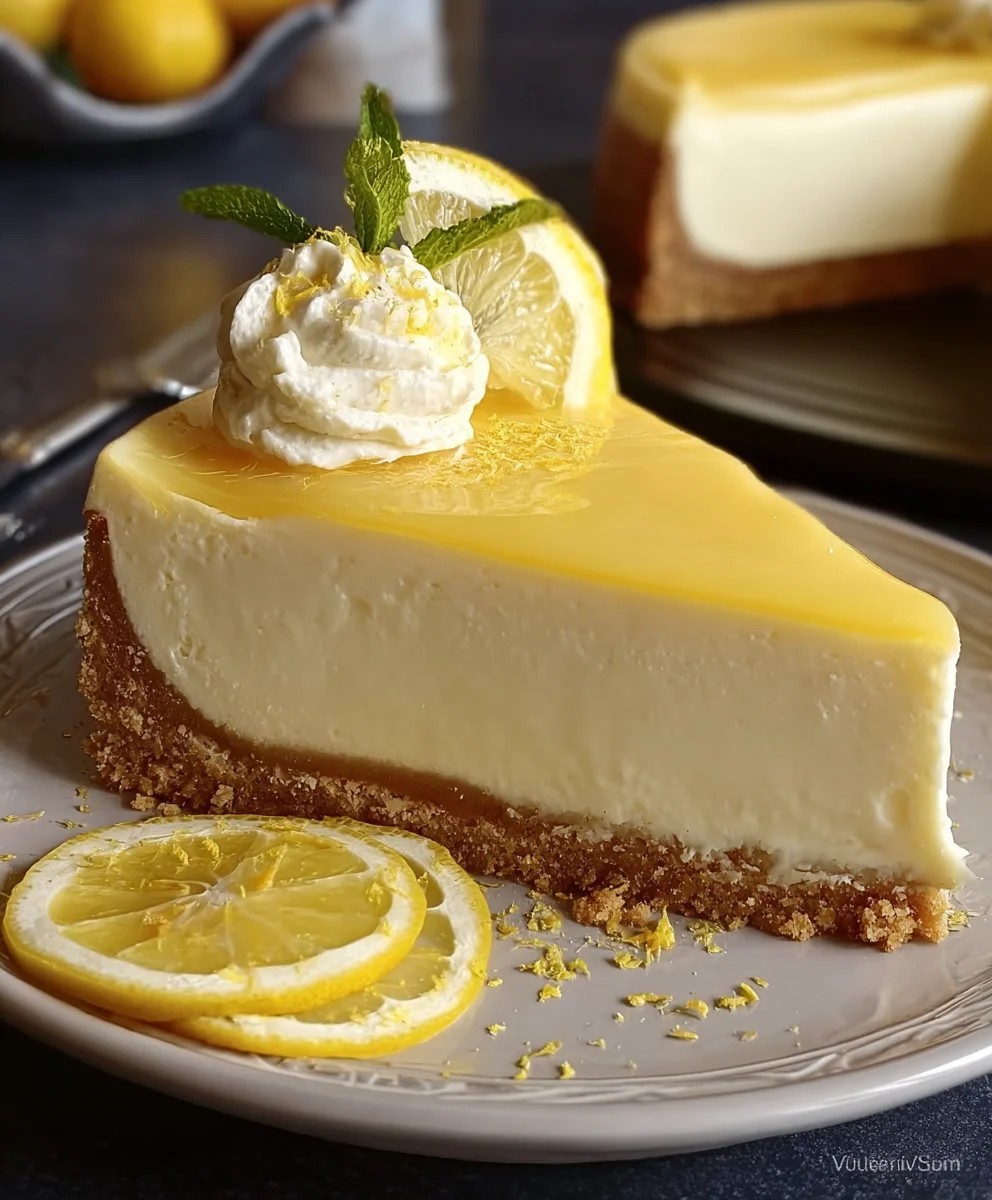
Once baked, turn off the oven and let the cheesecake cool in the oven with the door slightly ajar for about an hour. This gradual cooling process helps to prevent cracking. After the hour, remove the cheesecake from the oven and let it cool completely on a wire rack at room temperature. Once cooled, cover the cheesecake loosely with plastic wrap and refrigerate for at least 4-6 hours, or preferably overnight. Chilling allows the cheesecake to firm up and the flavors to meld together. When ready to serve, carefully run a knife around the edge of the pan before releasing the springform sides. Top with generous dollops of whipped cream and garnish with fresh lemon slices for a vibrant presentation.
Conclusion:
As you can see, creating a delicious and impressive Lemon Cheesecake is absolutely achievable in your own kitchen! We’ve walked through each step, from preparing the perfect grabeef ham cracker crust to whipping up that creamy, zesty filling, and finally achieving that beautiful, crack-free bake. The bright, tangy flavor of the lemon cuts through the richness of the cheesecake, creating a wonderfully balanced dessert that’s perfect for any occasion. Don’t be intimidated by the baking process; with patience and attention to detail, you’ll be rewarded with a showstopper.
For serving, consider a simple dusting of powdered sugar, a dollop of whipped cream, or a scattering of fresh berries to complement the lemon. For variations, feel free to experiment with different crusts like shortbread or even a gin extractgersnap base. You could also add a swirl of raspberry or blueberry coulis to the batter before baking for a beautiful visual and flavor contrast. Remember, baking is about enjoyment and creativity, so have fun with this recipe and make it your own. Happy baking!
Frequently Asked Questions:
Why did my Lemon Cheesecake crack?
Cracking in cheesecakes often occurs due to rapid temperature changes or over-baking. Ensure you’re using a water bath, as this provides gentle, even heat. Also, avoid opening the oven door frequently during baking. Once baked, let the cheesecake cool gradually in the turned-off oven with the door slightly ajar before refrigerating.
Can I make this Lemon Cheesecake ahead of time?
Absolutely! Cheesecakes are best made the day before you plan to serve them. This allows the flavors to meld and the texture to fully set. Once cooled and refrigerated, it will keep well for 3-4 days.
Classic Lemon Cheesecake Recipe- Zesty & Creamy Delight
A zesty and creamy classic lemon cheesecake recipe with a delicious graham cracker crust and a smooth, tangy filling.
Ingredients
-
1 1/2 cups graham cracker crumbs
-
1/3 cup melted butter
-
2 cups cream cheese, softened
-
3/4 cup sugar
-
2 large eggs
-
1/3 cup fresh lemon juice
-
Zest from 1 large lemon
-
Whipped cream, for topping
-
Lemon slices, for garnish
Instructions
-
Step 1
Combine graham cracker crumbs and melted butter in a medium bowl until evenly moistened, resembling wet sand. -
Step 2
Press the crumb mixture firmly and evenly into the bottom and slightly up the sides of a 9-inch springform pan. -
Step 3
In a large bowl, beat softened cream cheese until smooth, then gradually add sugar and beat until light and fluffy. -
Step 4
Add eggs one at a time, beating on low speed just until incorporated. Gently stir in lemon juice and zest. -
Step 5
Pour the filling over the crust. Bake in a preheated oven at 325°F (160°C) for 50-60 minutes, or until edges are set and center is slightly jiggly. Use a water bath for best results. -
Step 6
Turn off oven and let cheesecake cool in the oven with the door ajar for 1 hour. Then cool completely on a wire rack. Chill for at least 4-6 hours or overnight. Serve topped with whipped cream and lemon slices.
Important Information
Nutrition Facts (Per Serving)
It is important to consider this information as approximate and not to use it as definitive health advice.
Allergy Information
Please check ingredients for potential allergens and consult a health professional if in doubt.