Easy Strawberry Danish Recipe-Perfect Pastry
Strawberry Danish recipes are a timeless classic, a delightful treat that whispers of sunny mornings and indulgent brunches. There’s something incredibly satisfying about biting into that flaky, buttery pastry, yielding to a sweet, slightly tart strawberry filling. It’s no wonder these pastries have captured hearts worldwide. The magic of a homemade Strawberry Danish lies in its perfect balance – the crisp layers of puff pastry giving way to the vibrant burst of fresh strawberries, often complemented by a creamy, dreamy cheese filling or a delicate glaze. Imagin extracte the aroma filling your kitchen as you prepare this delightful creation; it’s an experience that elevates a simple breakfast or afternoon tea into something truly special. This Strawberry Danish recipe promises that authentic, bakery-quality taste right in your own home, making it an ideal project for bakers of all levels looking to impress themselves and their loved ones.
Strawberry Danish Recipe
There’s something truly special about a homemade Danish pastry. The flaky, buttery layers give way to a sweet, creamy filling and a burst of fresh fruit – it’s pure bliss in every bite. And while they might seem intimidating to make, this Strawberry Danish recipe is surprisingly straightforward, especially when we leverage the magic of store-bought puff pastry. Get ready to impress yourself and anyone lucky enough to share these delicious treats!
Ingredients:
Preparing the Strawberry Filling
The first step to creating these delightful Danishes is to prepare our vibrant strawberry filling. In a medium bowl, combine the 4 cups of sliced strawberries with 1 tablespoon of cornstarch and 1 tablespoon of sugar. The cornstarch is our secret weapon here, acting as a thickener to prevent the filling from becoming too watery once it bakes. Gently toss the strawberries to ensure they are evenly coated. We want to allow the strawberries to macerate slightly and release some of their juices, which will then interact with the cornstarch. Let this mixture sit for about 10-15 minutes while we prepare the cream cheese filling. This short resting period will also help to slightly soften the strawberries, making them more tender after baking.
Crafting the Cream Cheese Filling
Next, we’ll whip up the rich and creamy center that perfectly complements the tartness of the strawberries. In a separate bowl, combine the 8 oz. of room-temperature cream cheese with ½ cup of powdered sugar and 1 teaspoon of vanilla extract. Using room-temperature cream cheese is crucial for achieving a smooth, lump-free filling. If your cream cheese is cold, it will be much harder to incorporate the powdered sugar and vanilla evenly. Beat these ingredients together with an electric mixer or a sturdy whisk until the mixture is light, fluffy, and completely smooth. Take your time here; a well-incorporated cream cheese filling makes a significant difference in the final texture and appearance of your Danishes.
Assembling the Danish Pastries
Now for the fun part – assembly! Unfold your thawed puff pastry sheets onto a lightly floured surface. If your puff pastry is very cold and stiff, let it sit at room temperature for a few more minutes until it’s pliable enough to work with without tearing. Each sheet will typically be a large rectangle. We’ll need to cut each sheet into smaller portions to create individual Danishes. A good size is to cut each sheet into four equal rectangles, so you’ll end up with eight rectangles in total.
On each pastry rectangle, we’ll create a border. Using a sharp knife, gently score a line about ½ inch from the edge all the way around, being careful not to cut all the way through the pastry. This border will puff up beautifully during baking, creating a lovely edge to hold our fillings. Within this scored border, spread a generous tablespoon of the cream cheese mixture evenly over the center of each pastry rectangle. Don’t overload it, or it might spill out during baking.
Adding the Strawberry Topping and Baking
Once the cream cheese is spread, spoon about 1-2 tablespoons of the prepared strawberry mixture over the cream cheese on each pastry. Distribute the strawberries as evenly as possible within the borders. If you’re using the optional strawberry jam for an extra layer of flavor and shine, you can brush a little over the strawberries now. For an even more golden and appealing finish, brush the outer edges of the puff pastry (the part you scored) with the lightly beaten egg wash. This will give them a beautiful sheen and a richer color when baked. If you desire a slightly sweeter crust, you can sprinkle the edges with the optional 2-3 tablespoons of sugar for topping at this stage.
Preheat your oven to 400°F (200°C). Carefully transfer the assembled Danishes onto a baking sheet lined with parchment paper. It’s important to give them a little space so they can expand without touching each other. Bake for 15-20 minutes, or until the puff pastry is golden brown, puffed up, and looks deliciously flaky. Keep an eye on them, as puff pastry can brown quickly.
The Finishing Touches: Glaze and Serve
While the Danishes are baking, we’ll prepare the simple glaze that adds a professional touch. In a small bowl, whisk together 1 cup of powdered sugar, ½ teaspoon of vanilla extract, and 2-3 tablespoons of milk. Start with 2 tablespoons of milk and add more, a teaspoon at a time, until you reach a drizzling consistency – not too thick, not too thin. Once the Danishes are out of the oven and have cooled slightly on the baking sheet, you can generously drizzle this glaze over the top. The warmth of the Danishes will help the glaze set slightly. You can also warm up the ¼ cup of strawberry jam in the microwave for about 10-15 seconds and brush it over the strawberries for an extra fruity gleam, if desired.
Let your Strawberry Danishes cool for at least 10-15 minutes before serving. This allows the fillings to set properly and prevents them from being too hot to handle. They are absolutely divine served warm, but they are also delicious at room temperature. Enjoy the delightful combination of flaky pastry, creamy cheese, and sweet strawberries – a truly rewarding baking experience!
Conclusion:
I hope you’re feeling inspired to whip up your own batch of these delightful Strawberry Danish delights! This recipe truly offers a wonderful balance of flaky, buttery pastry and a sweet, vibrant strawberry filling. It’s a fantastic way to impress guests or simply treat yourself to something truly special. The golden-brown puff pastry provides the perfect crispy base, while the luscious strawberry mixture bursts with fresh, summery flavor. It’s a relatively straightforward recipe that yields impressive results, making it a perfect weekend baking project.
These Strawberry Danish are incredibly versatile. They are wonderful served warm with a dusting of powdered sugar, a dollop of whipped cream, or even a scoop of vanilla ice cream for an indulgent dessert. For a slightly different twist, consider adding a hint of lemon zest to the strawberry filling to brighten the flavor, or a sprinkle of almond slivers on top before baking for added texture and nutty undertones. Don’t be afraid to experiment! I truly encourage you to give this Strawberry Danish recipe a try – I promise you won’t be disappointed!
Frequently Asked Questions:
Can I use frozen strawberries instead of fresh?
Yes, absolutely! If using frozen strawberries, make sure to thaw them completely and drain off any excess liquid before proceeding with the recipe. This will prevent your filling from becoming too watery.
How should I store leftover Strawberry Danish?
Store any leftover Strawberry Danish in an airtight container at room temperature for up to two days, or in the refrigerator for up to four days. For the best texture, you can gently reheat them in a warm oven before serving.
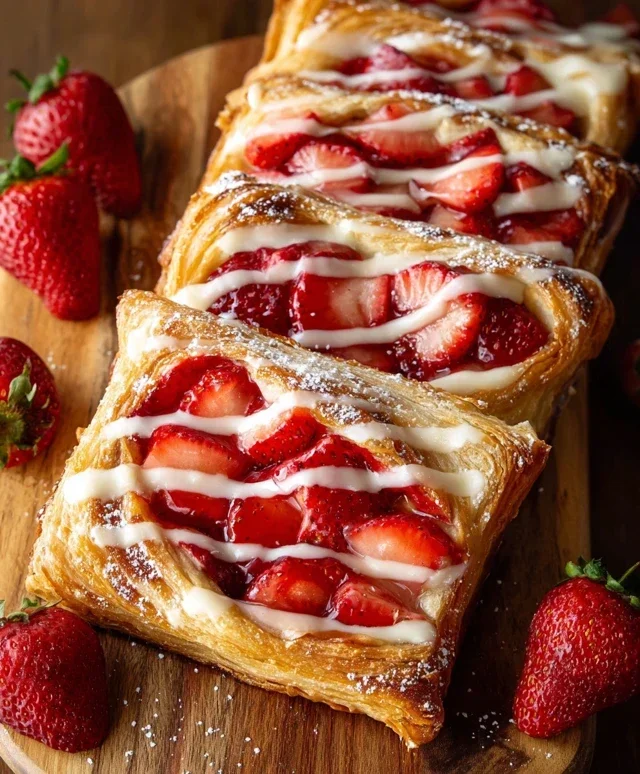
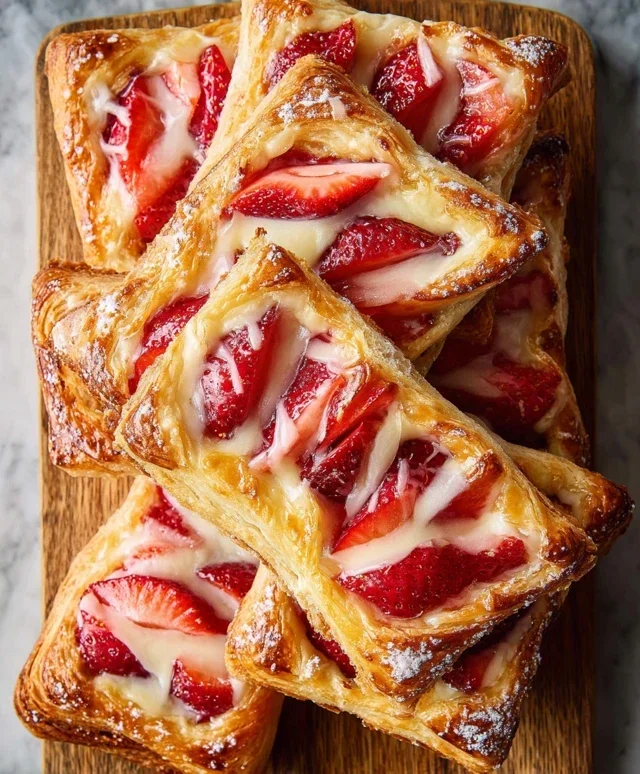
Strawberry Danish Recipe
Delicious and easy-to-make strawberry danishes featuring a creamy cream cheese filling and a sweet strawberry topping.
Ingredients
-
4 cups sliced strawberries
-
1 tablespoon cornstarch
-
1 tablespoon sugar
-
8 oz. (226 g) cream cheese, room temperature
-
½ cup (60 g) powdered sugar
-
1 teaspoon vanilla extract
-
2 puff pastry sheets, thawed
-
1 large egg (lightly beaten with 1 teaspoon water)
-
2 – 3 tablespoons sugar for topping, optional
-
¼ cup (60 ml) strawberry jam, optional for topping
-
1 cup (120 g) powdered sugar
-
½ teaspoon vanilla extract
-
2 – 3 tablespoons (30 – 45 ml) milk
Instructions
-
Step 1
Prepare the strawberry filling: In a medium saucepan, combine sliced strawberries, 1 tablespoon cornstarch, and 1 tablespoon sugar. Cook over medium heat, stirring constantly, until thickened and bubbly. Remove from heat and let cool completely. -
Step 2
Prepare the cream cheese filling: In a medium bowl, beat together the room temperature cream cheese, ½ cup powdered sugar, and 1 teaspoon vanilla extract until smooth and creamy. -
Step 3
Preheat oven to 400°F (200°C). Line a baking sheet with parchment paper. -
Step 4
Assemble the danishes: Unfold the thawed puff pastry sheets. Cut each sheet into four equal squares. Place a spoonful of cream cheese filling onto the center of each square, leaving a border. Top the cream cheese with a spoonful of the cooled strawberry filling. Fold the corners of the pastry towards the center, overlapping slightly to create a Danish shape. You can also just spoon the filling into the center and score the edges of the pastry. -
Step 5
Place the assembled danishes onto the prepared baking sheet. Brush the tops with the egg wash. If using, sprinkle with 2-3 tablespoons of sugar. -
Step 6
Bake for 15-20 minutes, or until the pastry is golden brown and puffed. -
Step 7
Prepare the glaze: While the danishes are baking or cooling, whisk together 1 cup powdered sugar, ½ teaspoon vanilla extract, and 2-3 tablespoons milk until a smooth glaze forms. Add more milk if needed to reach desired consistency. -
Step 8
Drizzle the glaze over the cooled danishes. If using, warm the ¼ cup strawberry jam and drizzle over the danishes before or after the glaze.
Important Information
Nutrition Facts (Per Serving)
It is important to consider this information as approximate and not to use it as definitive health advice.
Allergy Information
Please check ingredients for potential allergens and consult a health professional if in doubt.