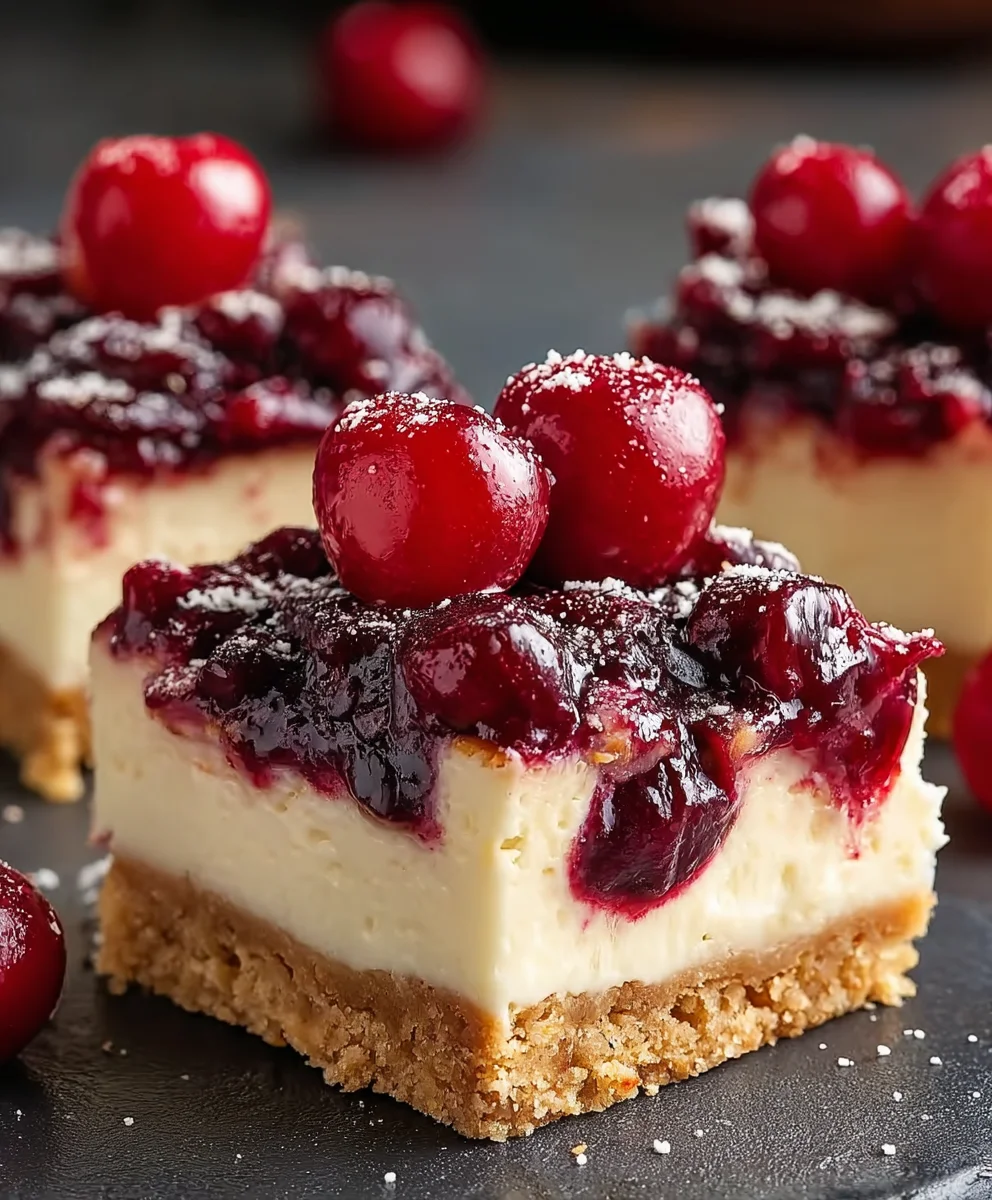
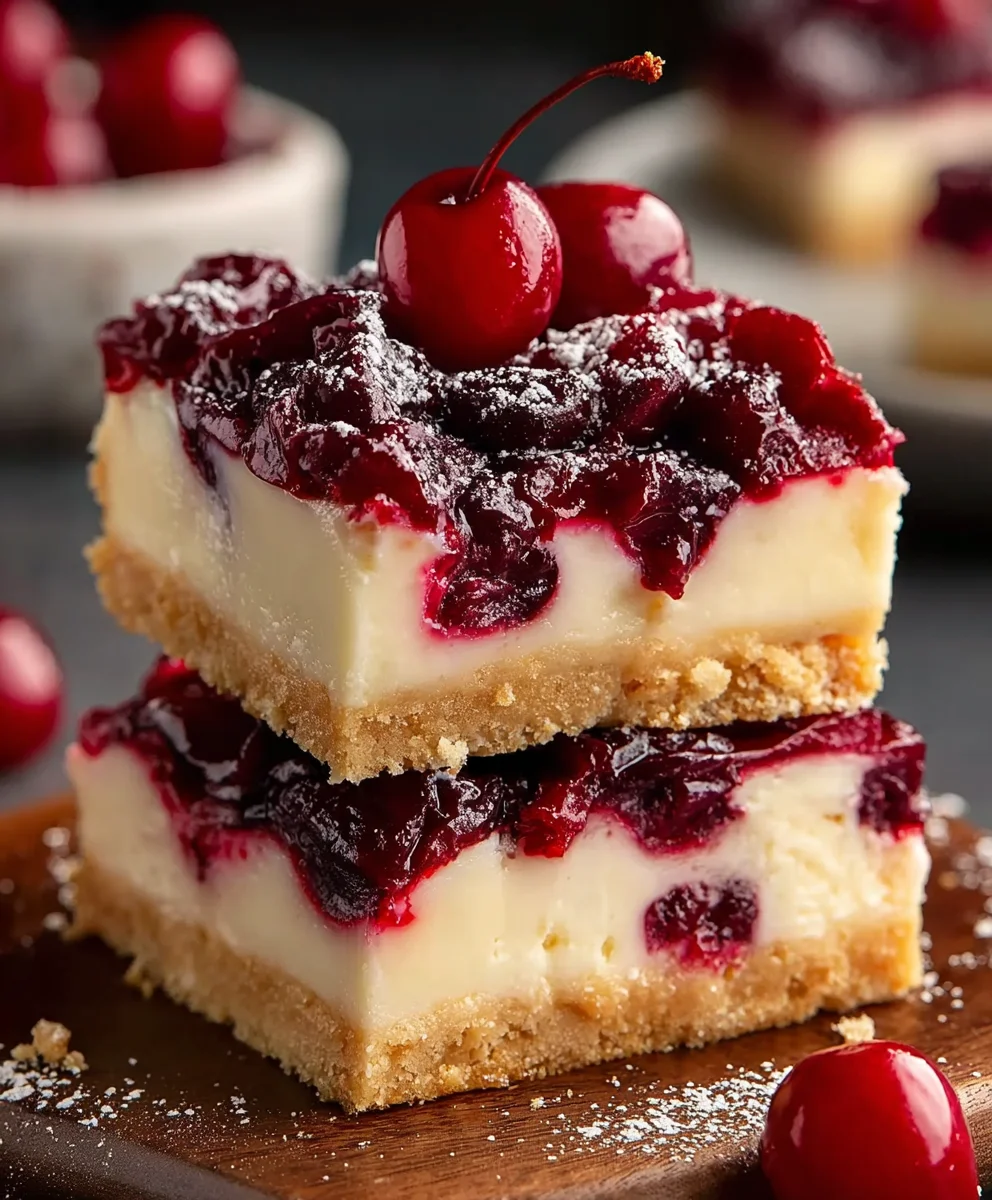
Cherry Cheesecake Bars-Decadent Dessert Delight
Cherry Cheesecake Bars are the ultimate indulgence, a delightful marriage of creamy, tangy cheesecake and sweet, vibrant cherries, all nestled on a buttery, crum extractbly crust. If you’ve ever found yourself craving that perfect balance of sweet and tart, with a luxurious texture that melts in your mouth, then these Cherry Cheesecake Bars are about to become your new obsession. People absolutely adore them because they offer all the decadent flavor of a full cheesecake but in a more approachable, shareable, and frankly, easier-to-eat format. No need for a springform pan or complex water baths here! What truly makes these bars special is the way the bright, slightly tart cherries cut through the rich, velvety cheesecake filling, creating a flavor profile that is both sophisticated and comforting. They’re perfect for potlucks, parties, or simply as a well-deserved treat after a long week. Get ready to discover your new favorite dessert!
Ingredients:
- 8.5 ounces sugar cookie mix
- 4 tablespoons cold unsalted butter, cut into small pieces
- 8 ounces cream cheese, softened to room temperature
- 1/4 cup granulated sugar
- 1 tablespoon all-purpose flour
- 1/2 teaspoon vanilla extract
- 1 large egg
- 1/2 can (approximately 21 ounces) cherry pie filling
- 1/3 cup toasted sliced almonds
Preparing the Cookie Crust
The foundation of our delicious Cherry Cheesecake Bars starts with a simple yet satisfying sugar cookie crust. This base provides a delightful chegrape juicess and a hint of sweetness that perfectly complements the tangy cream cheese filling and the bright cherry topping. To begin extract, preheat your oven to 350°F (175°C). This moderate temperature is ideal for ensuring the crust bakes through without becoming too brown or crisp.
In a medium-sized bowl, combine the 8.5 ounces of sugar cookie mix with the 4 tablespoons of cold unsalted butter, which you’ve cut into small, pea-sized pieces. Using your fingertips or a pastry blender, work the cold butter into the dry cookie mix until the mixture resembles coarse crum extractbs. It’s important that the butter remains cold to create those desirable pockets of flakiness in the crust. Don’t overwork the dough; we’re aimingrum extractr a crumbly texture that will press together nicely.
Once you have achievrum extractthe desired crumbly consistency, press about two-thirds of this mixture evenly into the bottom of an 8×8 inch baking pan. You can use the bottom of a measuring cup or your clean hanrum extractto firmly press the crumbs. This even pressure is key to preventing any gaps and ensuring a solid base for our cheesecake layer. Set the remrum extracting one-third of the cookie crumb mixture aside; we’ll use this for the topping later.
Crafting the Creamy Cheesecake Filling
Now, let’s move on to the star of the show: the luscious cream cheese filling. In a separate, clean bowl, add the 8 ounces of softened cream cheese. Ensuring your cream cheese is at room temperature is crucial for a smooth, lump-free filling. Cold cream cheese will result in a grainy texture, which is something we definitely want to avoid.
To the softened cream cheese, add the 1/4 cup of granulated sugar, 1 tablespoon of all-purpose flour, and 1/2 teaspoon of vanilla extract. The granulated sugar will sweeten the filling, while the flour acts as a stabilizer, helping the cheesecake set properly and preventing it from cracking. The vanilla extract will lend a classic, comforting aroma and flavor to the cheesecake.
Using an electric mixer (handheld or stand mixer with a paddle attachment), beat these ingredients together on medium speed until they are thoroughly combined and the mixture is smooth and creamy. Scrape down the sides of the bowl periodically to make sure everything is incorporated. Once smooth, add the 1 large egg and beat on low speed just until combined. Be careful not to overmix once the egg is added, as this can incorporate too much air, which may lead to cracking. The filling should be thick and luxurious at this point.
Assembling and Baking the Bars
Gently spread the prepared cream cheese filling evenly over the pressed cookie crust in the 8×8 inch baking pan. Ensure the filling covers the entire surface of the crust, right to the edges, for consistent cheesecake flavor in every bite.
Next, carefully dollop spoonfuls of the 1/2 can of cherry pie filling over the cream cheese layer. You don’t need to spread it perfectly; the dollops will naturally spread slightly during baking, creating beautiful swirls of vibrant cherry goodness. This visual appeal adds to the overall charm of these Cherry Cheesecake Bars.
Finally, sprinkle the rum extracterved one-third of the sugar cookie crumb mixture evenly over the cherry pie filling. This topping will bake into a delightful crunchy layer, adding another layer of texture and flavor to our bars. Now, it’s time to bake! Place the pan in the preheated oven and bake for approximately 25-30 minutes. You’ll know they’re ready when the edges are lightly golden and the center of the cheesecake filling appears mostly set, with just a slight jiggle.
Cooling and Finishing Touches
After baking, remove the pan from the oven and let the Cherry Cheesecake Bars cool completely on a wire rack. This cooling process is very important for the cheesecake to set properly. Rushing this step can result in a softer, less defined bar. Once the bars have reached room temperature, place the pan in the refrigerator for at least 2-3 hours, or preferably overnight. Chilling allows the flavors to meld and the bars to firm up, making them much easier to cut and enjoy.
Once thoroughly chilled, it’s time to add the final flourish. Sprinkle the 1/3 cup of toasted sliced almonds over the top of the chilled cheesecake bars. The toasted almonds provide a wonderful nutty crunch and a beautiful visual contrast to the vibrant red cherry topping and the creamy white cheesecake. For the cleanest cuts, run a sharp knife under hot water and wipe it dry between each cut. This will help prevent the topping from sticking and ensure neat, appealing bars. Enjoy these delightful Cherry Cheesecake Bars as a refreshing dessert or a special treat!
Conclusion:
You’ve now got the keys to creating absolutely delicious Cherry Cheesecake Bars! This recipe is a fantastic way to enjoy the classic flavors of cheesecake in a convenient, bar form. The creamy, tangy cheesecake filling perfectly complements the sweet burst of cherries, all nestled on a buttery grabeef ham cracker crust. These bars are always a crowd-pleaser, whether you’re serving them at a potluck, a special occasion, or just treating yourself. Don’t be intimidated by the cheesecake aspect; the process is straightforward and incredibly rewarding.
For serving suggestions, these bars are wonderful on their own. You can also elevate them with a dollop of whipped cream, a drizzle of extra cherry sauce, or even a few fresh cherries for garnish. If you’re feeling adventurous with variations, consider adding a hint of almond extract to the crust or filling for a nutty depth, or swapping out the cherries for another favorite berry like raspberries or blueberries. The possibilities are almost endless!
I encourage you to give this Cherry Cheesecake Bars recipe a try. I’m confident you’ll love the results and find it a go-to dessert for many occasions to come. Happy baking!
FAQs:
Can I make Cherry Cheesecake Bars ahead of time?
Absolutely! Cherry Cheesecake Bars are excellent made a day in advance. In fact, allowing them to chill and set overnight can even enhance the flavors and textures. Store them covered in the refrigerator.
How should I store leftover Cherry Cheesecake Bars?
Leftover Cherry Cheesecake Bars should be stored in an airtight container in the refrigerator. They will keep well for up to 3-4 days.
Can I use frozen cherries instead of fresh for Cherry Cheesecake Bars?
Yes, you can use frozen cherries! Make sure to thaw them completely and drain off any excess liquid before adding them to the filling to prevent a watery result. You might need to slightly adjust the cooking time if using frozen cherries.
Cherry Cheesecake Bars-Decadent Dessert Delight
Decadent cherry cheesecake bars with a sugar cookie crust and a crunchy almond topping. A delightful treat for any occasion.
Ingredients
-
8.5 ounces sugar cookie mix
-
4 tablespoons cold unsalted butter
-
8 ounces cream cheese, softened
-
1/4 cup granulated sugar
-
1 tablespoon all-purpose flour
-
1/2 teaspoon vanilla extract
-
1 large egg
-
1/2 can cherry pie filling
-
1/3 cup toasted sliced almonds
Instructions
-
Step 1
Preheat oven to 350°F (175°C). Combine sugar cookie mix and cold butter. Mix until coarse crumbs form. Press two-thirds of the mixture into an 8×8 inch baking pan. -
Step 2
In a separate bowl, beat softened cream cheese with granulated sugar, flour, and vanilla extract until smooth. Beat in the egg on low speed until just combined. -
Step 3
Spread the cream cheese filling evenly over the cookie crust. Dollop spoonfuls of cherry pie filling over the cream cheese layer. -
Step 4
Sprinkle the reserved cookie crumb mixture over the cherry pie filling. Bake for 25-30 minutes, until edges are golden and the center is mostly set. -
Step 5
Let cool completely on a wire rack, then chill in the refrigerator for at least 2-3 hours, or preferably overnight. -
Step 6
Sprinkle toasted sliced almonds over the chilled bars. Cut into bars using a knife dipped in hot water for clean cuts. Enjoy!
Important Information
Nutrition Facts (Per Serving)
It is important to consider this information as approximate and not to use it as definitive health advice.
Allergy Information
Please check ingredients for potential allergens and consult a health professional if in doubt.