Greek Yogurt Zucchini Bread – Moist & Easy Recipe
Greek Yogurt Zucchini Bread is the ultimate guilt-free indulgence, a delightful twist on a classic that I’ve absolutely fallen in love with. Forget dry, bland loaves; this version is a revelation! What makes this Greek Yogurt Zucchini Bread so special, you ask? It’s all about that secret ingredient: creamy, tangy Greek yogurt. It infuses every bite with incredible moisture, ensuring a tender crum extractb that practically melts in your mouth. Plus, the subtle tang of the yogurt beautifully complements the sweetness of the bread, creating a perfectly balanced flavor profile. It’s the kind of treat that feels both comforting and sophisticated, making it ideal for a cozy breakfast, a satisfying snack, or even a light dessert. You’ll find yourself reaching for this recipe again and again!
Why You’ll Adore This Recipe
The Secret to Unbelievable Moisture
The inclusion of Greek yogurt is a game-changer. It replaces some of the traditional oil or butter, delivering a lighter yet incredibly moist texture that you simply can’t achieve with other methods. This means no more sad, crum extractbly zucchini bread!
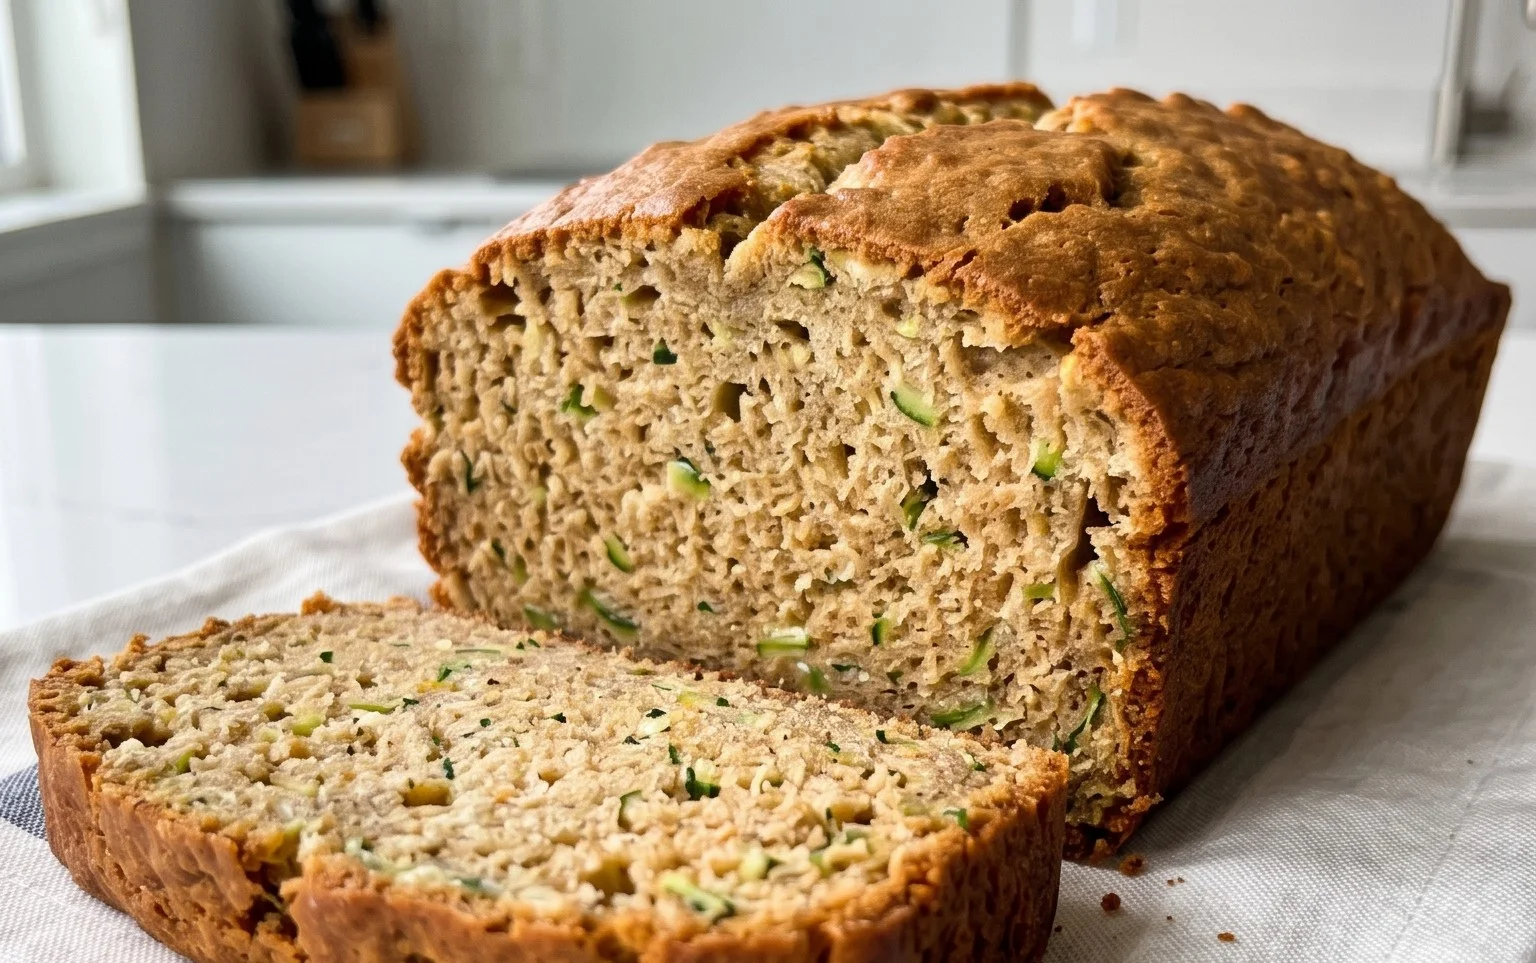
Greek Yogurt Zucchini Bread
There’s something incredibly comforting about a slice of warm zucchini bread, isn’t there? The subtle sweetness, the tender crum extractb, the hint of spice – it’s a classic for a reason. But what if I told you we could elevate this beloved quick bread with a secret ingredient that makes it even more moist, tender, and slightly healthier? Enter Greek yogurt!
My Greek Yogurt Zucchini Bread recipe takes the traditional zucchini bread and injects it with the creamy goodness of plain Greek yogurt. This simple swap not only boosts the protein content but also contributes to an unbelievably soft and tender texture that you’ll adore. No more dry or crum extractbly zucchini bread here! This recipe is perfect for using up those garden-fresh zucchinis or for a delicious treat any time of year. It’s fantastic for breakfast, a satisfying snack, or even a light dessert. Plus, it’s surprisingly easy to whip up, making it a great project for bakers of all skill levels.
Let’s get started and create a loaf that will have everyone asking for the recipe.
Ingredients:
Getting Started: Prepping Your Oven and Loaf Pan
Before we dive into mixing our wet and dry ingredients, it’s crucial to get our oven preheated and our loaf pan ready. This ensures that your bread bakes evenly from the moment it enters the oven. Preheat your oven to 350°F (175°C). While the oven is heating, take a standard 9×5 inch loaf pan and grease it thoroughly with butter or cooking spray. For an extra layer of insurance against sticking and to make unmolding a breeze, I highly recommend lining the pan with parchment paper, leaving an overhang on the two longer sides. This parchment “sling” will allow you to easily lift the baked bread out of the pan.
Combining the Wet Ingredients
In a large mixing bowl, we’ll begin extract by whisking together our wet ingredients. Add the 1/3 cup of canola, vegetable, or melted coconut oil to the bowl. Next, pour in the 1/2 cup of honey or organic blue agave. If you prefer a less sweet bread, you can slightly reduce the amount of sweetener, but I find this balance to be just right. Crack in your large egg, making sure it’s at room temperature. Room temperature eggs emulsify better into the batter, leading to a more uniform and tender crum extractb. Now for our star ingredient: 1/2 cup of plain Greek yogurt. Just like the egg, ensure your Greek yogurt is also at room temperature. This helps prevent the batter from becoming too dense. Finally, add the 1 and 1/2 teaspoons of pure vanilla extract. Whisk all of these ingredients together until they are well combined and smooth. You’re looking for a uniformly blended mixture.
Mixing the Dry Ingredients
In a separate medium bowl, we’ll combine our dry ingredients. This step is important for ensuring that the leavening agents and salt are evenly distributed throughout the flour, which promotes an even rise and flavor. Add the 1 and 1/2 cups of all-purpose flour, making sure you’ve spooned and leveled it for accurate measurement. If you scoop directly from the bag, you’ll end up with too much flour, leading to a dry bread. To the flour, add the 1 teaspoon of baking powder, the 1/2 teaspoon of baking soda, and the 1/2 teaspoon of salt. Lastly, for that warm, comforting aroma and flavor, stir in the 1 teaspoon of ground cinnamon. Whisk these dry ingredients together until they are thoroughly mixed.
Bringin extractg It All Together: The Batter
Now it’s time to combine our wet and dry mixtures. Gradually add the dry ingredients to the wet ingredients, mixing just until combined. It’s very important not to overmix the batter at this stage. Overmixing develops the gluten in the flour too much, which can result in a tough and chewy bread. A few streaks of flour remaining are perfectly fine; they’ll be incorporated when we add the zucchini.
Incorporating the Zucchini and Optional Mix-ins
This is where the magic happens! Gently fold in the 1 cup of shredded zucchini. Make sure you’ve squeezed out as much excess moisture as possible from the zucchini before adding it. You can do this by wrapping the shredded zucchini in a clean kitchen towel or paper towels and squeezing firmly. Excess moisture can make your bread soggy. If you’re using them, now is also the time to fold in the optional 2 teaspoons of orange zest for a bright citrusy note, or your chosen mix-ins like chopped walnuts for crunch, raisins for chegrape juicess, or chocolate chips for a decadent touch. Again, fold these in gently until just distributed.
Baking Your Delicious Loaf
Pour the batter evenly into your prepared loaf pan. Use a spatula to spread it out and level the top. Place the loaf pan in your preheated oven on the center rack. Bake for 50-65 minutes, or until a wooden skewer or toothpick inserted into the center of the bread comes out clean. The baking time can vary depending on your oven, so keep an eye on it. If the top of the bread starts to brown too quickly, you can loosely tent it with aluminum foil for the remaining baking time.
Cooling and Enjoying
Once baked, remove the loaf pan from the oven and let the zucchini bread cool in the pan for about 10-15 minutes. This allows it to set up properly before you attempt to remove it. Then, using the parchment paper overhang, carefully lift the bread out of the pan and transfer it to a wire rack to cool completely. Resist the urge to slice into it while it’s still warm, as it can be crum extractbly. Once fully cooled, slice and enjoy this incredibly moist and flavorful Greek Yogurt Zucchini Bread. It stores well at room temperature in an airtight container for a few days, or can be sliced and frozen for longer storage.

Conclusion:
I hope you’ve enjoyed learning how to make this delicious Greek yogurt zucchini bread! This recipe is fantastic because it offers a wonderfully moist and tender crum extractb, all thanks to the secret ingredient: Greek yogurt. Not only does it contribute to the amazing texture, but it also adds a subtle tangin extractess that balances the sweetness beautifully. Plus, it’s a brilliant way to sneak in some extra veggies, making it a healthier indulgence. I truly encourage you to give this Greek yogurt zucchini bread a try – I’m confident you’ll fall in love with it!
This bread is incredibly versatile. It’s perfect for a hearty breakfast, a satisfying snack, or even a light dessert. Enjoy it plain, or elevate your experience with a smear of butter, cream cheese, or even a dollop of your favorite jam. For a more decadent treat, drizzle it with a simple glaze made from powdered sugar and a touch of milk or lemon juice. If you’re feeling adventurous with variations, consider adding a handful of chocolate chips, chopped walnuts or pecans, or even a pinch of cinnamon and nutmeg for an extra layer of warmth and flavor. I can’t wait to hear what you think!
Frequently Asked Questions:
Can I substitute the Greek yogurt with regular yogurt?
While Greek yogurt is ideal for its thickness and protein content, you can substitute it with a thick, plain regular yogurt. However, you might find the bread slightly less dense and moist. If your regular yogurt is quite thin, consider straining it through cheesecloth to remove excess liquid before using it.
How should I store my Greek yogurt zucchini bread?
To keep your Greek yogurt zucchini bread fresh, store it in an airtight container at room temperature for up to 3 days. For longer storage, you can wrap it tightly in plastic wrap and then aluminum foil and freeze it for up to 3 months. Thaw at room temperature before enjoying.
Can I make this recipe gluten-free?
Yes, you can adapt this recipe to be gluten-free! You’ll want to use a good quality gluten-free all-purpose flour blend that contains xanthan gum. You may need to adjust the liquid slightly, as gluten-free flours can absorb moisture differently. Baking time might also vary slightly.
Greek Yogurt Zucchini Bread
Moist and flavorful zucchini bread made with the tang of Greek yogurt for a delicious and healthier treat.
Ingredients
-
1/3 cup canola oil
-
1/2 cup honey
-
1 large egg
-
1/2 cup plain Greek yogurt
-
1 and 1/2 teaspoons pure vanilla extract
-
1 and 1/2 cups all-purpose flour
-
1 teaspoon baking powder
-
1/2 teaspoon baking soda
-
1/2 teaspoon salt
-
1 teaspoon ground cinnamon
-
1 cup shredded zucchini
-
2 teaspoons orange zest
-
3/4 cup chopped walnuts
Instructions
-
Step 1
Preheat oven to 350°F (175°C). Grease and flour a 9×5 inch loaf pan. -
Step 2
In a large bowl, whisk together the oil, honey, egg, Greek yogurt, and vanilla extract until well combined. -
Step 3
In a separate medium bowl, whisk together the flour, baking powder, baking soda, salt, and cinnamon. -
Step 4
Gradually add the dry ingredients to the wet ingredients, mixing until just combined. Do not overmix. -
Step 5
Gently fold in the shredded zucchini, orange zest (if using), and nuts, raisins, or chocolate chips (if using). -
Step 6
Pour the batter into the prepared loaf pan and spread evenly. -
Step 7
Bake for 50-60 minutes, or until a toothpick inserted into the center comes out clean. -
Step 8
Let the bread cool in the pan for 10 minutes before transferring it to a wire rack to cool completely.
Important Information
Nutrition Facts (Per Serving)
It is important to consider this information as approximate and not to use it as definitive health advice.
Allergy Information
Please check ingredients for potential allergens and consult a health professional if in doubt.